Introduction
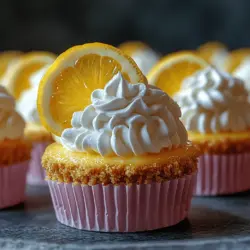
Delve into the delightful world of desserts with these Zesty Mini Lemon Cheesecakes. Perfect for any occasion, these bite-sized treats combine the rich, creamy texture of cheesecake with the refreshing zing of lemon. Cheesecakes have long been a favored dessert, but mini versions have surged in popularity due to their convenience and visual appeal. In this article, we will explore not just the recipe but also the unique qualities of each ingredient, the baking process, and tips for creating the perfect mini cheesecakes. Whether you are a seasoned baker or trying your hand at dessert-making for the first time, this guide will equip you with everything you need to know to impress your family and friends.
Understanding the Allure of Mini Cheesecakes
Mini cheesecakes have become a staple in the dessert world, celebrated for their versatility and charm. One of the key reasons behind their popularity is their bite-sized nature, which allows for portion control and an easy way to enjoy a sweet treat. These little delights are perfect for parties, gatherings, or even a quiet night at home when you just want to indulge without going overboard.
The appeal of mini cheesecakes also lies in their versatility. They can be customized with a myriad of flavors and toppings, from classic chocolate and berry compotes to exotic flavors like matcha or coconut. This flexibility means there’s a mini cheesecake for every palate, making them a hit at any event. The presentation factor cannot be overlooked either; these charming little desserts look stunning on a platter, adding an elegant touch to any occasion.
Moreover, mini cheesecakes are not just delicious; they are also incredibly easy to make. The straightforward preparation process makes them an excellent choice for both novice bakers and experienced chefs looking to whip up something special without spending hours in the kitchen.
Ingredients Breakdown
To create the perfect Zesty Mini Lemon Cheesecakes, it is essential to understand the role of each ingredient in the recipe. Each component contributes to the overall flavor, texture, and success of the dessert.
Graham Cracker Crumbs: The Foundation of the Crust
The base of any cheesecake is its crust, and for mini cheesecakes, graham cracker crumbs are the go-to choice. These crumbs bring a delightful crunch and a hint of sweetness that perfectly balances the creamy filling. When mixed with melted butter and sugar, graham cracker crumbs create a sturdy foundation that holds the cheesecake together while adding a delicious flavor profile.
If you’re looking for alternatives, crushed cookies or even nut-based crusts can provide a unique twist. Options like Oreos or almond flour can add different textures and tastes, allowing you to experiment with the flavor of your mini cheesecakes.
Cream Cheese: The Star of the Show
Cream cheese is the primary ingredient that gives cheesecakes their rich and creamy texture. For the best results, it is crucial to use cream cheese that is at room temperature. This ensures that it blends smoothly with the other ingredients, preventing lumps and resulting in a silky-smooth filling. Additionally, the tanginess of cream cheese complements the zest of lemon, enhancing the overall flavor of the dessert.
Fresh Lemons: A Zesty Kick
Lemons are the heart and soul of these Zesty Mini Cheesecakes. The zest and juice of fresh lemons infuse the filling with a bright and refreshing flavor that cuts through the richness of the cream cheese. Using fresh lemons over bottled juice is recommended, as the natural oils in the zest and the vibrant acidity of fresh juice create a more pronounced taste. The combination of lemon zest and juice will elevate your mini cheesecakes, making each bite a burst of citrus goodness.
Vanilla Extract: Enhancing the Flavor
A splash of high-quality vanilla extract is often a game-changer in baking, and these mini cheesecakes are no exception. Vanilla adds depth to the flavor profile, balancing the tartness of the lemons and the creaminess of the cheese. Opting for pure vanilla extract rather than imitation can significantly enhance the overall taste of your dessert, making it more luxurious and satisfying.
Eggs: The Binding Agents
Eggs play a vital role in the structure of cheesecakes. They act as binding agents, helping to set the filling as it bakes and providing a smooth and creamy texture. It’s crucial to use large eggs and ensure they are at room temperature for even mixing. The addition of eggs also contributes to the cheesecake’s overall richness, making each bite indulgent.
Preparation Steps for Zesty Mini Lemon Cheesecakes
Now that we have a good understanding of the ingredients, let’s dive into the preparation steps for creating these delightful Zesty Mini Lemon Cheesecakes.
Preheating the Oven: Setting the Stage for Perfect Baking
Before you begin mixing your ingredients, it’s essential to preheat your oven. This ensures that the mini cheesecakes cook evenly and achieve the perfect texture. Set your oven to 325°F (160°C) and allow it to fully preheat while you prepare the crust and filling. This step is often overlooked but is crucial for successful baking.
The Art of Making the Graham Cracker Crust
The next step in your mini cheesecake journey is to create the graham cracker crust. This process is simple yet requires attention to detail to achieve the right consistency.
1. Gather Your Ingredients: You will need graham cracker crumbs, melted butter, and sugar. A typical ratio is 1 cup of crumbs, 1/4 cup of melted butter, and 2 tablespoons of sugar, but feel free to adjust based on your taste preferences or to suit the number of mini cheesecakes you plan to make.
2. Mixing the Crust: In a medium-sized bowl, combine the graham cracker crumbs, sugar, and melted butter. Stir until the mixture is well combined and resembles wet sand. The butter should coat the crumbs evenly, providing moisture and flavor.
3. Achieving the Right Consistency: The key to a great crust is ensuring it holds together well. When you squeeze a handful of the mixture, it should hold its shape. If it crumbles apart, add a little more melted butter until you achieve the desired consistency.
Pressing the Crust into the Muffin Tin: Techniques for Success
Once your crust mixture is ready, it’s time to press it into the muffin tin. This step is crucial for creating a solid base for your cheesecakes.
1. Prepare the Muffin Tin: Line a standard muffin tin with paper liners or grease it lightly to prevent sticking. Using liners also makes it easy to remove the mini cheesecakes once they are baked.
2. Distributing the Crust: Using a tablespoon, scoop the crust mixture into each muffin cup, filling it about 1/3 of the way full. This will create the base for each mini cheesecake.
3. Pressing Down: Use the back of a measuring cup or your fingers to firmly press the crust mixture into the bottom of each cup. Make sure to pack it tightly to prevent crumbling when you remove the cheesecakes later.
4. Baking the Crust: Place the muffin tin in the preheated oven and bake the crusts for about 5-7 minutes, or until they are lightly golden. This step helps to set the crust, giving it a nice firm texture. Once baked, remove the tin from the oven and allow the crusts to cool slightly while you prepare the cheesecake filling.
With the crust prepped and cooling, you are one step closer to creating your Zesty Mini Lemon Cheesecakes. The next part of this recipe will guide you through making the creamy lemon filling and baking the cheesecakes to perfection. Stay tuned as we continue this delicious journey!
Creating the Cheesecake Filling: Mixing It Right
The cornerstone of any great cheesecake is its filling. For our Zesty Mini Lemon Cheesecakes, achieving the perfect texture is key to a creamy, smooth experience. When mixing your ingredients, it’s vital to avoid overmixing, as this can lead to a dense and heavy cheesecake instead of the light and airy texture we desire.
To start, combine your softened cream cheese and sugar in a mixing bowl. Using an electric mixer, blend these ingredients on medium speed until they are just combined and smooth. It’s crucial to scrape down the sides of the bowl frequently to ensure all the cream cheese is incorporated evenly. Once the sugar and cream cheese are mixed, add the eggs one at a time, beating gently after each addition. This gradual incorporation helps maintain the cheesecake’s delicate structure.
Next, add the sour cream, vanilla extract, and the fresh lemon juice and zest. Mix these ingredients on low speed just until they are incorporated. The goal here is to combine everything without introducing too much air into the mixture. Overmixing can lead to cracks in your cheesecakes as they bake, so be mindful of this step.
Filling and Baking the Cheesecakes: Timing is Key
Once your cheesecake filling is ready, it’s time to fill the prepared crusts. Using a small ice cream scoop or a piping bag, evenly distribute the filling into each mini cheesecake crust, filling them about three-quarters full to allow for some expansion during baking.
Preheat your oven to 325°F (160°C) and line a baking sheet with parchment paper. Place your filled cupcake tins on the baking sheet for easier handling. Bake the mini cheesecakes in the preheated oven for about 20-25 minutes. The key to determining doneness lies in the jiggle test: gently shake the pan, and the center of the cheesecakes should have a slight jiggle but not be liquid. The edges should appear set, while the center should still have a soft wobble.
Once they are done, remove the cheesecakes from the oven and let them cool in the pan for about 10 minutes. This gradual cooling helps prevent cracks from forming. After cooling, transfer them to a wire rack to cool completely before chilling in the refrigerator.
Cooling and Chilling: Why Patience Pays Off
Patience is essential in the cheesecake-making process. After your mini cheesecakes have cooled to room temperature, they should be chilled in the refrigerator for at least 4 hours, though overnight is preferable. This chilling period allows the flavors to meld and the texture to firm up, resulting in a decadent cheesecake that holds its shape when served.
Garnishing Your Mini Cheesecakes
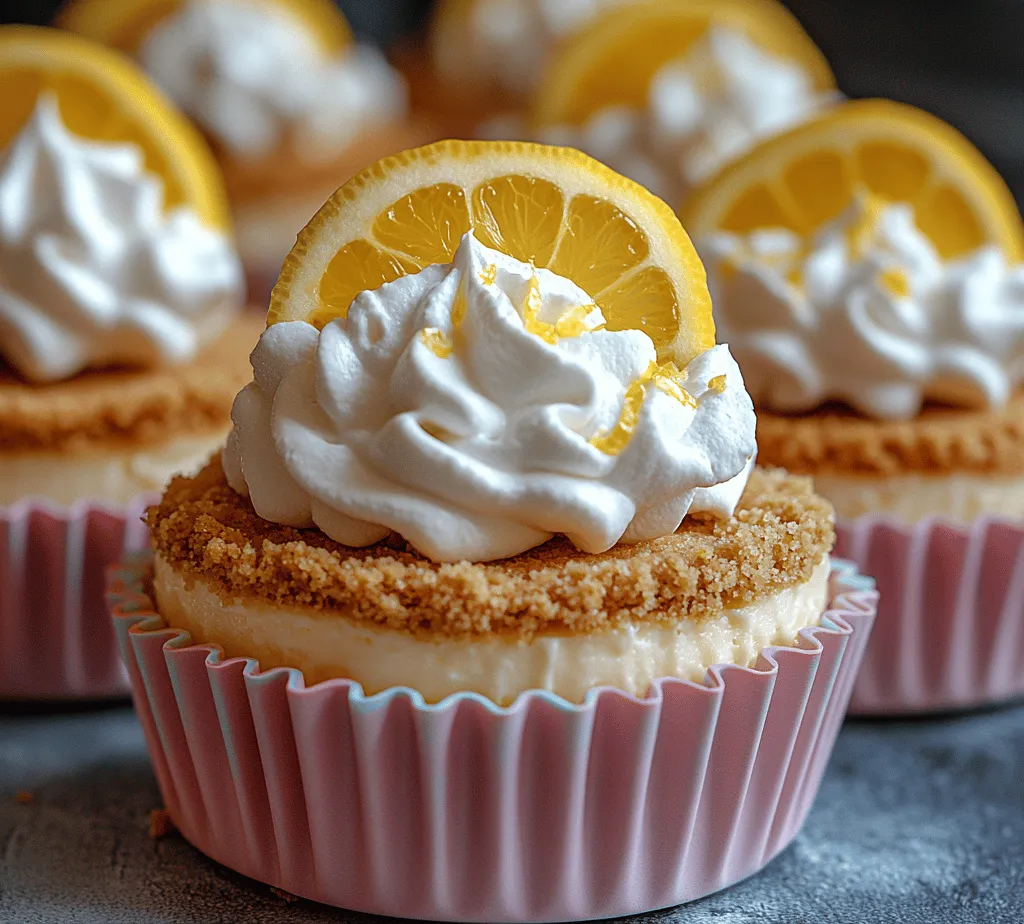
Once your mini cheesecakes have chilled and are ready to serve, it’s time to elevate their appearance with some beautiful garnishes. A dollop of freshly whipped cream is a classic topping that adds both flavor and visual appeal. For a simple whipped cream, beat heavy cream with a little sugar and vanilla extract until soft peaks form.
Choosing the Right Toppings: Whipped Cream and Lemon Slices
Lemon slices are a natural choice for garnishing your zesty cheesecakes. They not only reinforce the lemon flavor but also provide a sunny, inviting look. You can also opt for thinly sliced candied lemon peel for added sweetness and a decorative touch.
Creative Garnish Ideas to Elevate Your Presentation
To further enhance the presentation of your mini cheesecakes, consider these creative garnish ideas:
– Fresh Berries: Adding a handful of fresh raspberries, blueberries, or strawberries can provide a vibrant contrast to the bright yellow lemon cheesecake. Their tartness complements the sweetness of the cheesecake beautifully.
– Mint Leaves: A sprig of fresh mint adds a pop of green and a refreshing aroma, making your mini cheesecakes look even more appealing.
– Edible Flowers: For a truly stunning presentation, consider adding edible flowers like pansies or nasturtiums. They not only look beautiful but also add a subtle floral note.
– Drizzling with Lemon Curd or Berry Sauce: A drizzle of lemon curd or a berry sauce over the top can create a gorgeous visual and an extra layer of flavor. Simply warm the lemon curd slightly to make it easier to drizzle, or blend fresh berries with a bit of sugar and water to create a sauce.
Serving Suggestions and Pairings
Zesty Mini Lemon Cheesecakes are perfect for various occasions, whether it’s a summer garden party, a holiday gathering, or a casual family dinner. Their bright flavor and petite size make them an ideal dessert for any celebration.
Best Occasions to Serve Mini Cheesecakes
These mini cheesecakes shine at events such as:
– Weddings: Their elegant presentation and delightful taste make them a great addition to dessert tables.
– Birthday Parties: Mini cheesecakes are a fun and interactive way to celebrate.
– Baby Showers or Bridal Showers: Their cute size fits perfectly with the festive atmosphere.
– Holiday Gatherings: They’re light and refreshing, providing a welcome contrast to heavier holiday desserts.
Beverage Pairings that Complement the Zesty Flavor
When it comes to pairing beverages with your mini cheesecakes, consider the following options:
– Wine: A glass of chilled Prosecco or a light, fruity white wine, such as Riesling or Sauvignon Blanc, pairs beautifully with the zesty notes of lemon cheesecake.
– Tea: A refreshing cup of herbal tea, like chamomile or peppermint, complements the flavors without overpowering them. For a more robust pairing, try a citrusy Earl Grey.
– Coffee: The richness of coffee balances the tartness of the lemon, making a cup of freshly brewed coffee an excellent choice.
Storage and Shelf Life
Proper storage is crucial to maintaining the quality of your mini cheesecakes. After they have chilled, cover each cheesecake with plastic wrap or place them in an airtight container. They can be stored in the refrigerator for up to 5 days.
Discussing the Shelf Life in the Fridge and Freezer
If you want to keep your cheesecakes for longer, they can also be frozen. Place them in a single layer on a baking sheet until firm, then transfer them to a freezer-safe container or wrap them tightly in plastic wrap and foil. Properly stored, they can last in the freezer for up to 3 months. When you’re ready to enjoy them, simply thaw them in the refrigerator overnight.
Tips for Reheating or Serving After Storage
When serving previously frozen mini cheesecakes, it’s best to take them out of the freezer and let them thaw in the refrigerator. If you prefer your cheesecakes chilled rather than at room temperature, you can serve them straight from the fridge. Avoid refreezing cheesecakes that have already been thawed, as this can affect their texture.
Conclusion
In conclusion, Zesty Mini Lemon Cheesecakes are not only a treat for the taste buds but also a feast for the eyes. With their bright flavor and creamy texture, they make for a perfect dessert for gatherings, celebrations, or simply to indulge yourself. Armed with this detailed recipe and insights, you can confidently create these delightful cheesecakes, ensuring that they are a hit with everyone who tries them. Enjoy the process of baking and savor every delicious bite!