Heavenly Chocolate Chip Scones: The Perfect Recipe Guide

WANT TO SAVE THIS RECIPE?

Heavenly Chocolate Chip Scones: A Delightful Recipe for Any Occasion

Introduction

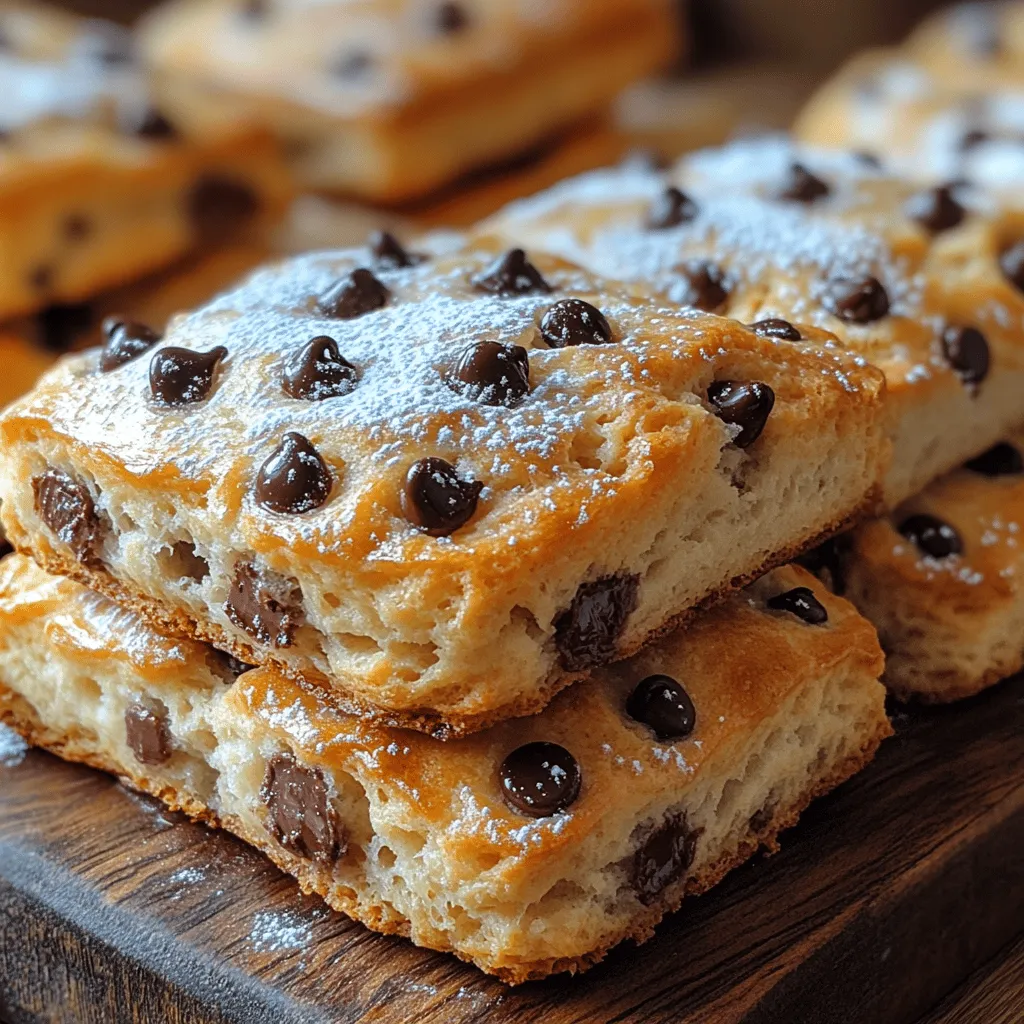
Indulging in the warm embrace of freshly baked scones is an experience like no other, especially when those scones are generously studded with rich semi-sweet chocolate chips. The Heavenly Chocolate Chip Scones recipe promises to deliver a delightful treat that is perfect for any occasion—be it breakfast, brunch, or a comforting afternoon snack. This guide will take you through each step of creating these delicious scones, and in doing so, we will also explore the origins and variations of this beloved pastry. Whether you’re an experienced baker or just starting out on your culinary journey, you’ll find that this recipe is both approachable and rewarding.

Understanding Scones: A Brief History and Their Popularity

The Evolution of Scones

The scone has a rich history that traces back to its humble beginnings in Scotland in the 1500s. Originally, scones were round and flat, made with oats and baked on a griddle. Over time, the recipe evolved, and with the introduction of wheat flour, the scone began to resemble the fluffy, tender treats we know today. Scones gained popularity in England during the 19th century, especially with the rise of afternoon tea culture. They quickly became a staple at social gatherings and tea parties, often served with clotted cream and jam. Today, scones have transcended their regional roots and are enjoyed across the globe, with variations that cater to diverse palates.

The Different Types of Scones

Scones come in a delightful array of flavors and forms, showcasing their versatility as a baked good. While some may prefer the classic plain scone or a fruit-filled version, others may opt for savory options infused with cheese or herbs. In the United States, the sweet scone has become particularly popular, with variations that include ingredients such as blueberries, cranberries, or, as in our recipe, chocolate chips. This adaptability makes scones a favorite choice for both casual family breakfasts and elegant brunches, allowing bakers to experiment and cater to their culinary preferences.

Ingredients Overview: What You’ll Need to Create Heavenly Chocolate Chip Scones

Before diving into the baking process, it’s essential to gather all the necessary ingredients to ensure a smooth and successful baking experience. Here’s a breakdown of the key components that will make your Heavenly Chocolate Chip Scones truly exceptional.

Essential Baking Ingredients

To create the perfect scone, you will need a few fundamental ingredients that work together to achieve the ideal texture and flavor. The base of scones is all-purpose flour, which provides structure and stability. Granulated sugar adds a touch of sweetness, while baking powder acts as a leavening agent, giving the scones their characteristic rise. A pinch of salt enhances the flavors and balances the sweetness. These ingredients form the foundation of your scone dough, setting the stage for the richness that follows.

The Importance of Butter

Butter plays a crucial role in the scone-making process, affecting both texture and flavor. For this recipe, it’s essential to use cold, unsalted butter. The cold temperature helps to create a flakier texture, as the butter will melt during baking, creating steam pockets that result in a light and airy scone. Unsalted butter allows you to control the salt content in the recipe, ensuring a well-balanced flavor profile. When cutting the butter into the dry ingredients, aim for pea-sized pieces. This technique helps to achieve that sought-after tender crumb.

Choosing the Right Chocolate

To elevate your scones to heavenly status, selecting the right chocolate chips is key. Semi-sweet chocolate chips are an excellent choice as they provide a perfect balance of sweetness and richness. Look for high-quality brands that boast a high cocoa content, as they will melt beautifully and offer a decadent flavor. For a unique twist, consider mixing in dark chocolate chips or even chunks for added texture. The melted chocolate combined with the buttery scone creates a delightful contrast, making each bite a truly indulgent experience.

Step-by-Step Instructions for Perfect Scones

Now that we have a deeper understanding of the ingredients, it’s time to roll up our sleeves and begin the baking process. Follow these step-by-step instructions to create your Heavenly Chocolate Chip Scones.

Preheating the Oven and Preparing the Baking Sheet

Before you start mixing your ingredients, it’s crucial to preheat your oven to 425°F (220°C). Preheating ensures that the scones will bake evenly and rise properly. While the oven is heating, prepare your baking sheet by lining it with parchment paper. This not only prevents sticking but also makes for easy cleanup. If you don’t have parchment paper, lightly greasing the baking sheet will work, but parchment is preferred for optimal results.

Creating the Dry Mixture

Once your oven is preheated, it’s time to prepare the dry mixture. In a large mixing bowl, combine 2 cups of all-purpose flour, 1/3 cup of granulated sugar, 1 tablespoon of baking powder, and a pinch of salt. Use a whisk to mix these dry ingredients thoroughly, ensuring that the baking powder is evenly distributed throughout the flour. This step is vital, as it lays the groundwork for uniform rising and consistent flavor in your scones.

Incorporating Butter into the Mixture

Next, it’s time to incorporate the cold, unsalted butter into the dry mixture. Cut 6 tablespoons of the butter into small cubes and add them to the flour mixture. Using a pastry cutter or your fingertips, work the butter into the flour until the mixture resembles coarse crumbs, with pea-sized pieces of butter still visible. This process is essential for achieving that tender, flaky texture characteristic of a well-made scone. Be careful not to overwork the dough, as this can lead to tough scones.

As you embark on this baking journey, let the anticipation build as you imagine the heavenly aroma of chocolate chip scones wafting through your kitchen. With the dry mixture and butter prepared, you are well on your way to creating a delicious treat that will delight family and friends alike. Stay tuned for the next part, where we will guide you through the remaining steps to complete this scrumptious recipe.

<strong>Introduction</strong>” /></p>
</p>
<h2>Techniques for Cutting in Butter to Achieve That Perfect Crumbly Texture</h2>
</p>
<p>One of the key techniques in achieving the perfect scone texture is the method of cutting in butter. This process involves incorporating cold butter into the dry ingredients to create a crumbly mixture. The goal is to break the butter into small pieces, which will create pockets of steam during baking, resulting in a light and flaky scone.</p>
</p>
<p>To cut in the butter effectively, start with cold butter straight from the refrigerator. Using a pastry cutter, two forks, or your fingertips, work the butter into the flour mixture until it resembles coarse crumbs. Some larger pea-sized pieces of butter should remain, as these contribute to the flaky texture. Avoid overworking the mixture; the less you handle the dough, the better your scones will turn out.</p>
</p>
<h2>Mixing Wet Ingredients: Achieving the Right Consistency</h2>
</p>
<p>Properly mixing the wet ingredients is crucial for the overall texture and flavor of your scones. In a separate bowl, combine your wet ingredients—typically milk or cream, an egg, and vanilla extract. Whisk these together until smooth and well blended.</p>
</p>
<p>The consistency of your wet mixture should be creamy but not overly thick. This balance is essential because it will ensure that the wet ingredients integrate smoothly with the dry ingredients, allowing the dough to come together without becoming overly sticky. If your mixture feels too thick, you can add a splash of milk to loosen it slightly before incorporating it into the dry ingredients.</p>
</p>
<h2>Combining and Folding Techniques</h2>
</p>
<p>When it comes time to combine the wet and dry ingredients, it’s essential to do so carefully. Pour the wet mixture into the bowl of dry ingredients and use a spatula or wooden spoon to gently fold the mixture together. The key here is to mix just until the ingredients are combined; overworking the dough will lead to tough scones.</p>
</p>
<p>As you fold, be gentle and patient. The dough should come together but may still be slightly shaggy. This is perfectly normal. If you notice dry flour spots, add a tiny bit of milk to help incorporate those areas. Remember, the aim is to maintain a tender crumb, which means avoiding excessive handling or kneading of the dough.</p>
</p>
<h2>Shaping the Dough: Tips for Cutting and Forming</h2>
</p>
<p>Once your dough is combined, it’s time to shape it into scones. Turn the dough out onto a lightly floured surface. Using your hands, gently pat the dough into a circle about 1 to 1.5 inches thick. The thickness is crucial as it will affect the baking time and final texture.</p>
</p>
<p>To cut the scones, use a sharp knife or a bench scraper to slice the dough into wedges (similar to a pizza) or use a round cutter for uniform circles. If you prefer a rustic look, simply cut the dough into triangles. Make sure to avoid twisting the cutter, as this can seal the edges and prevent the scones from rising properly.</p>
</p>
<h2>Final Preparations: Brushing and Spacing</h2>
</p>
<p>Before baking, brushing the scones with cream or milk gives them a beautiful golden color and adds an extra layer of richness. Use a pastry brush to lightly coat the tops of each scone with your chosen liquid.</p>
</p>
<p>Spacing is equally important when placing your scones on the baking sheet. Arrange them at least an inch apart to allow for expansion during baking. If they are too close together, they may not rise properly, and the sides will bake unevenly.</p>
</p>
<h2>Baking the Scones: Ensuring Perfect Texture and Flavor</h2>
</p>
<h3>Timing and Temperature</h3>
</p>
<p>Baking your scones at the correct temperature is essential for achieving that perfect golden-brown crust while maintaining a tender interior. Preheat your oven to 400°F (200°C). This high temperature allows the scones to rise quickly, creating a light and fluffy texture.</p>
</p>
<p>Bake the scones for about 15 to 20 minutes, keeping an eye on them as they approach the 15-minute mark. They should be golden brown on top and firm to the touch. A toothpick inserted into the center should come out clean or with just a few moist crumbs attached.</p>
</p>
<h3>Cooling and Serving Suggestions</h3>
</p>
<p>Once the scones are baked, transfer them to a wire rack to cool. This step is crucial for achieving the perfect texture, as it allows steam to escape. Serve the scones warm or at room temperature, depending on your preference.</p>
</p>
<p>These chocolate chip scones pair beautifully with clotted cream, butter, or fruit preserves. For a delightful twist, try serving them with a drizzle of chocolate or a dollop of whipped cream. They also make a fantastic accompaniment to a cup of tea or coffee, perfect for a cozy afternoon treat.</p>
</p>
<h2>The Joy of Enjoying Your Heavenly Chocolate Chip Scones</h2>
</p>
<h3>Serving Warm or at Room Temperature</h3>
</p>
<p>The best way to enjoy your freshly baked scones is warm, right out of the oven. The chocolate chips will be slightly melty, and the buttery aroma will fill your kitchen, making it hard to resist. However, if you have leftovers, these scones are equally enjoyable at room temperature.</p>
</p>
<p>When serving, consider slicing them in half to spread butter or jam, or serve them whole for a more rustic presentation. The choice is yours, but be sure to savor the delightful combination of flavors and textures.</p>
</p>
<h3>Storage Tips for Leftover Scones</h3>
</p>
<p>If you have any leftover scones (which is often a rarity), proper storage is essential for maintaining their freshness. Allow the scones to cool completely, then store them in an airtight container at room temperature. They are best enjoyed within two days, but if you want to keep them longer, consider freezing them.</p>
</p>
<p>To freeze, individually wrap each scone in plastic wrap and then place them in a freezer-safe bag. They can be frozen for up to three months. When ready to enjoy, simply thaw at room temperature or warm them in the oven for a few minutes to restore that fresh-baked quality.</p>
</p>
<h2>Conclusion</h2>
</p>
<p>Heavenly Chocolate Chip Scones are not just a treat; they are an experience that brings warmth and joy to any gathering or quiet moment at home. With simple ingredients and straightforward techniques, you can create these delightful pastries that are sure to impress family and friends. As you savor each bite, you’ll appreciate the blend of buttery, flaky dough and rich chocolate—a perfect combination that showcases the beauty of home baking. Enjoy the process, share the results, and indulge in the deliciousness that these scones have to offer. Whether for breakfast, brunch, or a sweet afternoon snack, these scones are bound to become a favorite in your recipe repertoire.</p>
</div>

Fluffy Chocolate Chip Scones

Discover the joy of baking with this Heavenly Chocolate Chip Scones recipe that's perfect for any occasion! These delightful scones, featuring rich semi-sweet chocolate chips, are simple to make and yield a buttery, flaky texture. Ideal for breakfast, brunch, or afternoon tea, this recipe offers step-by-step instructions and tips for achieving the perfect crumb. Enjoy warm or at room temperature, and share these scrumptious treats with friends and family!

Ingredients
  

2 cups all-purpose flour

1/4 cup granulated sugar

1 tbsp baking powder

1/2 tsp salt

1/2 cup unsalted butter, cold and cubed

1/2 cup heavy cream (plus extra for brushing)

1 large egg

1 tsp vanilla extract

1 cup semi-sweet chocolate chips

Optional: powdered sugar for dusting

Instructions
 

Preheat the Oven: Preheat your oven to 400°F (200°C) and line a baking sheet with parchment paper.

    Mix Dry Ingredients: In a large mixing bowl, combine the flour, granulated sugar, baking powder, and salt. Whisk together until well-blended.

      Cut in Butter: Add the cold, cubed butter to the flour mixture. Using a pastry cutter or your fingers, work the butter into the flour until the mixture resembles coarse crumbs.

        Combine Wet Ingredients: In a separate bowl, whisk together the heavy cream, egg, and vanilla extract until well combined.

          Mix Dough: Pour the wet ingredients into the dry mixture and stir gently with a spatula or wooden spoon until just combined. Do not overmix! Fold in the semi-sweet chocolate chips until evenly distributed.

            Shape the Scones: Turn the dough out onto a lightly floured surface and gently knead it a couple of times until it holds together. Pat the dough into a circle about 1-inch thick. Using a sharp knife, cut the circle into 8 wedges.

              Prepare for Baking: Place the scone wedges on the prepared baking sheet, spacing them about 1 inch apart. Brush the tops with a little extra heavy cream to ensure a golden crust.

                Bake: Bake in the preheated oven for 15-20 minutes or until the scones are puffed, golden brown, and a toothpick inserted into the center comes out clean.

                  Cool & Serve: Allow the scones to cool on the baking sheet for about 5 minutes before transferring them to a wire rack. If desired, dust with powdered sugar before serving.

                    Enjoy: Serve warm with butter or your favorite jam—or simply enjoy them as they are!

                      Prep Time, Total Time, Servings | 15 mins | 30 mins | 8 scones

                        WANT TO SAVE THIS RECIPE?

                        Leave a Comment

                        Recipe Rating


                        Sharing is Caring

                        Help spread the word. You're awesome for doing it!