Introduction: The Allure of Classic Chocolate Chip Blondies
In the world of baked goods, few treats can rival the comforting delight of a classic chocolate chip blondie. These decadent squares, characterized by their rich, buttery flavor and gooey chocolate chips, are a favorite among dessert lovers everywhere. Unlike brownies, which boast a deep chocolate flavor, blondies offer a unique vanilla sweetness that pairs perfectly with the semi-sweet chocolate, creating a harmonious balance in every bite. The appeal of blondies lies not only in their taste but also in their simplicity; they are easy to prepare and require minimal ingredients, making them an accessible treat for bakers of all skill levels.
The origins of blondies can be traced back to the early 20th century, where they emerged as a lighter alternative to traditional brownies. While the exact recipe has evolved over the years, the essence of the blondie remains the same: a chewy, buttery square that delights the senses. Whether you’re looking to impress guests at a gathering or simply indulging in a sweet craving after a long day, this recipe for chocolate chip blondies is sure to satisfy. With their golden hue and melt-in-your-mouth texture, these blondies have secured their place as a beloved dessert in homes and bakeries alike.
Understanding the Ingredients for Success
When it comes to baking classic chocolate chip blondies, the quality and type of ingredients you use can make all the difference. Each component plays a crucial role in achieving that perfect combination of flavors and textures. Let’s explore the essential ingredients that will lead you to blondie perfection.
Butter: The Foundation of Flavor and Moisture
Butter is the cornerstone of any great blondie recipe. Not only does it provide the necessary moisture, but it also contributes a rich, creamy flavor that enhances the overall taste of the dessert. Using unsalted butter allows you to control the salt content, ensuring that the sweet and savory elements are perfectly balanced.
Brown Sugar: Adding Depth and Richness
Brown sugar is another key ingredient in blondies, bringing a deep caramel flavor that complements the natural sweetness of the butter. The molasses content in brown sugar adds moisture and creates that signature chewy texture that blondies are known for. For an even richer flavor, consider using a combination of light and dark brown sugar.
Eggs: Binding and Texture Enhancers
Eggs are essential in any baking recipe, and blondies are no exception. They act as a binding agent, helping to hold the ingredients together while providing structure. Additionally, eggs contribute to the blondies’ soft and fudgy texture. Using room-temperature eggs is recommended, as they incorporate more easily into the batter.
Vanilla Extract: Elevating the Flavor Profile
Vanilla extract is the secret weapon in many baking recipes, and chocolate chip blondies are no different. This ingredient enhances the overall flavor profile, adding a warm, aromatic note that pairs beautifully with the other ingredients. For the best results, opt for pure vanilla extract rather than imitation for a more authentic flavor.
Flour: The Structure of the Blondies
All-purpose flour is the backbone of the blondie batter, providing the necessary structure to keep the squares from falling apart. The right amount of flour ensures that the blondies have a soft, chewy interior while still holding their shape. Be careful not to overmeasure the flour, as this can lead to a denser texture.
Baking Powder and Salt: Essential Leavening Agents
Baking powder is crucial for achieving that soft and slightly risen texture in blondies. It acts as a leavening agent, giving the blondies their lift. A pinch of salt is also vital, as it enhances the flavor of the other ingredients and balances the sweetness.
Chocolate Chips: The Star Ingredient
No chocolate chip blondie would be complete without chocolate chips. These sweet morsels are the highlight of the dessert, adding bursts of chocolate flavor in every bite. Semi-sweet chocolate chips are the most popular choice, but feel free to experiment with milk chocolate or dark chocolate for a different taste experience.
Nuts (Optional): Enhancing Texture and Flavor
While not a traditional component, adding nuts such as walnuts or pecans can elevate the texture and flavor of your blondies. The crunchiness of the nuts contrasts beautifully with the soft, gooey chocolate chips, creating a delightful combination. If you choose to include nuts, be sure to chop them into smaller pieces for even distribution throughout the batter.
Preparation Steps for Perfect Blondies
Now that we’ve covered the essential ingredients, it’s time to dive into the preparation steps that will guide you in creating perfect chocolate chip blondies. Each stage is critical, so let’s set the stage for baking success.
Setting the Stage: Preheat Your Oven
The first step in any baking recipe is to preheat your oven. For chocolate chip blondies, the optimal temperature is 350°F (175°C). Preheating ensures that your blondies bake evenly, resulting in a perfectly cooked texture. While the oven heats up, you can prepare your baking pan.
Greasing or lining the baking pan is essential for easy removal of your blondies once baked. If you prefer, you can line the pan with parchment paper, leaving some overhang on the sides. This method not only prevents sticking but also makes it easier to lift the blondies out of the pan for cutting.
Mixing the Wet Ingredients
With your oven preheated and the baking pan ready, it’s time to mix the wet ingredients. Begin by melting the butter in a medium saucepan over low heat or in a microwave-safe bowl. Once melted, transfer the butter to a mixing bowl and add the brown sugar. Using a whisk or a spatula, mix until the sugar is fully incorporated and the mixture is smooth.
Next, it’s time to incorporate the eggs and vanilla extract. Add the eggs one at a time, mixing well after each addition. This step is crucial for creating a uniform batter. Finally, pour in the vanilla extract, stirring until everything is thoroughly combined. The result should be a glossy, cohesive mixture that serves as the base for your blondies.
Creating the Dry Mix
In a separate bowl, it’s time to prepare the dry mix. Start by whisking together the all-purpose flour, baking powder, and salt. This step is important for even distribution of the leavening agent and ensuring that the blondies rise properly during baking. Whisking also aerates the flour, contributing to a lighter texture.
Once the dry ingredients are well combined, it’s time to introduce them to the wet mixture. Gradually add the dry mix to the wet ingredients, folding gently with a spatula until just combined. Be careful not to overmix, as this can result in tough blondies. The batter should be thick and slightly gooey, ready to embrace the chocolate chips.
By following these preparation steps, you will be well on your way to creating a batch of decadent chocolate chip blondies that are sure to impress. With the right balance of flavors and textures, these treats will become a staple in your dessert repertoire, delighting family and friends with every bite.
Bringing It All Together: Wet Meets Dry
The key to mastering classic chocolate chip blondies lies in the delicate balance of combining your wet and dry ingredients. This process, often underestimated, is crucial for achieving that perfect blondie texture—moist, chewy, and rich in flavor.
The Art of Combining Mixtures Without Overmixing
When mixing your wet and dry ingredients, it’s essential to fold them together gently rather than stirring vigorously. Overmixing can lead to a tough texture, which is not what we want in a blondie. Instead, use a rubber spatula or wooden spoon to carefully combine the two mixtures. Start by adding the dry ingredients to the wet mixture, and then gently fold them together until just combined. A few streaks of flour are perfectly fine; they will disappear during baking.
Recognizing the Ideal Batter Consistency
Knowing when you’ve reached the right consistency for your batter is vital. The ideal blondie batter should be thick and slightly sticky, holding its shape as you scoop it into the baking pan. It should not be pourable like cake batter, nor should it be too dry or crumbly. If you’re uncertain, trust your instincts; a well-mixed batter will have a smooth, glossy appearance, inviting you to dig in.
Incorporating Chocolate Chips and Nuts
No classic chocolate chip blondie is complete without the rich addition of chocolate chips, and for those who enjoy a little crunch, nuts are a fantastic option too.
Techniques for Folding in Chocolate Chips
Once your batter is ready, it’s time to fold in your chocolate chips. It’s best to do this gently as well, ensuring that the chips are evenly distributed throughout the batter without breaking them apart. To achieve this, sprinkle the chocolate chips over the surface of the batter before folding them in. This method prevents any clumping and helps incorporate them evenly, ensuring every bite is packed with chocolatey goodness.
The Impact of Nuts on Flavor and Texture
Incorporating nuts into your blondies not only enhances their flavor but also adds a delightful texture. Chopped walnuts or pecans are popular choices, offering a satisfying crunch that contrasts beautifully with the soft, chewy blondies. If using nuts, aim for about half a cup, and fold them into the batter alongside the chocolate chips. This way, you can achieve a harmonious blend of flavors and textures in every bite.
Baking Your Blondies to Perfection
With your batter mixed and ready, it’s time to bake these delicious treats.
Pouring the Batter into the Pan
Before you pour your batter into the prepared baking pan, take a moment to ensure that your pan is properly greased or lined with parchment paper. This not only prevents sticking but also makes for easier cleanup. When spreading the batter into the pan, use an offset spatula or the back of a spoon to distribute it evenly. Start from the center and gently push the batter towards the edges, ensuring that it fills all corners of the pan.
Tips for Achieving That Perfect Blondie Texture
To achieve the ideal blondie texture, ensure your batter is level in the pan before baking. This helps with even baking and prevents any part from becoming overcooked or undercooked. One additional tip is to tap the pan lightly on the counter before placing it in the oven. This will help remove any air bubbles trapped in the batter, leading to a denser, more satisfying blondie.
Timing Is Everything: Baking Process
Baking blondies is an art, and timing plays a crucial role in achieving the perfect result.
Ideal Baking Duration and Signs of Doneness
The baking time for your blondies will typically range between 25 to 30 minutes at 350°F (175°C). However, every oven is different, so keep a close eye on them as they bake. You’ll know they are done when the edges are lightly golden, and the center appears set but still slightly soft. This is crucial, as blondies will continue to cook even after being removed from the oven due to residual heat.
Understanding Toothpick Tests for Perfect Blondies
Toothpick tests are a popular method for checking the doneness of baked goods. For blondies, insert a toothpick into the center of the pan; it should come out with a few moist crumbs but not wet batter. If it comes out clean, your blondies may be overbaked. Remember, the goal is to achieve that perfect, fudgy center.
Cooling and Serving Your Blondies
Once your blondies are baked to perfection, it’s time to cool and serve them.
The Cooling Process
Allow your blondies to cool in the pan for about 10-15 minutes before attempting to cut them. This waiting period is essential because it allows the blondies to set, making them easier to slice without falling apart. After this initial cooling period, carefully lift the blondies from the pan using the edges of the parchment paper (if lined) and transfer them to a wire rack to cool completely.
How to Properly Lift Blondies from the Pan
If you didn’t use parchment paper, run a knife around the edges of the pan to loosen the blondies. Place a cutting board over the top of the pan, flip the pan upside down, and gently tap until the blondies release. This method ensures that you don’t damage the edges and keeps your blondies intact.
Cutting and Serving Suggestions
After your blondies have cooled, it’s time to cut and serve them.
Ideal Serving Sizes for Blondies
When cutting your blondies, aim for squares or rectangles that are about 2 inches in size. This size is perfect for satisfying your sweet tooth without being overwhelming. You can also adjust the size according to your preference or occasion; cut them smaller for a party platter or larger for a decadent treat.
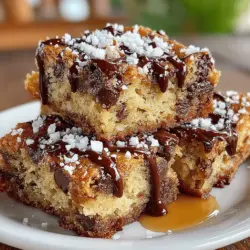
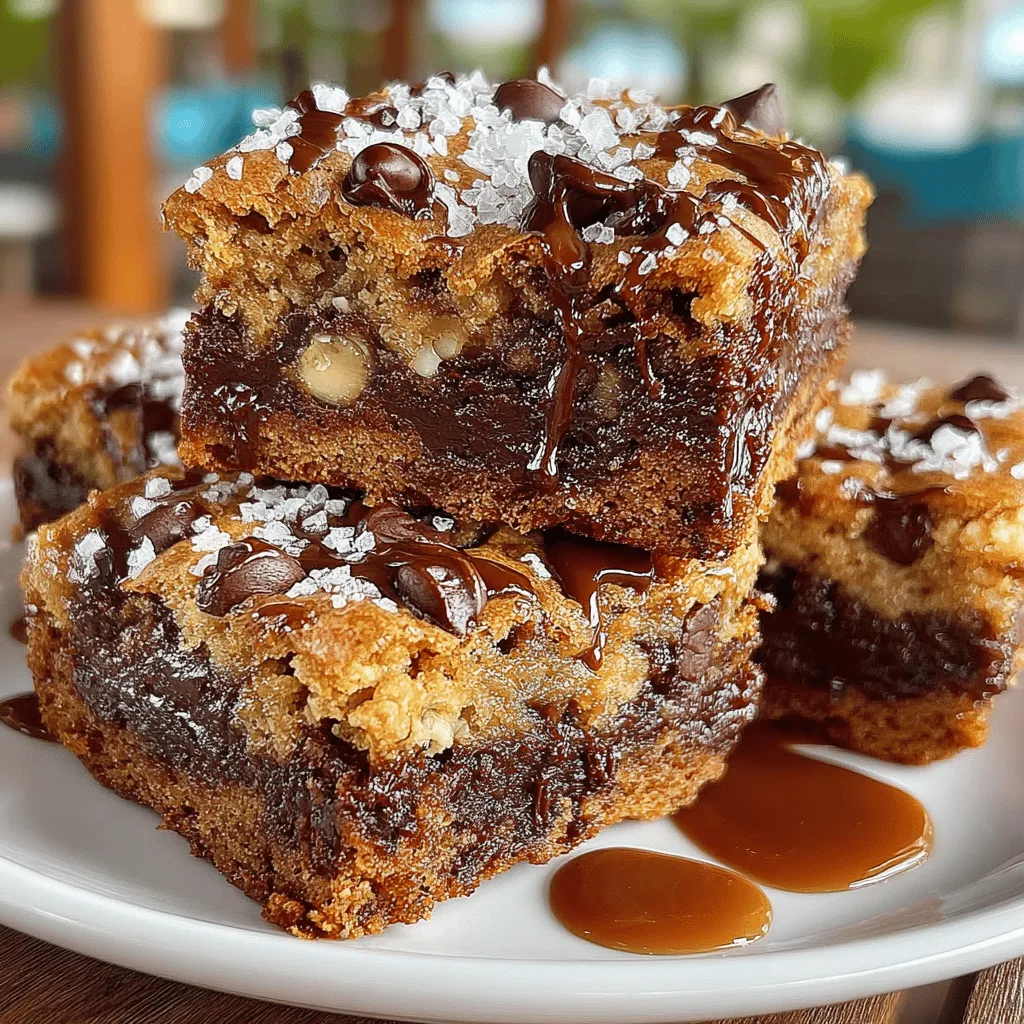
Pairing Ideas for Beverages and Toppings
Blondies are incredibly versatile and can be enjoyed on their own or dressed up with toppings. Consider serving them warm with a scoop of vanilla ice cream for an indulgent dessert. For a refreshing contrast, pair them with a glass of cold milk or a cup of coffee; the richness of the blondies pairs beautifully with both. Additionally, a drizzle of caramel sauce or a sprinkle of sea salt can elevate the flavors even further, adding a gourmet touch to your homemade treats.
Conclusion: Savoring the Sweetness of Your Creation
With their rich, buttery flavor and delightful chocolate bursts, classic chocolate chip blondies are more than just a dessert; they are a celebration of simple ingredients coming together to create something extraordinary. Whether enjoyed warm from the oven or at room temperature, these blondies are sure to bring smiles and satisfaction to all who indulge in them.
Embrace the joy of baking, and savor each bite of these delicious treats. Whether you’re making them for a special occasion or just because, these blondies are bound to become a favorite in your baking repertoire. So gather your ingredients, preheat your oven, and enjoy the process of creating these delightful chocolate chip blondies that are sure to impress friends and family alike.