Introduction to Poached Eggs: The Culinary Delight
Poaching eggs is a timeless cooking technique that transforms simple ingredients into a culinary delight. These eggs, known for their delicate texture and rich flavor, have become a staple in various cuisines around the world. From the classic Eggs Benedict to a hearty breakfast bowl, poached eggs can elevate any dish and add a touch of sophistication to your meals. Mastering the art of poaching eggs is not only a valuable skill for any home cook but also a way to impress friends and family with your culinary prowess.
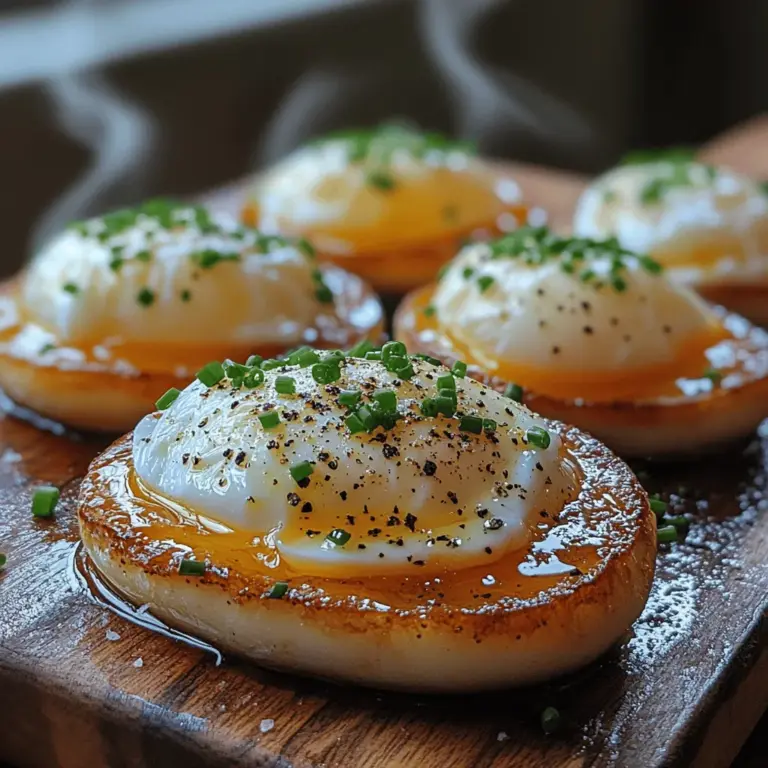
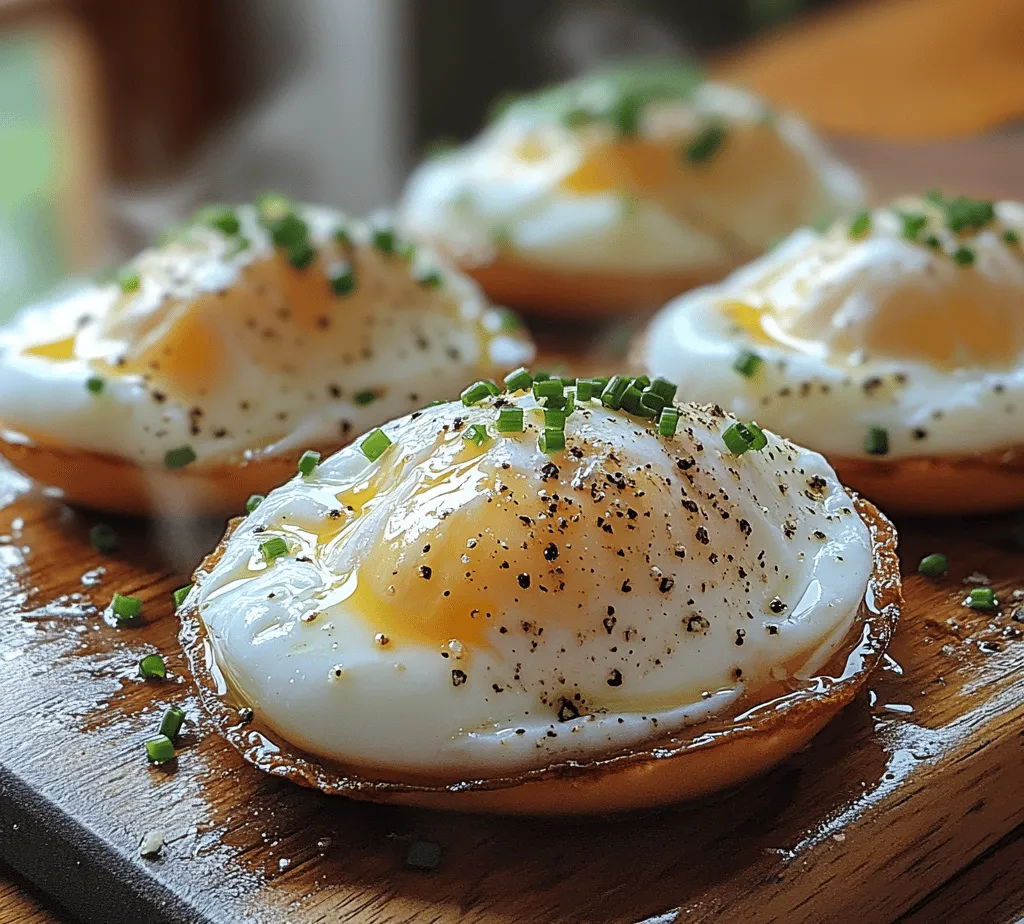
The allure of poached eggs lies in their versatility. They can be served on a bed of sautéed greens, atop a slice of crusty toast, or blended into a rich, velvety sauce. The process of poaching preserves the eggs’ natural flavors while creating a tender white that envelops a warm, runny yolk. This combination makes poached eggs a beloved choice for breakfast, brunch, or even dinner.
In this article, we will explore the nuanced world of poaching eggs, providing you with all the information you need to achieve that perfect poach. From understanding the science behind the process to step-by-step instructions, we will guide you through the essential techniques and tips to make poaching eggs a breeze.
Understanding the Basics of Poaching Eggs
The Science Behind Poaching Eggs
To truly appreciate the art of poaching, it’s important to understand the structure of an egg. Each egg consists of three main components: the yolk, the white, and the shell. The yolk, rich in flavor and nutrients, is the star of the show, while the egg white plays a crucial role in providing structure and texture. When poached, the egg white coagulates gently in hot water, creating a delicate barrier that keeps the yolk intact and runny.
The freshness of the eggs you use is vital for achieving the best results. Fresher eggs have firmer whites and yolks that sit higher, making them easier to poach. As eggs age, the whites become thinner, leading to a more spread-out and less attractive poached egg. Therefore, always choose the freshest eggs you can find for poaching.
It’s essential to understand how poaching differs from boiling or frying. Unlike boiling, where eggs are submerged in rapidly bubbling water, poaching involves gently simmering eggs in water that is just below boiling point. This controlled temperature allows the whites to set slowly while the yolk remains creamy and soft. Frying, on the other hand, uses oil or butter to cook the egg, resulting in a different texture and flavor profile altogether.
Essential Ingredients for Perfect Poached Eggs
When it comes to poaching eggs, the ingredients are minimal, but their quality is paramount. Here are the key ingredients you’ll need:
– Eggs: Choose the freshest eggs possible. Look for eggs with bright, unbroken shells and a sell-by date that is still in the future.
– Vinegar: A splash of vinegar in the poaching water is a common practice among chefs. Vinegar helps the egg whites coagulate more quickly, resulting in a neater poached egg. The acidity of the vinegar also helps to maintain the egg’s shape as it cooks.
– Water: Use clean, filtered water for poaching. The quality of water can affect the overall taste of the eggs.
In addition to these primary ingredients, seasoning can enhance the flavor profile of your poached eggs. A simple sprinkle of salt and pepper can go a long way in elevating the dish. You may also consider adding herbs or spices to the poaching water for an extra layer of flavor.
Preparing to Poach: Essential Tools and Techniques
Choosing the Right Equipment
To successfully poach eggs, you’ll need a few essential tools. Here’s a list of recommended equipment:
– Wide, shallow pan or pot: A shallow pan allows for better control of the water’s temperature and makes it easier to retrieve the poached eggs. A non-stick surface can also help prevent sticking.
– Slotted spoon: This tool is essential for gently lifting the poached eggs from the water without breaking them. A slotted spoon allows excess water to drain away, leaving you with perfectly poached eggs.
– Thermometer: While not strictly necessary, a kitchen thermometer can help you maintain the ideal water temperature for poaching. Ideally, the water should be between 180°F to 190°F (82°C to 88°C) for perfect poaching.
Setting Up Your Poaching Station
Before you begin, it’s important to set up your poaching station for efficiency. Here are some tips to prepare your workspace:
1. Organize your ingredients: Have your eggs, vinegar, and any additional seasonings within arm’s reach to streamline the process.
2. Prepare your tools: Have your pot filled with water on the stove, the thermometer ready, and your slotted spoon nearby. This way, you can work quickly and confidently.
3. Safety measures: Ensure your cooking area is clean and free from clutter. Use oven mitts when handling hot pots or pans to avoid burns.
The Step-by-Step Guide to Poaching Eggs
Preparing the Water
The first step in poaching eggs is preparing the water. Fill your pot with enough water to submerge the eggs, leaving about an inch of space at the top to prevent overflow. Heat the water on medium until it begins to simmer, then reduce the heat to maintain a gentle simmer.
Controlling the temperature is crucial; too hot, and the eggs will break apart; too cool, and they will not cook properly. You want to see small bubbles rising to the surface, creating a gentle movement in the water. A thermometer can be helpful here, as you aim for a temperature between 180°F and 190°F.
Adding Vinegar: Why It Matters
Once the water reaches the desired temperature, it’s time to add vinegar. A splash of vinegar—about one tablespoon per quart of water—will help the egg whites set more quickly. This is particularly important when using older eggs, which tend to spread more in the water.
Different types of vinegar can be used, including white vinegar, apple cider vinegar, or even rice vinegar. Each type will impart its own subtle flavor to the eggs, but the differences are often minimal. Feel free to experiment with different vinegars to find your preferred taste.
Cracking the Eggs: The Best Practices
Now that you have your water prepared and vinegar added, it’s time to crack the eggs. To avoid breaking the yolks, crack each egg into a small bowl or ramekin first. This allows you to inspect the egg and remove any bits of shell before gently sliding it into the simmering water.
When ready to poach, create a whirlpool in the simmering water by stirring with a spoon. This movement helps the egg white wrap around the yolk, creating a more aesthetically pleasing poached egg. Carefully slide the egg from the bowl into the center of the whirlpool to maximize its shape.
Creating the Whirlwind: A Crucial Technique
Creating a whirlpool is a crucial technique in poaching eggs. This method helps to keep the egg whites compact and prevents them from spreading out in the water. To create a whirlpool, stir the water in a circular motion with a spoon before adding the egg.
Once the egg is in the water, you can stop stirring. The whirlpool effect will continue to keep the egg in a nice round shape as it cooks. Allow the egg to poach for about 3-4 minutes for a runny yolk or slightly longer if you prefer a firmer yolk.
By following these initial steps, you are well on your way to mastering the art of poaching eggs. With practice and attention to detail, you can achieve perfectly poached eggs that are both beautiful and delicious. Stay tuned for more comprehensive steps and tips in the following sections, where we will cover everything you need to know to become a poaching pro.
The Science Behind the Whirlpool Method
The whirlpool method is a time-honored technique that enhances the poaching process, ensuring that your eggs come out perfectly shaped and tender. The science behind this method lies in the creation of a gentle vortex in the water. When you stir the water in one direction before adding the egg, you create a swirling motion that helps the egg whites wrap around the yolk, resulting in a beautifully formed poached egg.
To achieve the best results, use a deep saucepan filled with a sufficient amount of water. Bring the water to a gentle simmer, not a rolling boil; this is crucial because vigorous boiling can cause the egg whites to disperse too much, leading to an unattractive final product. Once you have the water at the right temperature and consistency, use a spoon to stir the water in a circular motion, creating a whirlpool effect. The key is to maintain a steady whirlpool as you add the egg.
Tips for Achieving the Perfect Swirl
To perfect the whirlpool technique, consider these tips:
1. Use Fresh Eggs: Fresh eggs have firmer whites, which hold together better than older eggs. This helps maintain the egg’s shape during poaching.
2. Temperature Control: Keep the water at a steady simmer (around 180°F to 190°F). Too high a temperature can break apart the egg whites, while too low will not cook them adequately.
3. Add Vinegar: A splash of vinegar in the water can help the egg whites coagulate more quickly, helping to keep them intact. However, don’t overdo it, as too much vinegar can affect the flavor of your eggs.
4. Speed of Addition: Crack the egg into a small bowl before adding it to the whirlpool. This allows you to control the placement of the egg in the swirling water, minimizing the splatter and ensuring you can add it gently.
Adding and Cooking the Eggs
Once you have the whirlpool in motion, it’s time to introduce the eggs. Gently slide the egg from the bowl into the center of the whirlpool. As the egg enters the water, the spinning motion of the liquid will help the whites envelop the yolk, creating a tidy poached egg.
Optimal Timing for Different Yolk Preferences
Timing is critical in poaching eggs, especially if you have specific preferences for yolk consistency. Here’s a handy guide:
– Soft-Yolk: For a runny yolk, cook the egg for about 3 to 4 minutes. The whites should be set, but the yolk remains liquid.
– Medium-Yolk: If you prefer a slightly firmer yolk, aim for around 5 to 6 minutes. This will result in a yolk that is partially set but still creamy.
– Hard-Yolk: For a fully cooked yolk, allow the egg to poach for 7 to 8 minutes. The egg will be solid throughout.
Managing Multiple Eggs in One Pot
If you’re preparing multiple poached eggs at once, it’s best to work in batches to avoid overcrowding the pot. Too many eggs in the water can lower the temperature and disrupt the poaching process. If you need to poach several eggs, consider using a larger pot or poaching them one or two at a time. Keep cooked eggs warm in a bowl of warm water while you finish the others, ensuring they remain at the right temperature until serving.
Removing and Resting the Eggs
Once your eggs have cooked to your liking, it’s time to remove them from the water. Use a slotted spoon to gently lift the egg out of the water. This method allows excess water to drain away and ensures the egg remains intact.
Techniques for Lifting Eggs Without Damage
When lifting the eggs, be gentle to avoid breaking the delicate whites. Here are some techniques:
– Slide the Spoon Underneath: Position the slotted spoon beneath the egg and gently lift it out at an angle. This minimizes the risk of the egg slipping or breaking.
– Tilt the Spoon: Once the egg is in the spoon, tilt it slightly to allow any remaining water to drain off.
The Importance of Resting on Paper Towels
After removing the eggs, it’s advisable to place them on a paper towel to absorb any excess water. This step is particularly important if you are serving the eggs on toast or as part of a salad, as it prevents sogginess. Let the eggs rest for a moment while you prepare your serving plates.
Serving Suggestions for Poached Eggs
Classic Pairings: Toast, Salads, and More
Poached eggs are incredibly versatile and can enhance a variety of dishes. Here are some classic pairings and serving suggestions:
– Avocado Toast: Spread ripe avocado on toasted sourdough or whole grain bread and top with a perfectly poached egg. Sprinkle with salt, pepper, and red chili flakes for added flavor.
– Salads: Place poached eggs atop mixed greens or a warm salad of roasted vegetables. The runny yolk acts as a natural dressing, adding creaminess and richness.
– Breakfast Bowls: Create a breakfast bowl with whole grains like quinoa or farro, topped with poached eggs, sautéed spinach, and a sprinkle of feta or goat cheese.
– Benedict Variations: Use poached eggs in classic Eggs Benedict or try variations with smoked salmon, sautéed mushrooms, or even spicy chorizo.
Exploring the Versatility of Poached Eggs in Various Dishes
Beyond the traditional breakfast options, poached eggs can be a delightful addition to lunch and dinner dishes. Try incorporating them into:
– Ramen: Add a poached egg to a steaming bowl of ramen for a rich, savory flavor.
– Curry: Nestle poached eggs into a spicy curry or shakshuka for a satisfying meal.
– Pasta: Top a bowl of pasta with a poached egg, allowing the yolk to create a luscious sauce when broken.
Garnishing for Presentation
Presentation can elevate your poached eggs from simple to stunning. Here are some ideas for garnishing:
Ideas for Fresh Herbs and Seasonings
– Chives: Finely chop fresh chives and sprinkle them over the eggs for a mild onion flavor.
– Cilantro: For a fresh twist, add chopped cilantro, especially if serving with a spicy dish.
– Paprika or Chili Powder: A sprinkle of smoked paprika or chili powder can add a pop of color and a hint of spice.
The Art of Plating Poached Eggs
When plating, consider the following tips:
– Layering: Stack ingredients, such as avocado and toast, to create visual interest.
– Use Color: Incorporate colorful vegetables or garnishes around the plate to enhance the overall presentation.
– Drizzle: A drizzle of high-quality olive oil or a balsamic reduction can add a gourmet touch.
Nutritional Benefits of Poached Eggs
Understanding the Nutritional Value
Poached eggs are a nutrient-dense food, offering a wealth of health benefits. They are an excellent source of high-quality protein, providing essential amino acids necessary for muscle repair and growth. Additionally, eggs are rich in vitamins such as B12, riboflavin, and folate, as well as minerals like iron and selenium.
Compared to other cooking methods, poaching is one of the healthiest ways to prepare eggs. Unlike frying, which can add unnecessary fats and calories, poached eggs retain their nutritional value without the need for added oils or butter.
Incorporating Poached Eggs into a Balanced Diet
To maximize the nutritional benefits of poached eggs, consider pairing them with a variety of healthful ingredients:
– Vegetables: Serve poached eggs with a side of sautéed or steamed vegetables to increase your fiber intake and add vitamins and minerals.
– Whole Grains: Combine poached eggs with whole grains like quinoa, brown rice, or whole-wheat bread to create a balanced meal that includes carbohydrates for energy.
– Portion Control and Dietary Considerations: While eggs offer many health benefits, it’s essential to consume them in moderation, especially for individuals with specific dietary concerns regarding cholesterol. Aim for a balanced approach to meals, incorporating a variety of food groups.
Common Challenges and Solutions in Poaching Eggs
Troubleshooting Common Issues
Even with the best techniques, poaching eggs can sometimes be tricky. Here are some common challenges and their solutions:
– Unruly Egg Whites: If your egg whites spread out too much in the water, try using a smaller pot or reducing the temperature to maintain a gentle simmer. Adding a bit of vinegar can also help the whites coagulate better.
– Adjusting Cooking Times: If you find that your eggs are consistently overcooked or undercooked, make note of your stove’s simmering temperature and adjust the cooking time accordingly. It may take a few attempts to find the perfect timing for your preferences.
Learning from Mistakes: What Not to Do
Mistakes are part of the learning process. Here are some pitfalls to avoid:
– Using Older Eggs: Older eggs tend to have weaker whites, leading to a less desirable poaching outcome. Always use the freshest eggs possible for the best result.
– Boiling Water: Avoid adding eggs to boiling water. Instead, stick to a gentle simmer to ensure the egg whites remain intact.
– Rushing the Process: Poaching takes practice and patience. Don’t rush the technique; take your time to create the perfect whirlpool and allow the eggs to cook properly.
Encourage a mindset of experimentation. Each time you poach an egg, you’ll learn something new that brings you closer to mastering this skill.
Conclusion: Mastering the Art of Poaching Eggs
Poaching eggs is a skill that can enhance any home cook’s repertoire. With the right techniques, tools, and a touch of patience, anyone can master this culinary art. As you become more comfortable with the process, you’ll find that poached eggs can be a delightful addition to your meals, bringing elegance and flavor to the table. Embrace the journey of learning to poach eggs, and enjoy the delicious rewards that come from your newfound skills.
Whether you’re preparing a simple breakfast or an elaborate brunch for friends and family, poached eggs can elevate any dish. With practice, you’ll be able to serve perfectly poached eggs that are not only visually appealing but also packed with flavor and nutrition. Don’t hesitate to experiment with different ingredients and pairings, as the possibilities are endless. Happy poaching!
