

Indulging in a Biscuit and Cream Cheese Cake is a true treat for the senses. This decadent dessert perfectly marries the buttery crunch of shortbread biscuits with the rich, creamy texture of a cream cheese filling. Ideal for any occasion—whether it be a birthday celebration, a festive gathering, or simply a sweet craving—this cake not only satisfies your sweet tooth but also impresses your guests with its elegant presentation. In this article, we will guide you step-by-step through the intricate process of crafting this delightful dessert, ensuring that you master the art of making a Biscuit and Cream Cheese Cake that is as delicious as it is visually appealing.
Ingredients Overview
Before we dive into the preparation steps, let’s take a closer look at the essential ingredients that come together to create this sumptuous cake. Each ingredient plays a vital role in contributing to the overall flavor and texture of the final product, so understanding their purpose will help you make informed choices while cooking.
Essential Ingredients:
1. Shortbread Biscuits: The foundation of our cake, shortbread biscuits provide a rich, buttery flavor and a satisfying crunch. Opt for high-quality, store-bought shortbread biscuits or consider making your own for a fresher taste.
2. Unsalted Butter: This ingredient is melted and combined with the crushed biscuits to form the base. Using unsalted butter allows you to control the saltiness of the cake, ensuring a balanced flavor.
3. Cream Cheese: The star of our filling, cream cheese adds a velvety richness that contrasts beautifully with the biscuit base. Make sure to use full-fat cream cheese for optimal creaminess and flavor.
4. Powdered Sugar: This sweetener is essential for achieving the right level of sweetness in the cream cheese filling. Gradually adding powdered sugar allows you to customize the sweetness to your liking.
5. Vanilla Extract: A hint of vanilla enhances the overall flavor profile of the cake, creating a delightful aroma that complements the cream cheese filling.
6. Heavy Cream: Whipped to perfection, heavy cream adds lightness and volume to the filling. The airy texture of whipped cream balances the density of the cream cheese, resulting in a harmonious blend.
Tips for Selecting Quality Ingredients
– Shortbread Biscuits: When purchasing store-bought biscuits, look for options with natural ingredients and minimal additives. If you have the time, homemade shortbread will provide a fresher flavor and allow you to customize the sweetness and texture to suit your preferences.
– Cream Cheese: Always choose full-fat cream cheese for the richest flavor and creamiest texture. Avoid low-fat or spreadable varieties as they may not set properly and will alter the consistency of your filling.
– Butter: Choose a reputable brand of unsalted butter. The fresh taste of high-quality butter will make a significant difference in the flavor of your cake.
– Heavy Cream: Look for heavy cream that contains at least 36% fat content. This will ensure that your whipped cream achieves stiff peaks and maintains its structure when mixed into the filling.
With a clear understanding of the essential ingredients and tips for selecting the best quality options, you are now ready to begin the preparation steps for your Biscuit and Cream Cheese Cake.
Preparation Steps for Biscuit and Cream Cheese Cake
Creating this delightful cake involves a series of straightforward steps, allowing even novice bakers to achieve delicious results. Let’s break down the initial phases of preparation, starting with the biscuit base.
Creating the Biscuit Base
The first step in crafting your Biscuit and Cream Cheese Cake is to prepare the biscuit base. This step is crucial, as a well-made base will provide stability and texture for the entire cake.
Instructions:
1. Crush the Shortbread Biscuits: Begin by placing the shortbread biscuits in a food processor. Pulse until they reach a fine crumb consistency. If you don’t have a food processor, you can place the biscuits in a resealable plastic bag and crush them with a rolling pin.
2. Combine with Melted Butter: In a mixing bowl, combine the crushed biscuits with melted unsalted butter. Stir until the mixture is well combined and resembles wet sand. This step ensures that the biscuits are fully coated in butter, which is essential for forming a stable base.
3. Press the Mixture into the Pan: Line a springform pan with parchment paper for easy removal. Transfer the biscuit mixture into the prepared pan and use the back of a measuring cup or your fingers to press the mixture firmly into the base. It’s important to apply even pressure to form a solid crust that will hold together once chilled.
4. Chill the Crust: Once the base is pressed down, place the pan in the refrigerator for at least 30 minutes. Chilling the crust allows the butter to firm up, ensuring that your biscuit base remains stable when you add the cream cheese filling.
Crafting the Cream Cheese Filling
While the biscuit base is chilling, it’s time to prepare the luscious cream cheese filling that will elevate your cake to new heights.
Step-by-Step Guide:
1. Soften the Cream Cheese: Before starting, make sure your cream cheese is at room temperature. This will allow for easier mixing and ensure a smooth filling. You can speed up the process by cutting the cream cheese into small cubes and letting it sit out for about 30 minutes.
2. Beat the Cream Cheese: In a large mixing bowl, use an electric mixer to beat the softened cream cheese until it is smooth and creamy. This step is crucial for achieving a lump-free filling, so take your time to mix well.
3. Gradually Add Powdered Sugar: Once the cream cheese is smooth, gradually add the powdered sugar, mixing well after each addition. This method helps to prevent clumps from forming and allows you to control the sweetness of the filling.
4. Incorporate Vanilla Extract: Add the vanilla extract to the cream cheese mixture and beat until fully combined. The vanilla will enhance the flavor profile of the filling, making it rich and aromatic.
The Significance of Gradual Mixing: Gradually adding the powdered sugar and vanilla ensures that the flavors meld together harmoniously, resulting in a balanced filling that compliments the biscuit base beautifully.
Whipping the Cream to Perfection
The final step in preparing the filling involves whipping the heavy cream to create a light, airy texture that will enhance the overall dessert.
Techniques for Whipping Heavy Cream:
1. Chill Your Equipment: To achieve the best results, ensure that your mixing bowl and beaters are cold. You can chill them in the refrigerator for about 15 minutes before whipping.
2. Add Heavy Cream: Pour the heavy cream into the chilled mixing bowl. Start mixing at a low speed to avoid splatters, then gradually increase to medium-high speed.
3. Monitor the Consistency: Continue whipping until the cream thickens and forms soft peaks. At this stage, you can add a tablespoon of powdered sugar for sweetness, if desired. Keep whipping until you reach stiff peaks, which means the whipped cream holds its shape when lifted with a spatula.
4. Fold into the Cream Cheese Mixture: Once the whipped cream has reached the desired texture, carefully fold it into the cream cheese mixture using a spatula. This gentle folding technique helps to maintain the lightness of the whipped cream, ensuring your filling is airy and fluffy.
By following these detailed preparation steps, you are well on your way to creating a Biscuit and Cream Cheese Cake that will delight anyone who has the pleasure of tasting it. The combination of a firm biscuit base and a light, creamy filling creates a harmonious balance that is sure to impress. Stay tuned for the next part of this article, where we will guide you through assembling your cake and share tips for achieving the perfect presentation.
Common Pitfalls to Avoid During the Whipping Process
Whipping cream can be a deceptively simple task, but there are several common pitfalls that can undermine your efforts. One of the primary concerns is over-whipping, which can lead to a grainy texture and, in extreme cases, turning the cream into butter. To avoid this, always whip the cream on a medium speed until soft peaks form. Soft peaks mean that the cream will hold its shape but still be smooth and airy.
Another issue to be mindful of is the temperature of your cream. For the best results, start with cold equipment—this includes your mixing bowl and beaters. Cold cream whips faster and achieves greater volume. If your cream is at room temperature, it can be more challenging to whip properly.
Lastly, ensure that there are no traces of oil or fat in your mixing bowl; even a small amount can hinder the cream’s ability to whip. By keeping these points in mind, you can successfully achieve a beautifully whipped cream that maintains its structure and adds lightness to your Biscuit and Cream Cheese Cake.
Combining the Cream Cheese and Whipped Cream
Now that your whipped cream is prepared, it’s time to combine it with the cream cheese mixture. Start by ensuring the cream cheese is at room temperature; this will make blending much easier and prevent lumps. In a separate bowl, gently stir the softened cream cheese until it’s smooth.
Next, take about one-quarter of the whipped cream and add it to the cream cheese mixture. Use a spatula to fold it in gently. The goal here is to lighten the cream cheese without deflating the whipped cream. Carefully lift the cream from the bottom of the bowl, turning it over onto the cream cheese, and repeat this process. This technique preserves the airiness of the whipped cream, which is crucial for achieving a light and fluffy filling.
Once the initial quarter is well incorporated, gradually fold in the remaining whipped cream. Continue this gentle folding motion until the mixture is fully blended, and you see no streaks of white cream cheese. Maintaining the airiness during this step is paramount; it will directly influence the final texture of your cake, ensuring that each slice is as light as a cloud.
Assembling the Biscuit and Cream Cheese Cake
With your filling ready, it’s time to assemble the cake. Begin by pouring the cream cheese and whipped cream mixture over the cooled biscuit crust. Use a spatula to spread it evenly across the surface, ensuring that you reach the edges for a neat finish. Once the filling is smoothed out, you can gently tap the pan on the counter to settle any air bubbles and create an even surface.
After the filling is spread, it’s essential to refrigerate the cake for at least 4 hours. This chilling time allows the filling to set properly, ensuring that it holds its shape when sliced. For the best results, consider letting it sit overnight; this not only enhances the flavor as the ingredients meld together but also results in a firmer texture.
Serving Your Biscuit and Cream Cheese Cake
When the chilling time is complete, it’s time to serve your masterpiece. Start by carefully releasing the cake from the springform pan. Run a knife around the edge to loosen it before unclipping the sides. This will help avoid any potential sticking and ensure a clean removal.
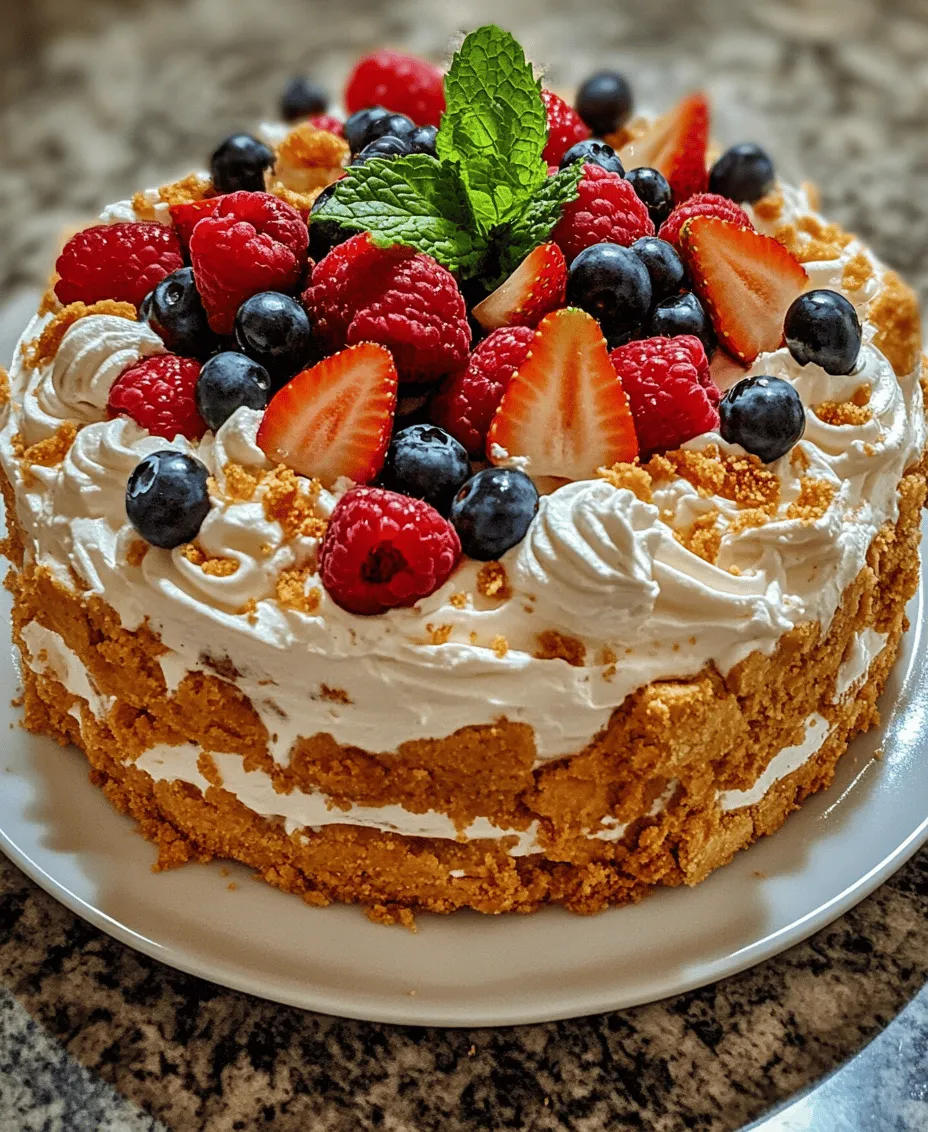
To transfer the cake to a serving platter, you can use a large spatula. Slide the spatula under the cake, lift it gently, and place it onto your chosen plate. Now comes the fun part—garnishing! Fresh berries such as strawberries, raspberries, or blueberries add a vibrant color contrast and a burst of flavor. Consider adding a few mint leaves for an aromatic touch that elevates the presentation.
Slice the cake into wedges and serve it chilled. The contrast of the creamy filling against the crispy biscuit base will delight your guests, making it a perfect dessert for any occasion.
Nutritional Information
Understanding the nutritional aspects of your Biscuit and Cream Cheese Cake can help you make informed decisions when serving this delicious treat. Each slice contains approximately 250-300 calories, depending on the size and specific ingredients used.
Here’s a breakdown of the nutritional components:
– Calories: Approximately 250-300 per slice
– Total Fat: About 18 grams, mainly from cream cheese and whipped cream
– Saturated Fat: Roughly 10 grams
– Sugars: Around 12-15 grams, depending on added sweeteners
– Protein: Approximately 4-5 grams per slice
If you are considering dietary restrictions, this cake can be customized by using low-fat cream cheese or a sugar substitute to reduce calories and sugar content. Always inform your guests of any modifications made to the recipe for clarity.
Conclusion: Enjoying Your Biscuit and Cream Cheese Cake
Creating and sharing a Biscuit and Cream Cheese Cake is not just about baking; it’s about bringing joy to your table and fostering a sense of accomplishment. This dessert is perfect for any gathering, from birthday celebrations to casual family dinners, and it leaves a lasting impression that your loved ones will surely remember.
By following the detailed steps outlined in this recipe, you can confidently present a dessert that combines delightful flavors and textures. The crispy biscuit base paired with the creamy, airy filling creates a harmonious balance that is pleasing to the palate. Whether enjoyed as a special treat or a simple indulgence, the Biscuit and Cream Cheese Cake is sure to be a crowd-pleaser.
So gather your ingredients, invite your friends or family, and embark on this delightful baking journey. Enjoy every moment spent creating this delicious cake, and relish the happiness it brings when shared with others. Happy baking!