
Exploring the world of cookies opens up a delightful realm of flavors and textures, and few combinations evoke nostalgia like the Fluffernutter Bliss Cookies. Inspired by the classic fluffernutter sandwich, which combines peanut butter and marshmallow fluff, these cookies marry the creamy richness of peanut butter with the sweet, soft touch of marshmallows and the optional indulgence of chocolate chips. In this article, we’ll delve into the details of creating these delightful treats, discussing each ingredient’s role, providing step-by-step instructions, and offering insights into how to achieve the perfect cookie.
The Allure of Fluffernutter Bliss Cookies
The allure of Fluffernutter Bliss Cookies lies in their comforting blend of flavors, reminiscent of childhood snacks enjoyed on a lazy afternoon. The fluffernutter sandwich itself has an interesting history; it first captured the hearts (and taste buds) of Americans in the 1960s. The combination of peanut butter and marshmallow fluff made for a quick and satisfying treat, perfect for school lunches and after-school snacks. Over the years, this delightful combination has evolved beyond sandwiches and inspired various desserts, including cakes, pies, and, of course, cookies.
The transition from a simple sandwich to a cookie was a natural progression, allowing bakers to encapsulate the beloved flavors in a new, bite-sized form. Fluffernutter Bliss Cookies provide the same comforting taste and nostalgia but with the added joy of freshly baked cookies. The soft, chewy texture, combined with gooey marshmallows and the rich taste of peanut butter, creates a harmonious balance of sweetness and creaminess that appeals to both children and adults alike.
Essential Ingredients for Fluffernutter Bliss Cookies
To create these delectable cookies, understanding the role of each ingredient is essential. Let’s take a closer look at what makes Fluffernutter Bliss Cookies so special.
The Star Ingredient: Peanut Butter
Peanut butter is the heart of Fluffernutter Bliss Cookies, providing not just flavor but also a rich, creamy texture. When choosing peanut butter, the decision often comes down to creamy versus crunchy. Creamy peanut butter results in a smooth, uniform dough, while crunchy peanut butter adds delightful texture and bursts of peanut flavor.
Health-wise, peanut butter is packed with protein, healthy fats, and vitamins, making it a satisfying option that can keep you feeling full longer. It’s important to choose a high-quality peanut butter, preferably one with minimal added ingredients—just peanuts and salt for the best flavor and health benefits.
The Role of Butter in Achieving Cookie Perfection
Butter plays a crucial role in cookie baking, impacting both flavor and texture. When it comes to Fluffernutter Bliss Cookies, using unsalted butter is recommended. This allows for greater control over the salt content in the recipe. Unsalted butter also provides a fresher taste, as its flavor is not influenced by added salt.
Butter also contributes to the cookie’s overall texture. It creates a tender and rich cookie when creamed with sugar, incorporating air into the dough, which helps the cookies rise. The more butter used, the richer the flavor, but it’s essential to maintain a balance to prevent the cookies from spreading too much during baking.
The Sugar Spectrum: Granulated vs. Brown Sugar
Sugar is a vital ingredient in any cookie recipe, and Fluffernutter Bliss Cookies use a combination of granulated and brown sugar. Granulated sugar contributes to the spread and crispiness of the cookies, while brown sugar adds moisture and chewiness due to its higher molasses content. This combination results in a well-balanced cookie with a delightful texture that is both chewy and slightly crisp on the edges.
The Egg: A Binding Agent and Moisture Provider
Eggs are another essential component in cookie recipes, serving as a binding agent that helps hold the ingredients together. In Fluffernutter Bliss Cookies, the egg also adds moisture, ensuring a soft and tender crumb. The egg white provides structure, while the yolk contributes richness and flavor. It’s important to use large eggs, as this is the standard size for baking recipes and ensures consistent results.
The Flour Balance
When it comes to baking cookies, all-purpose flour is typically the go-to choice. It provides the right amount of protein for structure while allowing the cookies to remain tender. Proper measuring techniques are critical; using too much flour can lead to dry and crumbly cookies. The best method is to spoon the flour into a measuring cup and level it off with a straight edge for accuracy.
Baking Essentials: Baking Soda and Salt
Baking soda is a leavening agent that helps the cookies rise, creating a light and airy texture. It also contributes to the browning of the cookies through the Maillard reaction, enhancing their flavor. A small amount of salt is essential as well; it enhances the sweetness of the cookies and balances the flavors. While it may seem counterintuitive, salt is a key player in elevating the overall taste profile of baked goods.
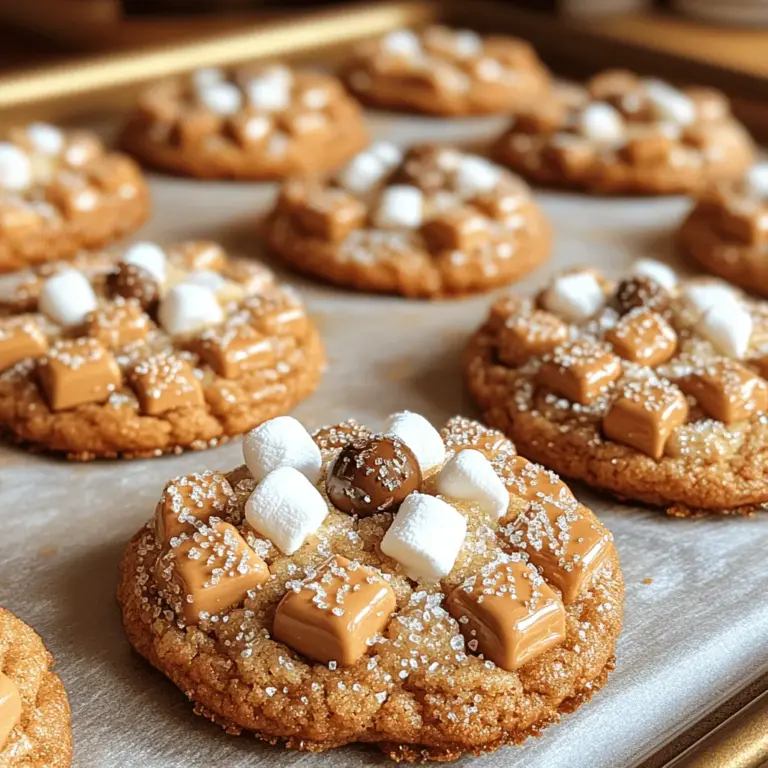
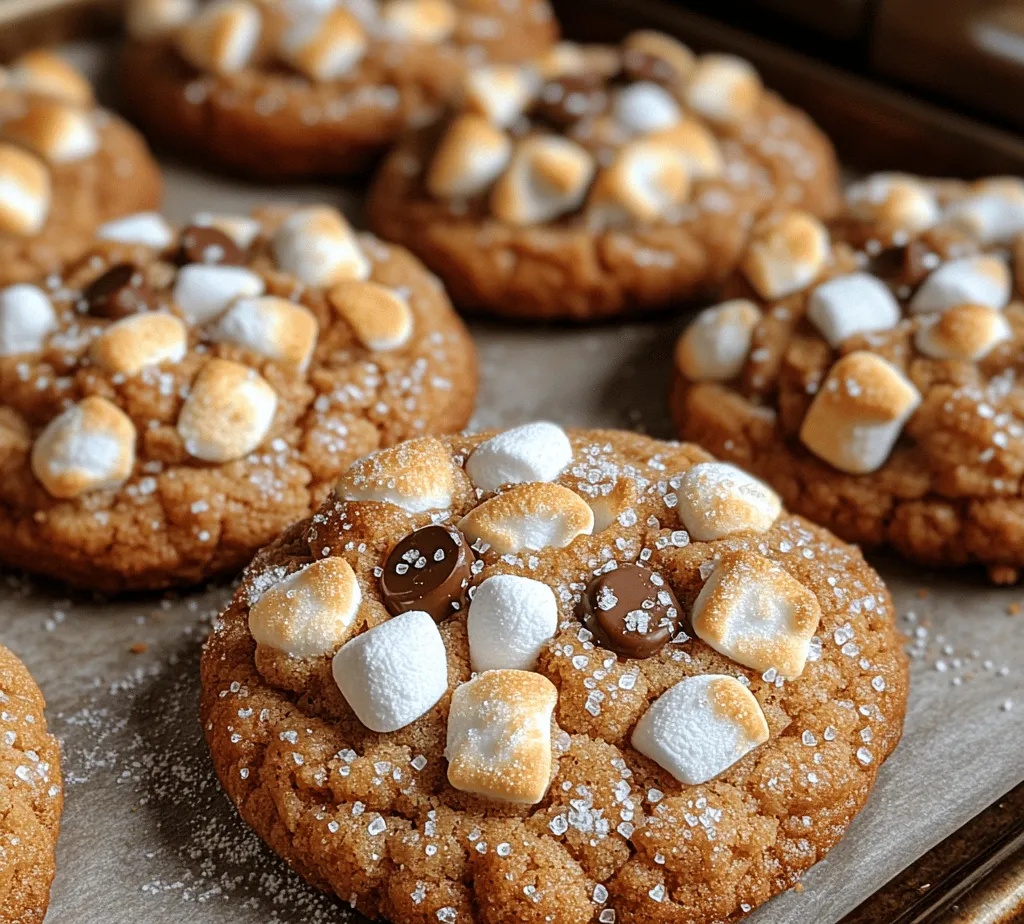
The Marshmallow Magic
Marshmallows are what truly elevate the Fluffernutter Bliss Cookies from ordinary to extraordinary. Mini marshmallows are the preferred choice, as they melt perfectly, creating gooey pockets of sweetness throughout the cookies. Their light, fluffy texture adds a delightful contrast to the rich peanut butter and buttery dough. When baking, the marshmallows will puff up and create a soft, chewy center that is irresistible.
Chocolate Chips: Optional but Delicious
While chocolate chips are optional in Fluffernutter Bliss Cookies, they offer an additional layer of flavor that many find irresistible. The choice of chocolate—dark, semi-sweet, or milk—can drastically alter the cookie’s flavor profile. Adding chocolate chips can also enhance the cookie’s visual appeal, turning them into a more decadent treat.
Step-by-Step Guide to Baking Fluffernutter Bliss Cookies
Now that we’ve covered the essential ingredients and their roles in creating the perfect cookie, it’s time to dive into the step-by-step guide for baking Fluffernutter Bliss Cookies. Follow these clear instructions to ensure your cookies come out perfectly every time.
1. Preheat the Oven: Start by preheating your oven to 350°F (175°C). This ensures that your cookies bake evenly.
2. Prepare the Baking Sheet: Line a baking sheet with parchment paper or a silicone baking mat. This will prevent the cookies from sticking and make for easy cleanup.
3. Cream Together Butter and Peanut Butter: In a large mixing bowl, combine softened unsalted butter and creamy peanut butter. Using an electric mixer, cream them together until the mixture is light and fluffy. This process typically takes about 2-3 minutes.
4. Add the Sugars: Gradually add in granulated sugar and brown sugar to the creamed mixture. Continue to mix until the sugars are fully incorporated, and the mixture is smooth.
5. Incorporate the Egg: Add the egg to the mixture and beat until fully combined. The egg will add moisture and help bind the ingredients together.
6. Combine Dry Ingredients: In a separate bowl, whisk together the all-purpose flour, baking soda, and salt. This ensures even distribution of the leavening agent and salt throughout the flour.
7. Mix Dry and Wet Ingredients: Gradually add the dry ingredients to the wet ingredients, mixing until just combined. Be careful not to overmix, as this can lead to tough cookies.
8. Fold in Marshmallows and Optional Chocolate Chips: Gently fold in the mini marshmallows and chocolate chips, if using. This step is crucial for ensuring the marshmallows and chocolate are evenly distributed throughout the cookie dough.
9. Scoop the Dough: Use a cookie scoop or tablespoon to portion out the dough onto the prepared baking sheet, leaving space between each scoop as the cookies will spread while baking.
10. Bake the Cookies: Place the baking sheet in the preheated oven and bake for 10-12 minutes, or until the edges are lightly golden brown. The centers may look slightly underbaked, but they will continue to cook on the baking sheet once removed from the oven.
These initial steps set the foundation for creating mouthwatering Fluffernutter Bliss Cookies. In the next part of our guide, we will explore essential tips for achieving the best results, ensuring that each batch of cookies is as delightful as the last, while answering common questions that may arise during the baking process. Stay tuned!
Preparing Your Workspace
Before diving into the delightful process of baking Fluffernutter Bliss Cookies, it’s essential to prepare your workspace effectively. A well-organized kitchen can significantly enhance your baking experience and ensure that your cookies turn out perfectly.
Tools and Equipment Needed for Successful Cookie Baking
To bake your Fluffernutter Bliss Cookies, gather the following tools and equipment:
1. Mixing Bowls: At least two—one for wet ingredients and another for dry.
2. Measuring Cups and Spoons: Precision is key in baking, so use proper measuring tools.
3. Hand or Stand Mixer: A handheld mixer is perfect for creaming butter and sugars, but a stand mixer can save time and effort.
4. Rubber Spatula: For scraping down the sides of the bowl and folding in ingredients.
5. Whisk: To aerate the dry ingredients before incorporating them into the wet mixture.
6. Cookie Sheets: You’ll need at least two or three, depending on how many cookies you plan to bake. Line them with parchment paper for easy removal.
7. Wire Rack: Essential for cooling your cookies after baking, ensuring they maintain their chewy texture.
Importance of Preheating the Oven
One crucial step not to overlook is preheating your oven. Always preheat it to the specified temperature before placing your cookies inside. This ensures that the cookies bake evenly and rise properly. For Fluffernutter Bliss Cookies, preheat your oven to 350°F (175°C). This temperature is ideal for achieving that perfect golden-brown exterior while keeping the inside soft and chewy.
Mixing the Wet Ingredients
With your workspace prepared and your oven preheated, it’s time to tackle the wet ingredients.
Techniques for Creaming Butter and Sugars Effectively
Start by placing softened butter in your mixing bowl. It’s important that the butter is at room temperature, which allows it to cream more effectively with the sugars. Using your hand mixer or stand mixer, beat the butter on medium speed until it becomes light and fluffy, about 2-3 minutes. This process incorporates air into the butter, which helps your cookies rise during baking.
Add both brown and granulated sugars to the creamed butter. Continue mixing on medium speed until the mixture is smooth and well combined, about another minute. The sugars will dissolve into the butter, creating a perfect base for your cookies.
Tips for Incorporating Peanut Butter Smoothly
Next, it’s time to add the star ingredient: peanut butter. Choose a creamy peanut butter for the best results. You can also opt for natural peanut butter, but make sure to stir it well before measuring to combine the oils. Add the peanut butter to the butter and sugar mixture and mix on medium speed until completely blended. This step ensures that the peanut butter is evenly distributed, resulting in a consistent flavor throughout your cookies.
Incorporating the Egg and Vanilla
Best Practices for Mixing Wet Ingredients to Achieve a Creamy Texture
Now, add one large egg and a teaspoon of pure vanilla extract to your wet mixture. The egg provides moisture and structure, while the vanilla adds a lovely aroma. Mix the ingredients together on low speed until just combined, being careful not to overbeat. Overmixing can lead to a denser cookie texture, so aim for a creamy consistency that is smooth but not overly whipped.
Combining Dry Ingredients
The Significance of Whisking Flour, Baking Soda, and Salt Before Mixing
In a separate mixing bowl, combine 2 cups of all-purpose flour, 1 teaspoon of baking soda, and 1/2 teaspoon of salt. Whisk these dry ingredients together thoroughly. This step is crucial because it ensures that the baking soda is evenly distributed throughout the flour, preventing any pockets of leavening agent that could cause uneven rising during baking.
Once whisked, gradually add the dry mixture to the wet mixture. Mix on low speed until just combined. This will help maintain the soft and chewy texture of your cookies.
Folding in Marshmallows and Chocolate Chips
How to Gently Incorporate Add-Ins Without Overworking the Dough
Now comes the fun part: folding in the add-ins! Gently fold in 1 cup of mini marshmallows and 1 cup of chocolate chips into your cookie dough using a rubber spatula. Take care not to overwork the dough at this stage; you want to keep the marshmallows and chocolate chips intact, ensuring they provide delightful bursts of flavor in each cookie.
Shaping and Rolling the Cookies
Techniques for Uniform Cookie Sizes and Proper Spacing on the Baking Sheet
Once your dough is ready, it’s time to shape the cookies. Using a cookie scoop or two spoons, portion out the dough onto your prepared cookie sheets. For uniformity, aim for about 2 tablespoons of dough per cookie. Space the cookies about 2 inches apart on the sheet, as they will spread while baking.
Baking with Precision
Understanding Baking Times and How to Recognize When Cookies Are Done
Bake your cookies in the preheated oven for 10-12 minutes. Keep an eye on them during the last few minutes of baking. You’ll know they’re done when the edges are lightly golden, and the centers appear slightly soft. This is crucial for achieving that perfect chewy texture. Remove the cookies from the oven and allow them to rest on the baking sheet for 5 minutes before transferring them to a wire rack to cool completely.
Cooling and Serving Suggestions
The Importance of Cooling on a Wire Rack for Optimal Texture
Cooling your cookies on a wire rack is essential for maintaining their texture. It allows air to circulate around them, preventing them from becoming soggy on the bottom. Once cooled, these Fluffernutter Bliss Cookies can be enjoyed right away or stored for later.
Serving Suggestions
For a delightful treat, serve your cookies with a glass of cold milk or a warm cup of coffee. They also pair wonderfully with a scoop of vanilla ice cream for a decadent dessert. Consider garnishing with extra chocolate chips or a drizzle of melted peanut butter for an extra touch of indulgence.
Storage and Shelf Life of Fluffernutter Bliss Cookies
Best Practices for Storing Cookies
To keep your Fluffernutter Bliss Cookies fresh for up to a week, store them in an airtight container at room temperature. Make sure they are completely cooled before sealing them in the container to prevent moisture buildup.
Tips for Freezing Cookies for Longer Shelf Life
If you want to extend their shelf life, you can freeze your cookies. Place them in a single layer on a baking sheet and freeze for about an hour. Once frozen, transfer the cookies to a freezer-safe bag or container, layering parchment paper between them to prevent sticking. These cookies can be frozen for up to three months. When you’re ready to enjoy them, simply thaw at room temperature or warm them in the oven for a few minutes to restore their chewy texture.
Nutritional Considerations
A Brief Overview of the Nutritional Value of Fluffernutter Bliss Cookies
These decadent cookies are not only delicious but also come with a few nutritional considerations. Each cookie contains approximately 150 calories, making them a delightful treat to savor in moderation. They provide a balance of carbohydrates from the flour and sugars, protein from the peanut butter and egg, and a touch of sweetness from the marshmallows and chocolate chips.
Balancing Indulgence with Nutrition
While Fluffernutter Bliss Cookies are certainly indulgent, you can balance your overall diet by enjoying these cookies as an occasional treat. Pair them with fresh fruit or nuts for a more balanced snack, or enjoy them after a nutritious meal to satisfy your sweet tooth without derailing your health goals.
Conclusion
Fluffernutter Bliss Cookies offer a sweet escape into nostalgia with every bite. Their unique combination of peanut butter, marshmallows, and optional chocolate chips creates a chewy and satisfying treat that is easy to prepare and perfect for sharing. Whether enjoyed fresh out of the oven or stored for later, these cookies are bound to become a favorite in any household. Baking these delightful cookies not only satisfies sweet cravings but also brings joy to the kitchen—a culinary experience worth savoring. So gather your ingredients, roll up your sleeves, and get ready to indulge in a delightful cookie adventure!
