Introduction
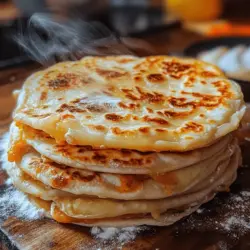
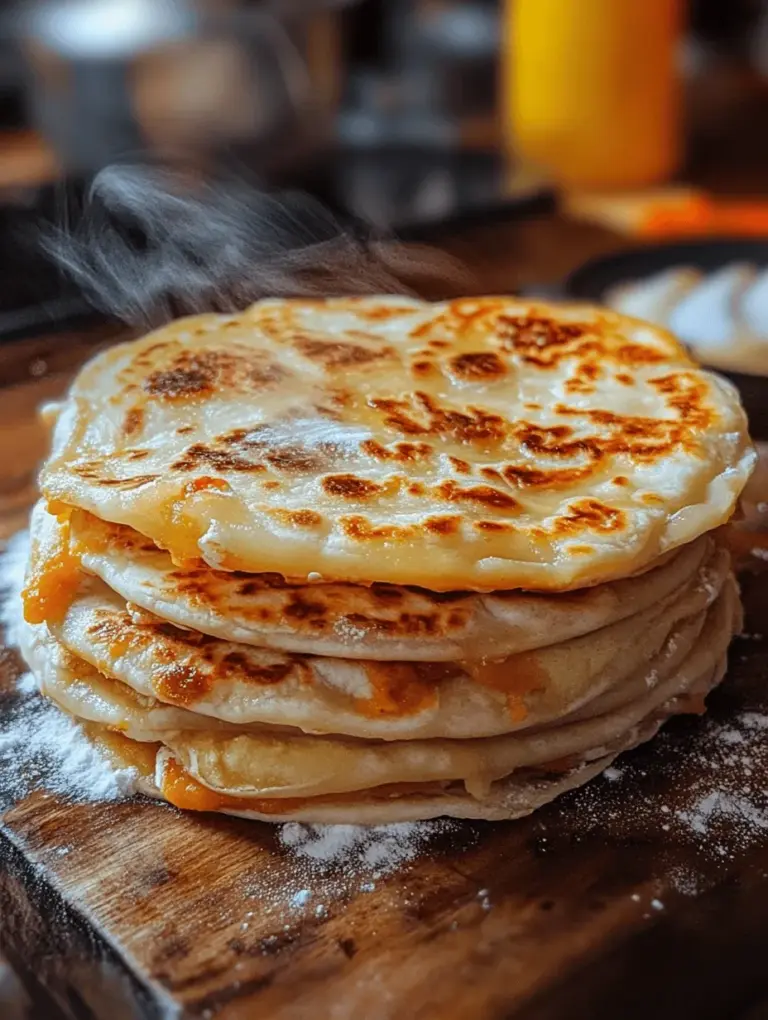
There’s something truly special about the taste and texture of homemade tortillas. When you make them from scratch, you unlock a world of flavor that elevates any meal—from tacos and enchiladas to wraps and quesadillas. The warm, soft, and slightly chewy consistency of fresh tortillas can turn a simple dish into a culinary experience. This guide is dedicated to helping you master the art of tortilla making, providing you with all the necessary ingredients, step-by-step instructions, and insights into the significance of each process along the way.
The joy of making your own tortillas lies not only in the delicious outcome but also in the simplicity of the process. With just a few basic ingredients and a little time, you can create tortillas that are far superior to anything you can buy at the store. This article will take you through an in-depth exploration of the various types of tortillas, their cultural significance, and a detailed breakdown of ingredients, leading you to the step-by-step instructions for achieving soft and flavorful homemade tortillas.
Understanding Tortillas: A Culinary Staple
Tortillas hold a significant place in various cuisines, particularly in Latin America and the southwestern United States. These versatile flatbreads have been a staple for centuries, serving as a fundamental component in countless dishes. The word “tortilla” derives from the Spanish term for “little cake,” highlighting its origins as a simple, round bread. In Mexico, tortillas are essential to everyday cuisine, acting as the base for tacos, enchiladas, and quesadillas, while in Central America, they are often paired with beans, meats, and vegetables.
There are two primary types of tortillas: flour and corn. Corn tortillas, made from masa harina (corn flour), are gluten-free and have a distinct, slightly earthy flavor. They are often used in traditional Mexican dishes and are beloved for their ability to hold up well with various fillings. Flour tortillas, on the other hand, are made from all-purpose flour and are characterized by their soft and pliable texture. They are often preferred for wraps and burritos due to their larger size and ability to hold more fillings.
The versatility of homemade tortillas is one of their most appealing aspects. You can customize them to suit your taste and dietary preferences, whether you prefer flour or corn. Making tortillas from scratch allows you to experiment with different flavors and ingredients, ensuring that your meals are as unique as they are delicious.
Ingredients Breakdown
To create the perfect homemade tortillas, you’ll need a few essential ingredients. Each one plays a crucial role in determining the final texture and flavor of your tortillas. Here’s a breakdown of what you’ll need:
Essential Ingredients
1. All-Purpose Flour: This is the primary ingredient for flour tortillas. All-purpose flour provides the structure and elasticity needed to create soft, pliable tortillas. The protein content in the flour helps develop the gluten, which gives the tortillas their characteristic chewiness.
2. Salt: A small amount of salt not only enhances flavor but also strengthens the dough. Salt plays a vital role in the overall taste of the tortillas, as it balances the flavors and brings out the natural sweetness of the flour.
3. Baking Powder: While not always included in traditional recipes, a pinch of baking powder can help create a lighter, airier texture in your tortillas. It acts as a leavening agent, allowing the dough to rise slightly during cooking, which contributes to the softness.
4. Fat (Lard, Vegetable Shortening, or Butter): The fat you choose will influence the flavor and texture of your tortillas. Lard is the traditional choice, imparting a rich flavor and flaky texture. Vegetable shortening or butter can be used as alternatives, each providing a distinct taste profile. While lard is favored for its flavor, you can easily substitute it with butter or a plant-based shortening for a vegetarian option.
5. Warm Water: The temperature of the water is essential when making tortilla dough. Warm water helps dissolve the salt and baking powder and activates the gluten in the flour, leading to a more cohesive and workable dough.
The Role of Each Ingredient
Understanding the role of each ingredient is crucial for achieving the desired results. All-purpose flour forms the backbone of your tortillas, while salt and baking powder enhance flavor and texture. The choice of fat not only influences taste but also assists in achieving the desired tenderness. Finally, warm water is essential for binding the ingredients together and creating a smooth, pliable dough.
Step-by-Step Instructions for Making Homemade Tortillas
Now that you have a solid understanding of the ingredients, let’s dive into the step-by-step process of making homemade tortillas. Follow these detailed instructions to ensure that your tortillas turn out perfectly every time.
1. Prepare the Dough
Start by gathering all your ingredients. Before you begin mixing, ensure that your work surface is clean and that you have the necessary tools on hand, including a mixing bowl, rolling pin, and a skillet or griddle for cooking the tortillas.
2. Combine Dry Ingredients
In a large mixing bowl, combine 2 cups of all-purpose flour, 1 teaspoon of salt, and 1 teaspoon of baking powder. Use a whisk or fork to thoroughly mix the dry ingredients. This step is crucial as it ensures that the salt and baking powder are evenly distributed throughout the flour, preventing any clumps.
3. Incorporate Fats
Next, add 3 tablespoons of lard, vegetable shortening, or softened butter to the dry mixture. Using your fingers or a pastry cutter, work the fat into the flour until the mixture resembles coarse crumbs. This process creates small pockets of fat within the flour, which contributes to the tenderness of the tortillas.
4. Adjusting Water Levels for Dough Consistency
Gradually add 3/4 cup of warm water to the mixture, starting with about half of it. Stir the mixture with a spoon or your hands to combine. Once the dough starts to come together, add more water as needed. The goal is to achieve a soft and slightly sticky dough that holds together without being overly wet.
5. Knead the Dough
Turn the dough out onto a lightly floured work surface. Knead the dough for about 5-7 minutes, or until it becomes smooth and elastic. This step is vital as it develops the gluten structure of the dough, resulting in the desired texture of the tortillas. If the dough feels too sticky, sprinkle a little more flour as you knead.
6. Resting the Dough
Once kneaded, shape the dough into a ball and cover it with a damp cloth or plastic wrap. Allow the dough to rest for at least 30 minutes. Resting is a critical step that allows the gluten to relax, making it easier to roll out the tortillas without them springing back. During this time, the dough will hydrate fully, resulting in a more pliable tortilla.
This preparation phase sets the foundation for the next steps in creating your homemade tortillas, ensuring that they turn out soft, flavorful, and perfect for any meal. Stay tuned for the continuation of this guide, where we will delve into the rolling and cooking techniques that will help you achieve tortilla perfection.

Rolling Out the Tortillas
Creating the perfect homemade tortillas begins with the rolling process. Achieving an even thickness is crucial for ensuring that your tortillas cook uniformly and maintain a delightful texture.
Techniques for Rolling: Achieving the Perfect Thickness
To roll out your tortillas effectively, use a combination of techniques to ensure evenness. Start by dividing your dough into equal portions, roughly the size of a golf ball. As you begin to roll, apply even pressure from the center outward, rotating the tortilla frequently to maintain a circular shape.
1. Start with a Well-Floured Surface: Dust your work surface and rolling pin lightly with flour to prevent sticking.
2. Use a Light Hand: Apply gentle pressure; if you press too hard, it can cause the dough to become tough.
3. Rotate Frequently: Every few rolls, lift and rotate the dough to prevent sticking and maintain a round shape. Aim for a thickness of about 1/8 inch for soft tortillas, which will puff up nicely during cooking.
Tools Needed for Rolling: A Guide to Equipment
While you can roll tortillas using just a rolling pin and a clean surface, several tools can enhance your experience and results:
– Rolling Pin: A traditional wooden rolling pin works well, but you can also use a marble or silicone one for a smoother roll.
– Pastry Mat: A non-stick pastry mat can provide a clean surface that helps prevent sticking.
– Bench Scraper: This handy tool assists in lifting and turning the tortilla without tearing it.
– Flour: Keep a small bowl of flour nearby to dust your surface and rolling pin as needed.
Tips for Avoiding Sticking and Ensuring Even Shapes
– Keep the Dough Covered: As you roll out each tortilla, cover the remaining dough with a damp cloth to prevent it from drying out.
– Use a Light Dusting of Flour: Too much flour can make your tortillas dry, but a light dusting will help keep them from sticking.
– Practice Makes Perfect: Don’t worry if your first few tortillas aren’t perfect; with practice, you’ll improve your technique and achieve consistently round shapes.
Cooking the Tortillas
Once your tortillas are rolled out, it’s time to cook them. The cooking surface and technique can significantly impact their flavor and texture.
Choosing the Right Cooking Surface: Benefits of Cast Iron vs. Non-Stick
Choosing the right pan is essential. Both cast iron and non-stick pans have their advantages:
– Cast Iron Skillet: Provides excellent heat retention and creates a nice char, which enhances the flavor of the tortillas. Preheat your skillet over medium-high heat for the best results.
– Non-Stick Skillet: Easier to clean and can prevent sticking, but may not provide the same level of char as cast iron. If using non-stick, ensure it’s well-heated before adding the tortilla.
The Cooking Process: What to Watch for During Cooking
1. Preheat Your Pan: Ensure your skillet is hot before placing the tortilla in it. A hot pan will help create those delightful charred spots.
2. Place the Tortilla in the Pan: Lay the tortilla flat in the skillet without pressing it down. Let it cook for about 30 seconds.
Recognizing When to Flip
During cooking, watch for visual cues to know when to flip your tortilla:
– Bubbles Forming: Small bubbles will start to form on the surface. This indicates that it’s time to flip.
– Color Change: The edges will begin to turn golden and the center will have a slight change in color.
Once you observe these signs, flip the tortilla using a spatula and cook for an additional 30 seconds on the other side.
Importance of Keeping Tortillas Warm Post-Cooking
To keep your tortillas warm and pliable after cooking, stack them on a plate and cover them with a clean kitchen towel. This will trap steam and prevent them from drying out, ensuring they remain soft until serving.
Serving Suggestions
Homemade tortillas are incredibly versatile and can be used in various ways. Here are some creative ideas for serving them:
Creative Ideas for Using Homemade Tortillas
1. Wraps: Use tortillas to make wraps filled with grilled vegetables, meats, or spreads like hummus.
2. Quesadillas: Fill tortillas with cheese and other fillings, then fold and cook on the skillet until the cheese melts.
3. Tostadas: Fry tortillas until crispy, then top with beans, avocado, and salsa for a crunchy treat.
Traditional Fillings: Tacos, Burritos, and More
– Tacos: Stuff your tortillas with seasoned meat, beans, lettuce, cheese, and salsa for a classic taco experience.
– Burritos: Fill larger tortillas with rice, beans, meat, and toppings, then roll them up for a hearty meal.
– Fajitas: Serve grilled chicken or beef with sautéed peppers and onions in tortillas for a fun, interactive dinner.
Innovative Serving Ideas and Pairings
– Breakfast Burritos: Fill tortillas with scrambled eggs, cheese, and avocado for a nutritious breakfast option.
– Dessert Tacos: Use sweet tortillas filled with fruits, whipped cream, and drizzled with chocolate for a delightful dessert.
Storing and Reheating Homemade Tortillas
Knowing how to store and reheat your tortillas correctly will help maintain their flavor and texture.
Best Practices for Storing Tortillas
– Short-term Storage: Keep cooked tortillas in a sealed plastic bag or an airtight container at room temperature if consuming within a few hours.
– Long-term Storage: For longer storage, place cooled tortillas in a freezer-safe bag and freeze them. They can last up to three months in the freezer.
Methods for Reheating to Maintain Softness
To reheat tortillas without drying them out, consider these methods:
1. Microwave: Wrap a stack of tortillas in a damp paper towel and microwave for about 30 seconds. This method helps retain moisture.
2. Skillet: Heat a non-stick or cast iron skillet over low heat and warm each tortilla for about 10-15 seconds on each side.
3. Oven: Preheat the oven to 350°F (175°C), wrap tortillas in aluminum foil, and heat for about 10-15 minutes.
Nutritional Benefits of Homemade Tortillas
Homemade tortillas not only taste better but also offer nutritional advantages over store-bought options.
Comparing Homemade vs. Store-Bought Tortillas
– Control Over Ingredients: Making tortillas at home allows you to choose whole, natural ingredients without preservatives or additives often found in store-bought varieties.
– Freshness: Homemade tortillas are fresher and can retain more nutrients than those that have been processed and stored.
Understanding the Nutritional Value of Ingredients Used
The basic ingredients for homemade tortillas—flour, water, salt, and fat—offer different nutritional benefits:
– Whole Wheat Flour: Provides more fiber and nutrients compared to all-purpose flour.
– Healthy Fats: Using options like olive oil can enhance flavor and provide healthy fats.
Healthier Options for Fillings and Toppings
When filling your tortillas, consider healthier options:
– Vegetables: Load up on fresh vegetables like lettuce, tomatoes, and peppers for added nutrients.
– Lean Proteins: Opt for grilled chicken, fish, or legumes instead of fatty meats.
– Avocado: Use avocado as a creamy, nutritious alternative to sour cream.
Conclusion
Creating soft and flavorful homemade tortillas is a rewarding culinary experience that enhances your meals. With simple ingredients and straightforward steps, you can master this essential skill. Whether you’re using them for traditional tacos, inventive wraps, or delectable breakfast burritos, homemade tortillas elevate the dining experience. Enjoy the process, experiment with various fillings, and savor the satisfaction of making tortillas from scratch. By mastering this technique, you not only enrich your cooking repertoire but also bring a taste of authenticity and creativity to your meals.