Introduction
In the world of desserts, no-bake creations have carved out a special niche. They offer a delightful solution for those who want to indulge their sweet tooth without the hassle of preheating the oven. No-bake desserts are synonymous with convenience and ease, making them ideal for busy lifestyles where time is of the essence. Among these delightful treats, cheesecakes stand out for their creamy texture and versatility, allowing for endless flavor combinations that can tantalize any palate.
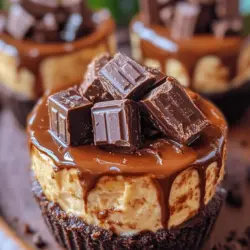
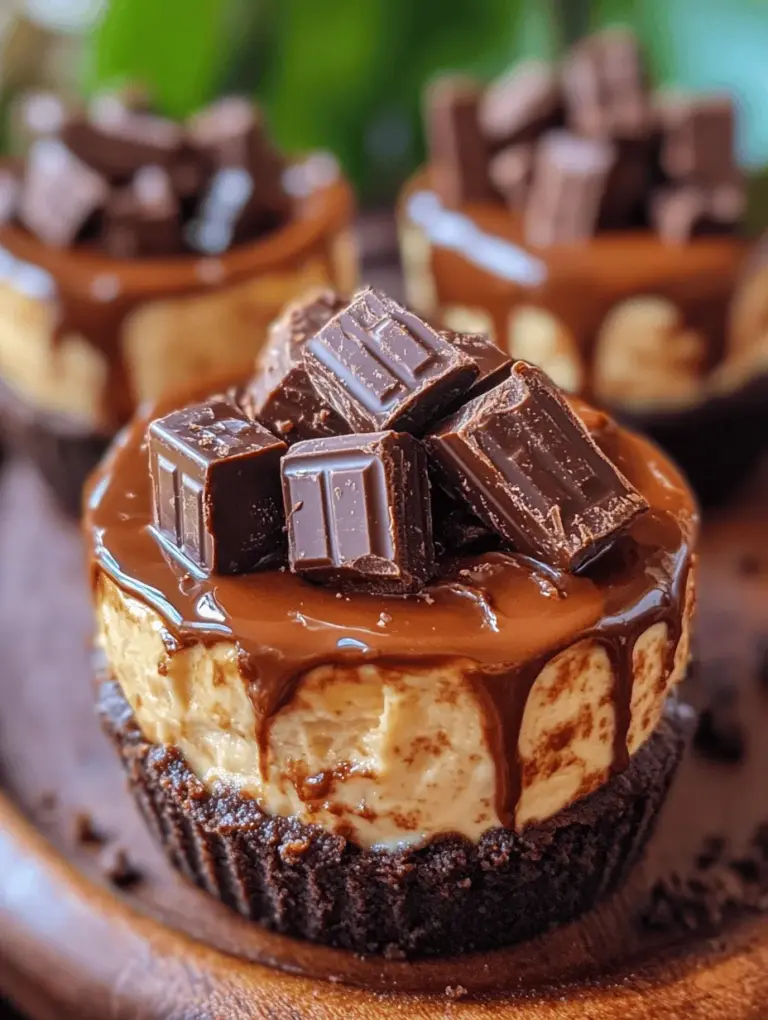
Enter the No-Bake Kit Kat Cheesecakes—a decadent fusion of rich cheesecake and the beloved chocolate bar. This recipe not only captures the essence of a classic cheesecake but also incorporates the crunchy texture and creamy chocolate flavor of Kit Kat bars, making it a unique dessert that is sure to impress. Whether you’re hosting a gathering, looking for a sweet treat to enjoy at home, or need a last-minute dessert for a potluck, this no-bake cheesecake is the perfect solution. The combination of flavors and textures will make it a crowd favorite, and the simplicity of preparation means you can whip it up in no time.
In a fast-paced world, easy no-bake recipes like this one are essential for those who love to bake but lack the time. They allow you to enjoy the satisfaction of creating a delicious dessert without the lengthy process typically associated with baking. So, let’s dive into the delicious world of No-Bake Kit Kat Cheesecakes and discover how to make this indulgent treat.
Understanding the No-Bake Cheesecake
To fully appreciate the No-Bake Kit Kat Cheesecakes, it’s important to understand what no-bake cheesecakes are and how they differ from their traditional counterparts. A no-bake cheesecake is a dessert that relies on refrigeration rather than baking to set. This means you won’t need an oven, making it a perfect option for warm weather or when you simply want to avoid the heat of cooking.
One of the primary benefits of no-bake recipes is their time-saving nature. With a no-bake cheesecake, you can prepare your dessert in a fraction of the time it takes to make a traditional cheesecake. There’s no need to worry about baking times or the possibility of cracks developing on the surface of the cake. Instead, you can focus on mixing your ingredients and letting the refrigerator do the work.
Furthermore, no-bake desserts have gained immense popularity across various culinary traditions due to their simplicity and ease of preparation. From classic variations to innovative twists, they cater to a wide range of tastes and dietary preferences, making them an appealing choice for any occasion. The No-Bake Kit Kat Cheesecakes exemplify this trend, combining the beloved flavors of a chocolate bar with the creamy goodness of cheesecake for a truly irresistible treat.
Ingredients Breakdown
To create the perfect No-Bake Kit Kat Cheesecakes, it’s essential to gather the right ingredients. Each component plays a crucial role in achieving the desired flavor and texture. Here’s a breakdown of what you’ll need:
Crust Ingredients
The crust of the No-Bake Kit Kat Cheesecakes serves as the foundation of the dessert. For this recipe, chocolate sandwich cookies are the star ingredient. Their rich chocolate flavor and crunchy texture provide an excellent base that complements the creamy filling above.
– Chocolate Sandwich Cookies: These cookies are essential for adding depth of flavor and a satisfying crunch to the crust. They also provide a sweet contrast to the creamy cheesecake filling.
– Unsalted Butter: This ingredient binds the crust together, helping to create a sturdy base that holds up well when the cheesecakes are served. The butter also adds a rich flavor that enhances the overall taste of the dessert.
Cheesecake Filling Components
The filling is where the magic happens, and it’s important to use high-quality ingredients to ensure a smooth and creamy texture. Here are the key components:
– Cream Cheese: As the foundation of any cheesecake, cream cheese provides the rich and tangy flavor that is characteristic of this dessert. Make sure to use softened cream cheese for easy mixing, which will help achieve a velvety texture.
– Powdered Sugar: This sweetener is ideal for cheesecakes due to its fine texture, which helps to blend seamlessly into the cream cheese. It adds the perfect amount of sweetness without any graininess.
– Vanilla Extract: A splash of vanilla extract enhances the flavor profile of the cheesecake filling. It adds warmth and depth to the overall taste, making each bite more enjoyable.
– Heavy Whipping Cream: This ingredient is crucial for achieving a light and airy texture in the cheesecake. Whipping the cream until stiff peaks form creates a luscious filling that is both creamy and fluffy.
– Kit Kat Bars: The addition of Kit Kat bars brings a unique twist to the cheesecake. Their crunchy wafers and smooth chocolate layers complement the creaminess of the filling, creating a delightful contrast in texture.
Chocolate Ganache Essentials
To finish off these decadent cheesecakes, a rich chocolate ganache is drizzled on top. This adds both flavor and visual appeal, making the dessert even more enticing.
– Semi-Sweet Chocolate Chips: The chocolate chips are melted and combined with heavy cream to create a luscious ganache. The balance of sweetness from the chocolate chips and the richness of the cream creates a decadent topping that elevates the entire dessert.
– Heavy Cream: Similar to its use in the filling, heavy cream is essential for achieving the right consistency in the ganache. It helps to create a silky smooth texture that pours beautifully over the cheesecakes.
Step-by-Step Instructions for No-Bake Kit Kat Cheesecakes
Now that you have a thorough understanding of the ingredients, it’s time to dive into the preparation of the No-Bake Kit Kat Cheesecakes. Follow these detailed steps to ensure your dessert turns out perfectly.
Preparation for the Crust
1. Crush the Cookies: Begin by placing the chocolate sandwich cookies in a food processor. Pulse them until they form fine crumbs. If you don’t have a food processor, you can place the cookies in a zip-top bag and crush them with a rolling pin.
2. Combine with Butter: In a mixing bowl, combine the crushed cookies with melted unsalted butter. Mix until the crumbs are well coated and the mixture resembles wet sand. The butter should help the crumbs stick together when pressed into the pan.
3. Press into the Pan: Transfer the crumb mixture into a 9-inch springform pan. Use the back of a measuring cup or your fingers to firmly press the mixture into the bottom of the pan. Make sure it’s evenly distributed and packed tightly to create a sturdy crust.
4. Chill the Crust: Place the pan in the refrigerator to chill while you prepare the cheesecake filling. This will help the crust set and hold its shape once you add the filling.
Techniques for Achieving the Perfect Cookie Crumb Texture
To achieve the ideal cookie crumb texture for your crust, there are a few techniques to keep in mind:
– Consistency is Key: When crushing the cookies, aim for a fine crumb. Larger pieces can result in a crumbly crust that doesn’t hold together well.
– Don’t Overmix: When combining the crumbs with the melted butter, mix just until the crumbs are moistened. Overmixing can lead to a dense crust that is not as enjoyable to eat.
– Firm Packing: Press the crumb mixture firmly into the pan to create a solid base. This will prevent the crust from crumbling when you serve the cheesecakes.
By following these steps and tips, you’ll create a delicious, sturdy crust that serves as the perfect foundation for your No-Bake Kit Kat Cheesecakes. Next, we will move on to preparing the creamy cheesecake filling, which is just as simple and rewarding.
Pressing the Crust Evenly for a Solid Base
Creating the perfect crust is crucial for a successful no-bake cheesecake. Start by taking the prepared mixture of crushed Kit Kat bars and graham cracker crumbs, and transfer it into your chosen dessert cups or a springform pan. Using the back of a measuring cup or your fingers, gently press the mixture down firmly. Aim for an even layer across the bottom to ensure that each bite provides a delightful crunch without falling apart. Make sure to press the crust up the sides slightly if you are using a pan, as this will give your cheesecake a beautiful presentation.
Crafting the Cheesecake Filling
Now that the crust is set, it’s time to make the luscious cheesecake filling. Begin by placing the softened cream cheese in a large mixing bowl. Using a hand mixer or a stand mixer fitted with the paddle attachment, beat the cream cheese on medium speed until it’s smooth and creamy—about 2 to 3 minutes. Gradually add in the granulated sugar and vanilla extract, continuing to mix until everything is well combined.
Next, in a separate bowl, pour your heavy whipping cream. Whip it until soft peaks form—this usually takes about 2 to 3 minutes at high speed. Soft peaks are formed when the cream holds its shape but droops slightly when you lift the beaters.
Tips for Ensuring Cream Cheese is Perfectly Softened
To achieve a smooth filling, it’s essential that your cream cheese is at room temperature. If you forget to take it out ahead of time, you can speed up the process by cutting the cream cheese into small cubes and letting it sit out for about 15-20 minutes. Alternatively, you can microwave it for 10 seconds at a time, checking after each interval to avoid melting.
Importance of Achieving Stiff Peaks in Whipped Cream
Achieving stiff peaks in the whipped cream is critical, as it provides the airy texture that makes the cheesecake light and fluffy. To check for stiff peaks, continue whipping until the cream holds its shape firmly and stands upright without drooping. This usually takes an additional 1 to 2 minutes after soft peaks form.
Folding Techniques to Maintain Airiness in the Mixture
Once your whipped cream is ready, it’s time to combine it with the cream cheese mixture. Use a rubber spatula to gently fold the whipped cream into the cream cheese. Folding involves scooping the mixture from the bottom and gently turning it over to the top, repeating until well combined. Be careful not to over-mix, as this can deflate the whipped cream and result in a denser filling.
Assembling the Cheesecakes
With the crust and filling prepared, it’s time to assemble your No-Bake Kit Kat Cheesecakes. Begin by spooning the cheesecake filling over the crust, taking care to spread it evenly. Use an offset spatula or the back of a spoon to smooth out the top for a polished finish. If you like, you can create a decorative swirl on top with the spatula for added visual appeal.
Best Practices for Layering the Filling over the Crust
When layering the filling, it’s ideal to start with a thin layer first, then add more until you reach the top. This technique prevents the crust from breaking and ensures that every bite contains an equal amount of crust and cheesecake.
Importance of Chilling Time for Optimal Texture
After assembling the cheesecakes, cover them with plastic wrap and place them in the refrigerator. Allow them to chill for at least 4 hours, or preferably overnight. Chilling allows the flavors to meld together and firms up the filling, resulting in a perfect slice. Patience is key; the longer they chill, the better the texture will be.
Creating the Chocolate Ganache
While the cheesecakes are chilling, you can prepare the chocolate ganache. In a small saucepan over low heat, combine equal parts of heavy cream and high-quality chocolate (dark, milk, or a mix depending on your preference). Stir continuously until the chocolate is melted and the mixture is smooth.
Techniques for Monitoring Heat to Prevent Burning Chocolate
Keep the heat low to avoid burning the chocolate. If you notice it starting to seize or become grainy, remove it from the heat immediately and stir until smooth. It’s better to melt it slowly than to risk ruining the texture with high heat.
Tips for Achieving a Smooth, Glossy Ganache Consistency
For a silky-smooth ganache, ensure that you use finely chopped chocolate or chocolate chips. If you prefer a thicker ganache, you can let it cool for a few minutes before pouring it over the cheesecakes. If it’s too thick, gently reheat it while whisking until it reaches the desired consistency.
Final Touches and Presentation
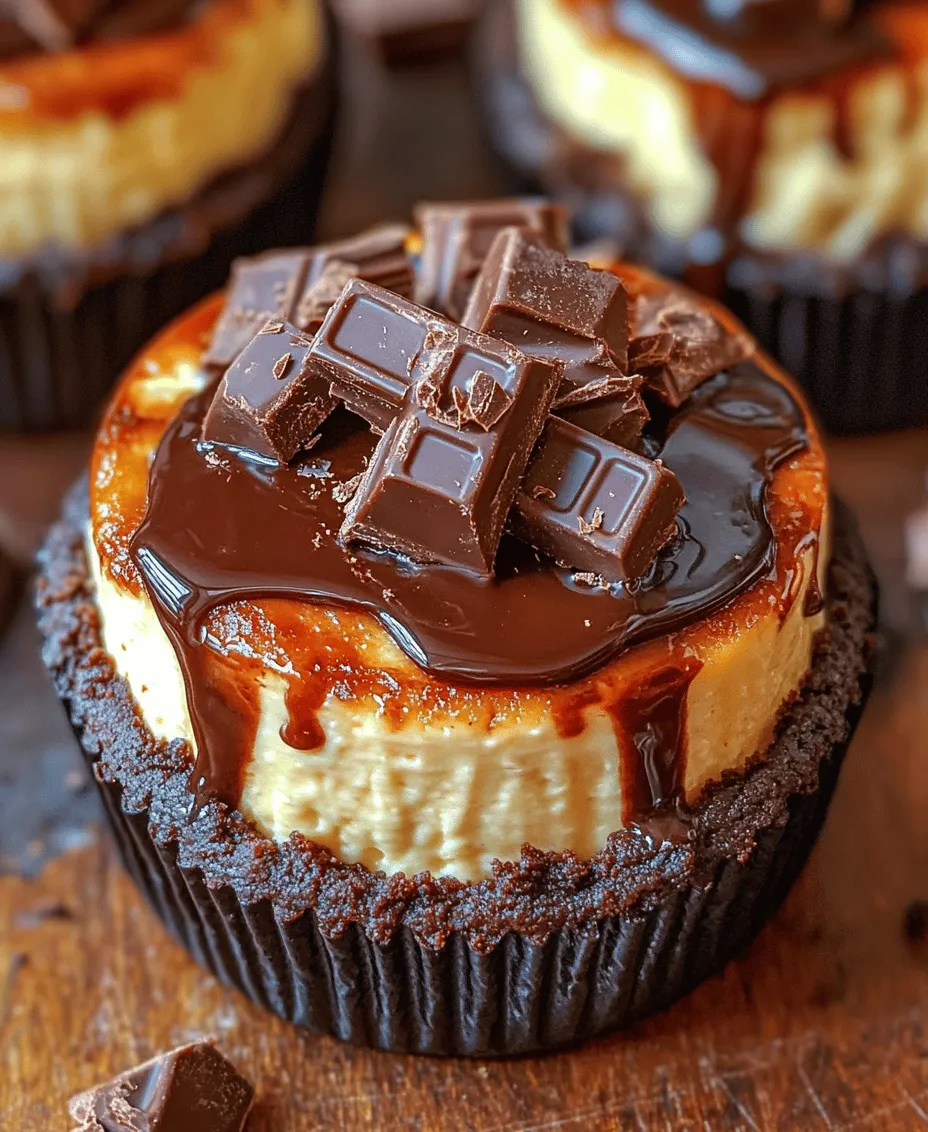
Once the cheesecakes are fully chilled and your ganache is ready, it’s time to put the finishing touches on your No-Bake Kit Kat Cheesecakes. Remove the cheesecakes from the refrigerator, and carefully pour the ganache over each cheesecake, allowing it to cascade down the sides for an elegant look.
Ideas for Garnishing with Kit Kat Bars and Other Decorative Elements
To elevate the presentation, garnish each cheesecake with crushed Kit Kat pieces or whole bars standing upright on top. You can also add a dollop of whipped cream on the side or sprinkle some chocolate shavings for a touch of decadence. Fresh mint leaves or berries can provide a pop of color and freshness, making your dessert even more inviting.
Serving Suggestions
Ideal Occasions for Serving No-Bake Kit Kat Cheesecakes
No-Bake Kit Kat Cheesecakes are perfect for a variety of occasions. Serve them at birthday parties, holiday gatherings, or casual family dinners. They are also a delightful treat for potlucks or as a sweet ending to a barbecue.
Pairing Suggestions
For beverage pairings, consider serving these cheesecakes with a glass of cold milk, a rich coffee, or even a sweet dessert wine. If you’re looking to serve them alongside other desserts, they pair beautifully with fresh fruit tarts or chocolate mousse.
Creative Presentation Ideas to Enhance Visual Appeal
To make your dessert table pop, consider using an elegant tiered dessert stand. Place the cheesecakes on different levels, allowing guests to admire their beauty from all angles. You can also use decorative plates or colorful napkins to enhance the visual appeal.
Nutritional Information
Overview of the Nutritional Aspects of the Ingredients
Each No-Bake Kit Kat Cheesecake contains a balance of flavors and textures. The cream cheese provides a creamy base rich in protein, while the Kit Kat bars add sweetness and a satisfying crunch. The crust made from graham crackers offers a classic flavor profile that complements the filling.
Discussion on Portion Control and Indulgence in Dessert
While these cheesecakes are a delicious treat, it’s important to enjoy them in moderation. Each serving is rich and satisfying, so consider cutting them into smaller portions to savor the flavors without overindulging.
Suggestions for Variations to Cater to Dietary Preferences
To accommodate various dietary needs, consider making a gluten-free version using gluten-free graham crackers or cookies for the crust. For a lower-sugar option, you can substitute the granulated sugar with a sugar alternative or a naturally sweetened option like maple syrup.
Conclusion
In conclusion, No-Bake Kit Kat Cheesecakes are not only a delightful and easy dessert option but also a guaranteed crowd-pleaser. Their creamy filling paired with the crunchy Kit Kat bars makes for an irresistible combination that is perfect for any occasion.
As you explore the world of no-bake desserts, remember that the joy of sharing homemade treats with loved ones is what truly makes the experience special. So, gather your ingredients, channel your inner pastry chef, and treat yourself and your friends to this delightful dessert that’s sure to impress. Happy baking!