Introduction
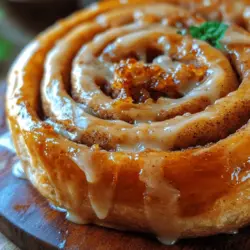
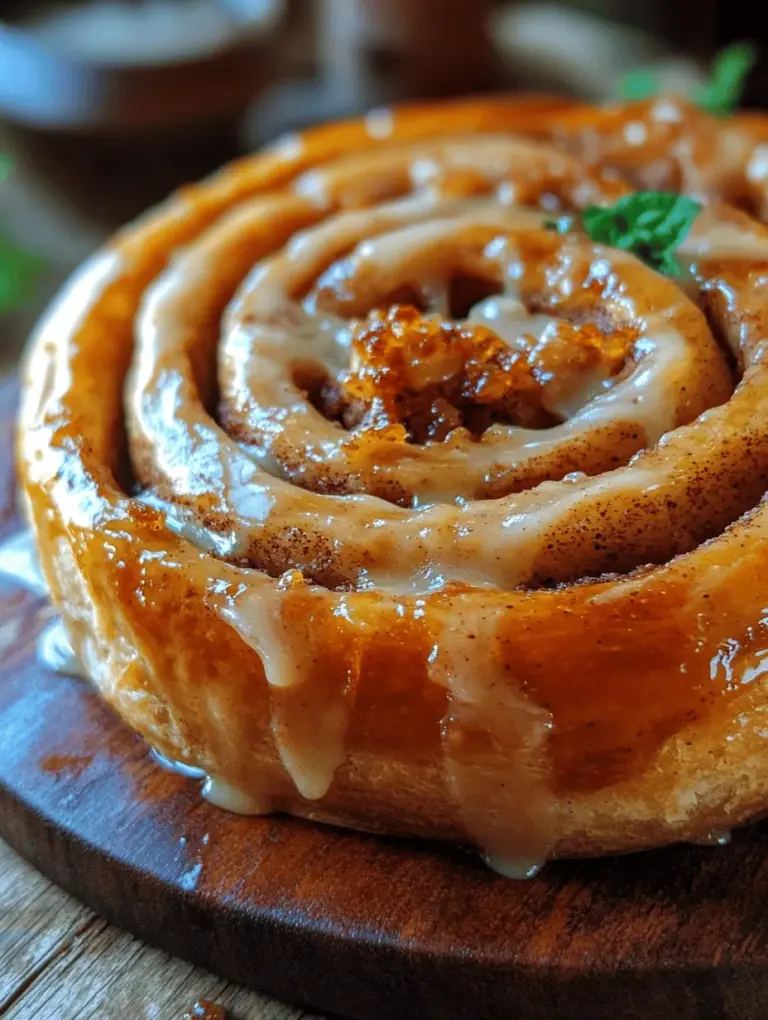
Homemade cinnamon rolls have a way of transforming an ordinary morning into something extraordinary. The aroma of freshly baked rolls wafting through the kitchen evokes feelings of comfort and nostalgia, making it a beloved breakfast staple for many. Whether you’re preparing for a cozy family brunch, a festive holiday gathering, or simply indulging in a sweet craving, these Heavenly Quick Cinnamon Rolls are the perfect solution.
Unlike traditional recipes that require hours of proofing and preparation, this recipe allows you to whip up a batch of gooey, cinnamon-swirled goodness in no time. With their warm, fluffy texture and rich flavor, these rolls are topped off with a delightful icing that complements the sweet cinnamon filling perfectly. Imagine sinking your teeth into a freshly baked roll, the warm dough melting in your mouth, and the sweet icing oozing down the sides—pure bliss!
In this article, we’ll explore not just the recipe itself, but also the essential ingredients that come together to create these heavenly rolls, as well as a step-by-step guide to ensure your baking experience is as enjoyable as the final product. Let’s dive into the world of heavenly cinnamon rolls!
Understanding the Ingredients
To create the perfect cinnamon roll, understanding the role of each ingredient is essential. Here’s a closer look at the components that form the foundation of these delicious treats:
All-Purpose Flour
The primary structure of your cinnamon rolls comes from all-purpose flour. This versatile ingredient is essential for achieving the right texture, providing the necessary gluten to help the dough rise and maintain its shape. While other types of flour can be used, all-purpose flour strikes an ideal balance between tenderness and strength, resulting in soft yet chewy rolls.
Granulated Sugar and Brown Sugar
Both granulated sugar and brown sugar play crucial roles in the flavor profile of your cinnamon rolls. Granulated sugar adds sweetness and helps the dough rise, while brown sugar contributes a deeper, more complex flavor due to its molasses content. The combination of these two sugars creates a delightful contrast in texture and taste, enhancing the overall experience with every bite.
Baking Powder
Baking powder is a key leavening agent in this quick cinnamon roll recipe. Unlike yeast, which requires time to rise, baking powder activates immediately when mixed with wet ingredients, resulting in a light and fluffy dough. This makes it an ideal choice for those busy mornings when you crave homemade cinnamon rolls but don’t have the luxury of waiting for dough to rise.
Cinnamon
Cinnamon is the star of the show in this recipe, providing that signature warm flavor that we all know and love. Not only does it add sweetness and spice to the filling, but it also boasts several health benefits, including anti-inflammatory properties and the ability to regulate blood sugar levels. The comforting scent of cinnamon as it bakes is enough to bring anyone to the kitchen, eager to enjoy a warm roll straight out of the oven.
Butter
Butter is a crucial ingredient that adds richness and moisture to the dough. For this recipe, you can choose between unsalted and salted butter based on your preference. Unsalted butter allows for better control over the saltiness of the dough, while salted butter can add an extra layer of flavor. Regardless of the choice, ensure the butter is softened to room temperature for easy incorporation into the dough.
Milk
Milk enriches the dough, contributing to its tender texture and enhancing the flavor. You can use whole milk for a richer result, or opt for low-fat or non-dairy alternatives if you prefer. The warmth of the milk also helps activate the baking powder, ensuring a delightful rise in your cinnamon rolls.
Egg
The inclusion of an egg in the dough serves two primary functions: binding and moisture. The egg helps hold the ingredients together, resulting in a cohesive dough, while also contributing to the overall richness. For a vegan alternative, you can substitute the egg with a flaxseed meal or applesauce, which will yield similar results.
Powdered Sugar and Vanilla
To create the delectable icing that tops these cinnamon rolls, powdered sugar and vanilla extract are key ingredients. Powdered sugar dissolves easily, creating a smooth, sweet glaze that perfectly complements the spicy cinnamon filling. Adding a splash of vanilla enhances the flavor, giving the icing a delightful aroma that pairs beautifully with the rolls.
Step-by-Step Guide to Making Heavenly Quick Cinnamon Rolls
With a solid understanding of the essential ingredients, it’s time to dive into the step-by-step process of creating your Heavenly Quick Cinnamon Rolls. Follow these detailed instructions to ensure your baking experience is a success.
Prepping the Kitchen
Before you begin mixing and kneading, it’s essential to prep your kitchen for the task ahead. A clean and organized workspace will make the process smoother and more enjoyable. Start by gathering all your ingredients and measuring them out in advance. This mise en place technique not only saves time but also ensures you have everything on hand when you need it.
Next, preheat your oven to 375°F (190°C). This will allow the oven to reach the optimal baking temperature by the time your rolls are ready to go in. Additionally, prepare your baking dish by greasing it with butter or non-stick spray to prevent the rolls from sticking once baked. A 9×13-inch baking dish works perfectly for this recipe, providing ample space for the rolls to rise and bake evenly.
Preparing the Dough
Now that your kitchen is prepped, it’s time to make the dough. Start by combining the dry ingredients in a large mixing bowl. This includes the all-purpose flour, granulated sugar, baking powder, and a pinch of salt. Whisk these together until well combined, ensuring that the baking powder is evenly distributed throughout the flour.
In a separate bowl, mix together the wet ingredients: milk, melted butter, and the egg. Whisk until the mixture is smooth and well combined. Once this is done, gradually add the wet mixture to the dry ingredients, stirring with a wooden spoon or spatula until a dough begins to form.
Techniques for Achieving the Right Dough Consistency
At this stage, your dough should start coming together, but it may still be a bit sticky. If it feels too wet, you can add a little more flour, one tablespoon at a time, until you achieve a workable consistency. The goal is to create a soft, pliable dough that holds together but isn’t overly sticky.
Once the dough has formed, turn it out onto a lightly floured surface. This will make it easier to knead and shape. Be sure to lightly flour your hands and the surface to prevent sticking.
Kneading: The Key to Perfect Texture
Kneading is an essential step in developing the gluten in your dough, which gives your cinnamon rolls their delightful texture. To knead, fold the dough over itself and push it away with the palms of your hands. Rotate the dough a quarter turn and repeat this process for about 5-7 minutes, or until the dough becomes smooth and elastic.
You’ll know the dough is ready when it springs back slightly when pressed with a finger. If it’s too sticky, sprinkle a little more flour onto the surface, but be careful not to over-flour the dough, as this can lead to dense rolls.
Tips on Knowing When the Dough is Ready
A well-kneaded dough should feel soft and slightly tacky but not overly sticky. If you’re unsure, perform the “windowpane test.” This involves stretching a small piece of dough between your fingers. If it stretches into a thin, translucent sheet without tearing, it’s ready to go. If it tears easily, continue kneading for a bit longer.
Creating the Filling
With your dough perfectly kneaded, it’s time to prepare the filling. In a small bowl, combine the brown sugar, granulated sugar, and cinnamon. This mixture will create that gooey, sweet filling that makes these cinnamon rolls irresistible.
Next, roll out the dough into a large rectangle on a lightly floured surface, aiming for about ¼-inch thickness. Spread softened butter evenly over the surface of the dough, leaving a small border around the edges. This butter will help the sugar mixture adhere to the dough, creating those beautifully swirled layers.
Sprinkle the cinnamon sugar mixture evenly over the buttered dough, ensuring every bite will be bursting with flavor. Once the filling is spread, it’s time to roll the dough into a log. Starting from one of the longer edges, carefully roll the dough tightly toward the opposite edge, ensuring the filling remains intact.
Once rolled, pinch the seam to seal it and use a sharp knife or bench scraper to slice the log into equal pieces, about 1 to 1.5 inches thick. Place the rolls cut-side up in the prepared baking dish, allowing for some space between each roll to give them room to expand as they bake.
With the rolls prepared, they are now ready for the oven. Following this step-by-step guide will ensure that your Heavenly Quick Cinnamon Rolls turn out perfectly delicious, ready to be enjoyed fresh from the oven.
In the next part of this article, we will cover the baking process and how to create the sweet icing that will take these cinnamon rolls to the next level of indulgence. Stay tuned for the final touches that will make your breakfast treat truly heavenly!

Step-by-Step Guide to Mixing and Applying the Filling
Creating the perfect filling for your cinnamon rolls is crucial for achieving that heavenly taste that everyone craves. Begin by gathering your filling ingredients: brown sugar, ground cinnamon, and softened butter. The ratio of brown sugar to cinnamon can be adjusted based on personal preference, but a common starting point is 1 cup of brown sugar to 2 tablespoons of cinnamon for a rich flavor.
1. Mix the Filling: In a medium-sized bowl, combine the brown sugar and ground cinnamon. Use a whisk to ensure the two ingredients are thoroughly blended, allowing for an even distribution of flavors throughout your rolls. This mixture should be aromatic and slightly clumpy, which is ideal for spreading.
2. Apply the Butter: Take your softened butter and spread it evenly over the rolled-out dough. To do this effectively, use a spatula or the back of a spoon to ensure the butter covers the entire surface area. Make sure not to skimp on the butter; a generous layer enhances the moisture and flavor of the rolls.
3. Add the Cinnamon-Sugar Mixture: Once the butter is evenly spread, sprinkle the cinnamon-sugar mixture generously on top. For optimal flavor distribution, consider using your hands to gently press the mixture into the butter, ensuring it adheres well. This prevents the filling from spilling out when you roll the dough.
Rolling and Cutting the Dough
Proper rolling and cutting techniques are essential for achieving tight, uniform cinnamon rolls that bake evenly.
Rolling Techniques for Tight Rolls
1. Start from One Edge: Begin rolling the dough from the edge closest to you, ensuring you roll tightly but not so tight that the filling spills out. The goal is to create a snug roll that holds together during baking.
2. Use a Gentle Pressure: As you roll, maintain even pressure. Too much pressure can squish the filling out, while too little can lead to loose rolls that unroll during baking.
3. Seal the Edge: Once you reach the far edge of the dough, seal it by pinching the edge together. This will help keep the rolls intact during baking and ensure that the filling stays inside.
Best Practices for Slicing Uniform Rolls
1. Use a Sharp Knife or Dental Floss: To cut your rolled dough, use a sharp serrated knife or, for a cleaner cut, unflavored dental floss. If you’re using a knife, a sawing motion works best. If using dental floss, slide it under the roll, bring the ends up, and cross them to cut through the dough without squishing it.
2. Cutting Size: Aim for rolls about 1.5 inches thick for an ideal size that allows for even baking and a delightful balance of dough and filling.
3. Placing in the Baking Dish: Arrange the sliced rolls in a greased baking dish, leaving a little space between each roll to allow for expansion during baking.
Baking the Cinnamon Rolls
The baking process is where your cinnamon rolls transform from dough to a warm, golden treat.
Optimal Baking Time and Temperature
Preheat your oven to 375°F (190°C). This temperature ensures that the rolls bake evenly without burning.
1. Bake Time: Bake the cinnamon rolls for 20-25 minutes, or until they are golden brown on top.
2. Indicators of Doneness: Look for a light golden color and a slightly firm texture. Gently press the top of a roll; it should spring back, indicating that they are cooked through.
Making the Icing
A wonderful icing can elevate your cinnamon rolls from delicious to divine.
1. Prepare the Icing: In a bowl, combine powdered sugar, milk (or cream), and vanilla extract. For a basic icing, the typical ratio is 1 cup of powdered sugar to 2 tablespoons of milk.
2. Adjusting Consistency: Whisk the mixture until smooth. If you prefer a thicker icing, add more powdered sugar; for a thinner glaze, gradually add more milk until the desired consistency is reached.
Glazing and Serving
The final touch to your cinnamon rolls is the icing, which adds a sweet finish.
1. Ideal Cooling Time: Allow the cinnamon rolls to cool for about 10 minutes after removing them from the oven. This cooling period helps the icing to set better and prevents it from melting into a pool.
2. Presentation Tips: Drizzle the icing over the warm rolls using a spoon or a piping bag for a more decorative effect. For added flair, consider sprinkling chopped nuts or a dusting of cinnamon on top.
Variations and Customizations
Cinnamon rolls offer a fantastic base for creativity. Here are some ideas to enhance your rolls:
– Add-Ins: Consider adding chopped nuts, such as pecans or walnuts, raisins, or even chocolate chips to the filling for added texture and flavor.
– Flavored Icing: Experiment with different icing flavors. A cream cheese icing can provide a tangy contrast, while maple icing can add a deliciously unique twist.
– Dough Variations: For a healthier version, substitute half of the all-purpose flour with whole wheat flour. If you’re gluten-free, try using a gluten-free flour blend that’s designed for baking.
Nutritional Information
Understanding the nutritional content of your cinnamon rolls can help you enjoy them mindfully.
– Serving Size: This recipe typically yields 12 rolls, with each roll containing approximately 200-250 calories depending on the amount of filling and icing used.
– Dietary Considerations: If you’re watching your sugar intake, consider using a sugar substitute for the filling and icing. Additionally, you can reduce the butter content or substitute with a plant-based alternative.
Conclusion
Making homemade cinnamon rolls is a simple yet rewarding experience that fills your home with an irresistible aroma and creates a delightful treat for any occasion. The recipe’s straightforward steps make it easy for bakers of all skill levels to achieve delicious results.
We encourage you to try your hand at this heavenly recipe and savor the joy of fresh-baked cinnamon rolls. Share them with family and friends, and relish the bliss of homemade treats that bring everyone together. Whether for breakfast, brunch, or a sweet afternoon snack, these cinnamon rolls are sure to become a beloved favorite in your household. Enjoy the warmth, comfort, and satisfaction that comes from sharing your culinary creations with those you love.