Introduction
Ah, S’mores—the quintessential campfire treat that evokes warm memories of summer nights spent around the fire, surrounded by friends and family. Whether it’s the crackle of the flames, the sweet aroma of toasted marshmallows, or the gooey goodness of melted chocolate and marshmallows sandwiched between crunchy graham crackers, S’mores have a way of transporting us back to simpler times. Their nostalgia is matched only by their deliciousness, making them a perennial favorite among dessert lovers of all ages.
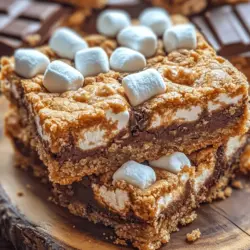
Now, imagine all of that delightful flavor transformed into an easy-to-prepare dessert that’s perfect for gatherings and family events. Enter S’more Cookie Bars—a creative twist on the classic S’mores that captures all the beloved flavors but in a convenient, bar form. These cookie bars are chewy, rich, and satisfyingly sweet, making them an irresistible treat for any occasion. Whether you’re hosting a backyard barbecue, a birthday party, or simply craving something sweet, S’more Cookie Bars are sure to impress your guests and leave everyone coming back for seconds.
The Allure of S’mores
The origins of S’mores can be traced back to the early 20th century. The first recorded recipe appeared in a Girl Scouts’ manual in 1927, showcasing the treat’s connection to outdoor adventures and youth culture. Named for the phrase “some more,” S’mores are a delightful blend of flavors and textures that has captured the hearts of many. They hold a special place in American tradition, often enjoyed during camping trips, backyard bonfires, and family gatherings.
Over the years, S’mores have evolved beyond the campfire, finding their way into various culinary creations. From S’mores-flavored ice cream to S’mores-inspired pastries, the beloved combination of chocolate, marshmallow, and graham crackers continues to inspire chefs and home bakers alike. Their cultural significance is evident in the way they bring people together, sparking conversations and creating lasting memories over shared treats. It’s no wonder that S’mores remain a beloved dessert across generations, symbolizing warmth, comfort, and the joys of togetherness.
Ingredients Breakdown
To create the perfect S’more Cookie Bars, it’s essential to use high-quality ingredients that enhance the flavor and texture of the bars. Here’s a breakdown of the key ingredients and their roles in this delicious recipe:
All-Purpose Flour
The foundation of any cookie recipe, all-purpose flour provides structure to the bars. It balances the moisture from the butter and eggs, ensuring the final product has the right consistency.
Graham Cracker Crumbs
Graham cracker crumbs are crucial for achieving that classic S’mores flavor. They add a subtle sweetness and a rich, crumbly texture that mimics the traditional graham cracker base of S’mores. For the best results, consider using finely crushed graham crackers to ensure an even distribution throughout the bars.
Unsalted Butter
Butter is the star ingredient that brings richness and flavor to the cookie bars. Using unsalted butter allows for better control over the saltiness of the final product. When creamed with sugars, it contributes to a tender, chewy texture.
Brown Sugar and Granulated Sugar
Using a combination of brown sugar and granulated sugar adds depth to the flavor profile. Brown sugar introduces a hint of caramel and moisture, while granulated sugar helps create a crisp exterior.
Eggs
Eggs serve as the binding agent in the recipe, providing structure and moisture. They help the dough hold together without becoming too dense, ensuring a tender bite.
Vanilla Extract
Vanilla extract enhances the overall flavor of the cookie bars, adding a warm, aromatic note that complements the chocolate and marshmallows beautifully.
Baking Soda and Baking Powder
These leavening agents are essential for achieving the right rise and texture in the bars. They help create a light and fluffy consistency, preventing the bars from becoming too dense.
Semi-Sweet Chocolate Chips (or Milk/Dark)
Chocolate is a key component of S’mores, and the choice of chocolate can significantly affect the flavor. Semi-sweet chocolate chips provide a balanced sweetness that pairs well with the other ingredients. For a richer flavor, consider using dark chocolate, while milk chocolate can offer a creamier, sweeter profile.
Mini Marshmallows
Mini marshmallows are a must-have for S’more Cookie Bars. They melt beautifully when baked, creating pockets of gooey goodness that mimic the experience of a traditional S’more. If you’re feeling adventurous, try using flavored marshmallows for a fun twist.
Step-by-Step Instructions
Preheat Oven
Before you begin mixing your ingredients, preheat your oven to 350°F (175°C). Preheating is crucial for even baking, ensuring that your cookie bars rise properly and develop a delightful golden-brown crust.
Creaming Butter and Sugars
In a large mixing bowl, combine the softened unsalted butter, granulated sugar, and brown sugar. Using an electric mixer or a sturdy whisk, cream the butter and sugars together until the mixture is light and fluffy. This process typically takes about 2-3 minutes. The creaming method incorporates air into the batter, which helps the cookie bars achieve a tender texture.
Incorporating Eggs and Vanilla
Once the butter and sugars are well combined, add the eggs one at a time, mixing well after each addition. Then, pour in the vanilla extract and mix until everything is fully incorporated. The eggs not only bind the ingredients but also add moisture, contributing to the overall quality of the bars.
Preparing Dry Ingredients
In a separate bowl, whisk together the all-purpose flour, baking soda, baking powder, and a pinch of salt. Properly mixing the dry ingredients helps to avoid clumps and ensures that the leavening agents are evenly distributed throughout the batter. This step is crucial for achieving consistent texture in your cookie bars.
Combining Mixtures
Gradually add the dry ingredient mixture to the wet ingredients, mixing until just combined. Be careful not to over-mix, as this can lead to tough cookie bars. The goal is to combine the ingredients until no visible flour remains, creating a cohesive dough.
Folding in Chocolate and Marshmallows
Gently fold in the semi-sweet chocolate chips and mini marshmallows using a spatula or wooden spoon. This step is essential for evenly distributing the chocolate and marshmallows throughout the dough without overworking it. The result should be a thick, sticky dough studded with sweet morsels of chocolate and fluffy marshmallows.
Spreading the Dough
Prepare a 9×13-inch baking dish by greasing it lightly or lining it with parchment paper for easy removal. Scoop the cookie dough into the prepared dish, spreading it evenly across the bottom. Use a spatula to press the dough down gently, ensuring it reaches all corners of the pan. Since the dough is thick, it may take a bit of effort to spread it evenly.
Now that you have the dough ready, you’re just moments away from enjoying these delectable S’more Cookie Bars. Stay tuned for the next part of this article, where we’ll guide you through the baking process and share some tips for achieving the best results.
Techniques for Achieving an Even Base Layer
Creating the perfect S’more Cookie Bars begins with a solid foundation, and achieving an even base layer is crucial to ensure that every bite is consistently delicious. Start by preheating your oven to 350°F (175°C). When mixing your cookie dough, make sure to cream the butter and sugars thoroughly until the mixture is light and fluffy. This process incorporates air, helping the cookies rise evenly.
Once your dough is mixed, lightly grease a 9×13-inch baking pan with cooking spray or line it with parchment paper for easy removal. Using a spatula or your hands, press the dough into the bottom of the pan, making sure to cover the entire surface evenly. For a perfect base, use a piece of wax paper to press the dough down firmly and evenly across the bottom. This technique minimizes stickiness and ensures that the dough is uniformly distributed.
Adding Chocolate Bar Pieces
After establishing your cookie base, it’s time to enhance the flavor with chocolate bar pieces. Choose your favorite chocolate bars—milk chocolate, dark chocolate, or even white chocolate will work beautifully. Chop the bars into bite-sized pieces, aiming for a mix of sizes to create texture in each bite. Scatter the chocolate pieces generously over the cookie base, ensuring that they are evenly distributed.
For an extra touch of indulgence, consider mixing in mini chocolate chips or crushed chocolate-covered candies, which will melt into the bars, providing a delightful surprise of chocolate in every mouthful.
Creative Ways to Incorporate Different Chocolate Types for Varied Flavor
Experimenting with different types of chocolate can elevate your S’more Cookie Bars to new heights. Consider using flavored chocolate, such as caramel-filled chocolate bars or even spicy chocolate, to introduce an unexpected twist. You can also blend chocolates—mixing dark chocolate with milk chocolate provides a rich, balanced flavor that pairs wonderfully with the sweetness of the marshmallows and cookie dough.
For a more adventurous take, try incorporating chocolate with unique profiles like mint, orange, or sea salt. These flavors can harmonize beautifully with the gooey marshmallows and buttery cookie base, creating a personalized dessert that stands out.
Topping with Remaining Dough
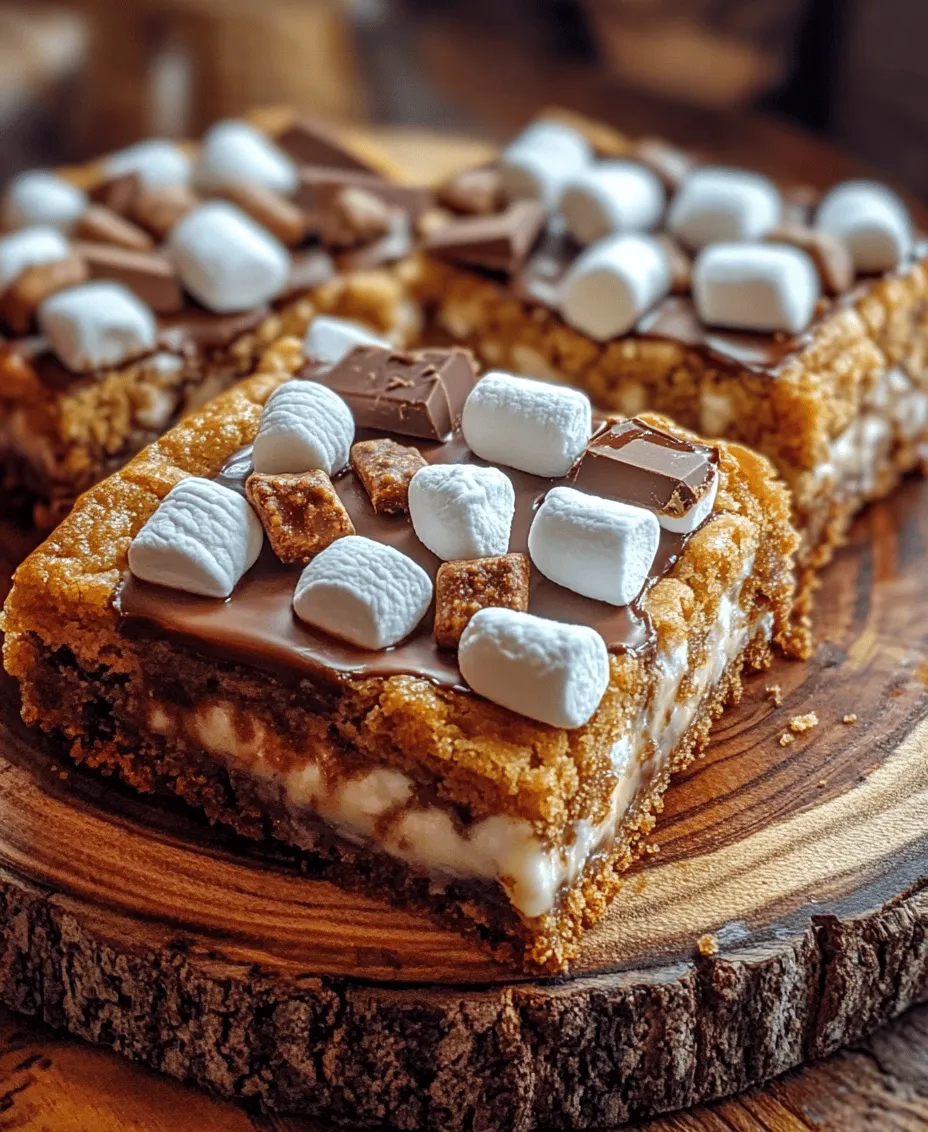
After scattering chocolate pieces, it’s time to add the finishing touch: the remaining cookie dough. Take small portions of the reserved dough and flatten them slightly in your hands before placing them on top of the chocolate layer. This method allows for gaps to remain, which will later fill with melted chocolate, creating a visually appealing marbled effect.
Be careful not to cover the chocolate completely; leaving some chocolate visible enhances the aesthetics and ensures that your finished bars are as delicious as they look.
Tips for Ensuring Melted Chocolate is Still Visible in the Final Product
To maintain the visual appeal of your S’more Cookie Bars, it’s essential not to overtop the chocolate layer. Aim for a light, even covering of the cookie dough on top, allowing some chocolate pieces to peek through. Additionally, once the bars are baked, gently press down on the dough with a spatula right after removing them from the oven. This method can help keep the melted chocolate visible while still ensuring that the cookie layer is fully cooked.
Baking Process
With your layers assembled, it’s time to bake. Place the pan in the preheated oven and bake for approximately 25-30 minutes. Keep a close eye on the bars during the last few minutes of baking. The edges should be golden brown, while the center remains soft. Avoid overbaking, as this could lead to dry bars.
Signs to Look for to Ensure Perfect Baking
To determine if your S’more Cookie Bars are done, gently shake the pan; if the center jiggles slightly but the edges are set, they are likely perfectly baked. Another indicator is the aroma; when the bars begin to smell heavenly, it’s a good sign they’re nearing completion.
Cooling and Slicing
Once baked, remove your S’more Cookie Bars from the oven and let them cool in the pan for about 10-15 minutes. This cooling period allows the bars to set, making slicing easier. After the initial cooling, transfer the entire pan to the refrigerator for an additional 20 minutes; this step helps solidify the chocolate and makes cutting the bars more manageable.
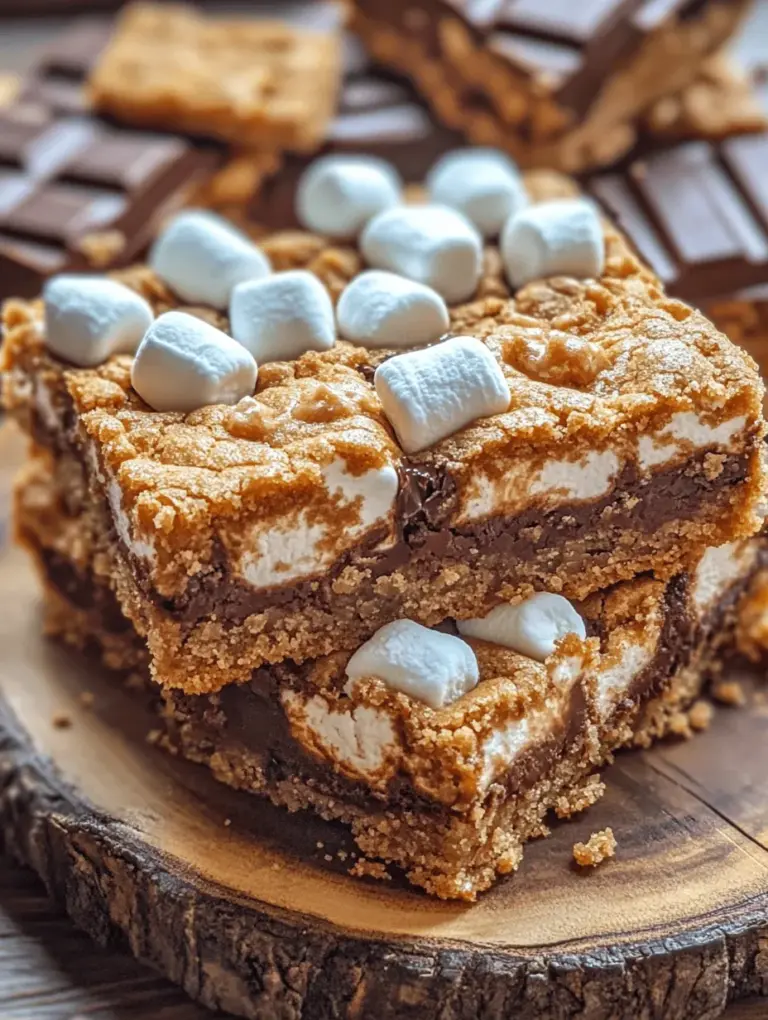
When slicing, use a sharp knife and make clean cuts to avoid tearing the bars apart. For optimal texture, aim for squares or rectangles about 2 inches wide, ensuring that each piece contains a bit of all the layers.
Flavor and Texture Profile
The S’more Cookie Bars present a delightful combination of flavors and textures. The base layer is chewy and rich, while melted chocolate pieces contribute a luxurious creaminess. The marshmallows add a gooey sweetness that contrasts beautifully with the crunchy bits of toasted edges. Each bite offers a melody of flavors—sweet, buttery, and chocolatey—creating a sensory experience that is nothing short of blissful.
Best Ways to Serve and Enjoy S’more Cookie Bars
These bars can be enjoyed warm or at room temperature. For an extra treat, serve them with a scoop of vanilla ice cream, allowing the cold creaminess to complement the warm, gooey center. Drizzling a bit of chocolate or caramel sauce over the top can take your presentation—and flavor—to the next level.
Storage and Shelf Life
To keep your S’more Cookie Bars fresh, store them in an airtight container at room temperature. They will remain delicious for up to a week. If you anticipate not finishing them within that timeframe, consider refrigerating them, which can extend their shelf life by a few days.
Discussion on Freezing Options and Best Practices for Thawing
If you want to enjoy your S’more Cookie Bars later, freezing is a great option. Cut the bars into individual portions and place them in a single layer on a baking sheet to freeze for about 1-2 hours. Once frozen, transfer the bars to an airtight container or freezer bag, separating layers with parchment paper to prevent sticking. They can be stored in the freezer for up to three months.
To thaw, remove the desired number of bars and let them sit at room temperature for about 30 minutes. If you prefer them warm, pop them in a microwave for a few seconds or reheat them gently in the oven.
Variations and Customizations
The beauty of S’more Cookie Bars lies in their versatility. Consider adding nuts, such as chopped pecans or walnuts, for added crunch and flavor. You can also experiment with flavored chocolates or seasonal add-ins, like pumpkin spice chips for fall or peppermint pieces for the holidays.
For a healthier alternative, use whole wheat flour, coconut oil instead of butter, or a sugar substitute to create a lighter version of these beloved bars without sacrificing flavor.
Nutritional Information
Each serving of S’more Cookie Bars contains approximately 250 calories, with 10g of fat, 32g of carbohydrates, and 3g of protein. These treats are best enjoyed in moderation. Consider portion control, especially when serving at gatherings, to maintain a balanced diet while still indulging in life’s sweet pleasures.
Conclusion
Making S’more Cookie Bars is a delightful experience, a blend of creativity and the joy of baking. These bars are not just a dessert; they are an invitation to share happiness with family and friends. Whether you are a casual baker or an experienced cook, this recipe offers a simple yet rewarding way to create something special. Embrace the fun of baking, enjoy the process, and savor the sweet moments shared with loved ones. These S’more Cookie Bars are a must-try that will undoubtedly leave a lasting impression.