
Introduction
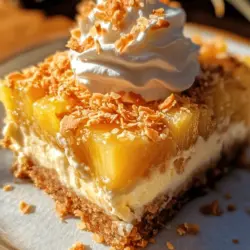
If you’re in search of a dessert that captures the essence of tropical paradise, look no further than Irresistible Pineapple Bliss Bars. These delightful treats are not only visually appealing, but they also boast a harmonious blend of flavors and textures that will transport your taste buds straight to a sun-soaked beach. Imagine biting into a sweet, creamy layer complemented by a crunchy, golden crust, all infused with the vibrant taste of fresh pineapple. This dessert is perfect for summer gatherings, potlucks, or simply indulging your sweet tooth any day of the year.
One of the standout features of Pineapple Bliss Bars is their versatility. The combination of sweet, creamy, and crunchy elements creates an irresistible treat that appeals to both kids and adults. The creamy filling, made with a luscious blend of cream cheese and sweetened condensed milk, perfectly balances the sweetness of the crushed pineapple. Meanwhile, the graham cracker crust provides a satisfying crunch that contrasts beautifully with the smooth filling.
What makes this recipe even more appealing is its simplicity. With just a handful of ingredients and straightforward steps, these bars are accessible to bakers of all skill levels. Whether you’re a seasoned pro or a novice in the kitchen, you’ll find that whipping up a batch of Pineapple Bliss Bars is a breeze. So, roll up your sleeves and get ready to create a dessert that will leave everyone asking for seconds!
Understanding the Ingredients
To achieve the perfect Pineapple Bliss Bars, it’s essential to understand the role of each ingredient in the recipe. Here’s a closer look at the key components that come together to create this tropical delight:
Graham Cracker Crumbs
The foundation of our Pineapple Bliss Bars begins with graham cracker crumbs. These crumbs form the crust, providing a delightful crunch that contrasts with the creamy filling. The slight sweetness and subtle flavor of the graham crackers make them an excellent base for this dessert, ensuring that each bite is not only satisfying but also adds depth to the overall flavor profile.
Shredded Coconut
Adding shredded coconut to our bars infuses them with an unmistakable tropical flair. The coconut contributes both texture and flavor, enhancing the dessert’s overall appeal. As the bars bake, the coconut takes on a golden hue, offering a nutty aroma that will make your kitchen smell divine.
Unsalted Butter
Unsalted butter is essential for adding richness and binding the crust ingredients together. The fat from the butter ensures that the graham cracker crust holds its shape while providing a melt-in-your-mouth texture. It’s important to use unsalted butter, as this allows you to control the saltiness of the dish better.
Brown Sugar
Brown sugar brings a delightful depth of sweetness to the recipe. The molasses content in brown sugar adds warmth and complexity, balancing the sweetness of the other ingredients. This ingredient also contributes to the perfect texture of the crust, helping it achieve that desirable chewy yet crumbly consistency.
Crushed Pineapple
The star ingredient of our Pineapple Bliss Bars is undoubtedly the crushed pineapple. This luscious fruit provides moisture, flavor, and a burst of tropical goodness that elevates the dessert to new heights. When selecting crushed pineapple, look for options packed in juice rather than syrup for a more natural sweetness and fruit-forward flavor.
Sweetened Condensed Milk
Sweetened condensed milk is a crucial component of the filling, offering a creamy texture and intense sweetness. This ingredient acts as a binding agent, ensuring that the filling holds together beautifully while adding richness that perfectly complements the tangy pineapple.
Cream Cheese
Cream cheese is the secret to achieving a rich and smooth filling in our Pineapple Bliss Bars. It adds a luxurious creaminess that balances the sweetness of the other ingredients and creates a velvety texture. Be sure to allow the cream cheese to soften at room temperature before mixing, ensuring a lump-free filling.
Granulated Sugar
Granulated sugar is used to balance the flavors in the filling. While the sweetened condensed milk contributes sweetness, a touch of granulated sugar helps to round out the flavors without overpowering the other ingredients.
Vanilla Extract
A splash of vanilla extract enhances the overall taste of the bars, adding a warm and inviting aroma. This simple ingredient elevates the flavor profile, ensuring that every bite is deliciously satisfying.
Macadamia Nuts (Optional)
For those looking to add an extra layer of flavor and crunch, macadamia nuts make a delightful optional addition. Their rich, buttery taste pairs beautifully with the tropical elements of the bars, providing a satisfying crunch that complements the creamy filling. If you opt to include macadamia nuts, coarsely chop them to ensure that they are evenly distributed throughout the filling.
Preparing the Base for Pineapple Bliss Bars
Now that we have a clear understanding of the ingredients, let’s dive into the preparation of our Pineapple Bliss Bars, starting with the graham cracker crust. Follow these step-by-step instructions to create a solid foundation for your dessert.
Step 1: Preheat the Oven
Begin by preheating your oven to 350°F (175°C). Preheating the oven ensures that your bars bake evenly and achieve that perfect golden color.
Step 2: Combine Crust Ingredients
In a mixing bowl, combine the graham cracker crumbs, shredded coconut, brown sugar, and melted unsalted butter. Use a fork or your hands to mix the ingredients until they are well incorporated and resemble wet sand. The mixture should hold together when pressed.
Step 3: Press the Mixture Firmly
Transfer the graham cracker mixture into a 9×9-inch baking pan lined with parchment paper. Using your fingers or the bottom of a measuring cup, press the mixture firmly into the bottom of the pan, ensuring an even layer. This step is crucial for creating a sturdy crust that won’t crumble when you cut the bars.
Step 4: Bake the Crust
Place the pan in the preheated oven and bake for 8-10 minutes, or until the crust is lightly golden. Keep an eye on it to prevent over-baking, as you want the crust to remain chewy and not overly crisp. Once baked, remove the pan from the oven and allow the crust to cool slightly while you prepare the filling.
Step 5: Prepare the Filling
While the crust is cooling, it’s time to create the creamy filling. In a separate mixing bowl, beat the softened cream cheese until smooth and creamy. Gradually add the sweetened condensed milk, granulated sugar, and vanilla extract, mixing until well combined. The filling should be smooth and free of lumps.
Step 6: Incorporate Crushed Pineapple
Next, gently fold in the crushed pineapple, ensuring that it is evenly distributed throughout the filling. If you desire, add in the chopped macadamia nuts at this stage for an extra crunch.
With the crust prepared and the filling ready, you are just moments away from creating a tropical dessert that’s sure to impress.
Stay tuned for the next part of our recipe, where we’ll explore how to assemble and bake your Irresistible Pineapple Bliss Bars, ensuring they are perfect for your next gathering or a sweet treat at home.

Importance of Draining the Pineapple Before Mixing
Draining the pineapple before mixing is crucial in ensuring that your Pineapple Bliss Bars achieve the perfect texture. Pineapple, while delicious, contains a significant amount of moisture. If you skip this step, the excess liquid can lead to a soggy filling that fails to set properly. To drain the pineapple, simply place it in a fine-mesh strainer over a bowl and let it sit for about 10 to 15 minutes. You can gently press it with a spatula or spoon to expedite the process. This will help concentrate the pineapple flavor while preventing any unwanted watery texture in your bars.
Techniques for Ensuring a Smooth and Creamy Filling
Achieving a smooth and creamy filling for your Pineapple Bliss Bars is essential for both flavor and presentation. Here are a few techniques to ensure your filling turns out perfectly:
1. Blend Well: Use a high-speed blender or food processor to mix your filling ingredients. This will help break down any pineapple chunks and incorporate the cream cheese smoothly.
2. Room Temperature Ingredients: Ensure that your cream cheese and eggs are at room temperature before mixing. This will help them blend more easily, reducing the risk of lumps in your filling.
3. Scrape the Bowl: While blending, stop occasionally to scrape down the sides of the bowl. This ensures all ingredients are evenly mixed and eliminates any stubborn lumps.
By following these techniques, you can create a luscious filling that pairs perfectly with the crust, making each bite of your Pineapple Bliss Bars an indulgent experience.
Discussion of Optional Ingredients Like Macadamia Nuts and Their Flavor Impact
While the base recipe for Pineapple Bliss Bars is delightful on its own, consider enhancing the flavor profile with optional ingredients like macadamia nuts. These nuts bring a rich, buttery flavor and a satisfying crunch, complementing the sweetness of the pineapple. To incorporate macadamia nuts:
– Chop Coarsely: Roughly chop the nuts to allow them to distribute evenly in the filling without overpowering the texture.
– Mix-In or Top: You can either fold them into the filling or sprinkle them on top before baking for an added crunch.
Additionally, you might consider using toasted coconut or a hint of lime zest to brighten the flavors further. These optional ingredients can elevate your Pineapple Bliss Bars, making them even more irresistible.
Assembling the Pineapple Bliss Bars
Once your crust is baked and cooled, it’s time to assemble your Pineapple Bliss Bars.
Tips for Evenly Pouring and Spreading the Filling Over the Crust
1. Pour Methodically: Begin by pouring the creamy filling into the center of the crust. This method helps prevent the filling from spilling over the edges and allows gravity to assist in spreading it evenly.
2. Use a Spatula: With a rubber spatula, gently spread the filling from the center outwards, ensuring an even layer. You can tap the pan lightly on the counter to help settle the filling and eliminate any air bubbles.
3. Smooth the Top: For a professional finish, smooth out the top with the spatula to create an even surface. This will also help with even baking.
The Role of the Shredded Coconut Garnish in Enhancing Presentation and Taste
After spreading the filling, consider garnishing your bars with shredded coconut. Not only does it enhance the visual appeal with a lovely texture contrast, but it also adds a subtle coconut flavor that complements the pineapple beautifully. Here’s how to add the coconut:
– Sprinkle Generously: Once your filling is spread, sprinkle a generous amount of shredded coconut over the top, ensuring an even distribution.
– Toast for Extra Flavor: For an added layer of flavor, toast the coconut in a dry skillet over medium heat until golden brown before sprinkling it on. This will enhance its nutty aroma and crunch.
Baking the Bars
Now that your bars are assembled, it’s time to bake them to perfection.
Key Indicators for Knowing When the Bars Are Perfectly Baked
The baking time for your Pineapple Bliss Bars will be critical in determining their texture. You’ll want to look for these key indicators:
– Set Edges: The edges should be firm and slightly puffed, while the center will still have a slight jiggle. This indicates that the filling has set without overcooking.
– Golden Top: The top should be lightly golden, especially if you’ve added shredded coconut, which will also provide a beautiful contrast.
Differences in Baking Times and How to Adjust for Various Ovens
Baking times can vary based on individual oven calibration. Generally, Pineapple Bliss Bars bake for about 25-30 minutes at 350°F (175°C). However, check them at the 25-minute mark. If the edges have set but the center is still too jiggly, add 5-minute increments until they reach the desired consistency.
If you know your oven runs hot or cool, adjust the temperature accordingly. Consider rotating the pan halfway through baking to promote even cooking.
The Importance of Cooling Time Before Slicing
After baking, patience is key. Allow your Pineapple Bliss Bars to cool in the pan for at least 30 minutes at room temperature, then transfer to the refrigerator for at least 2 hours to fully set. This cooling time helps the filling firm up, making slicing much easier and ensuring clean edges.
Serving Suggestions
When your Pineapple Bliss Bars are ready to serve, consider these delightful presentation ideas:
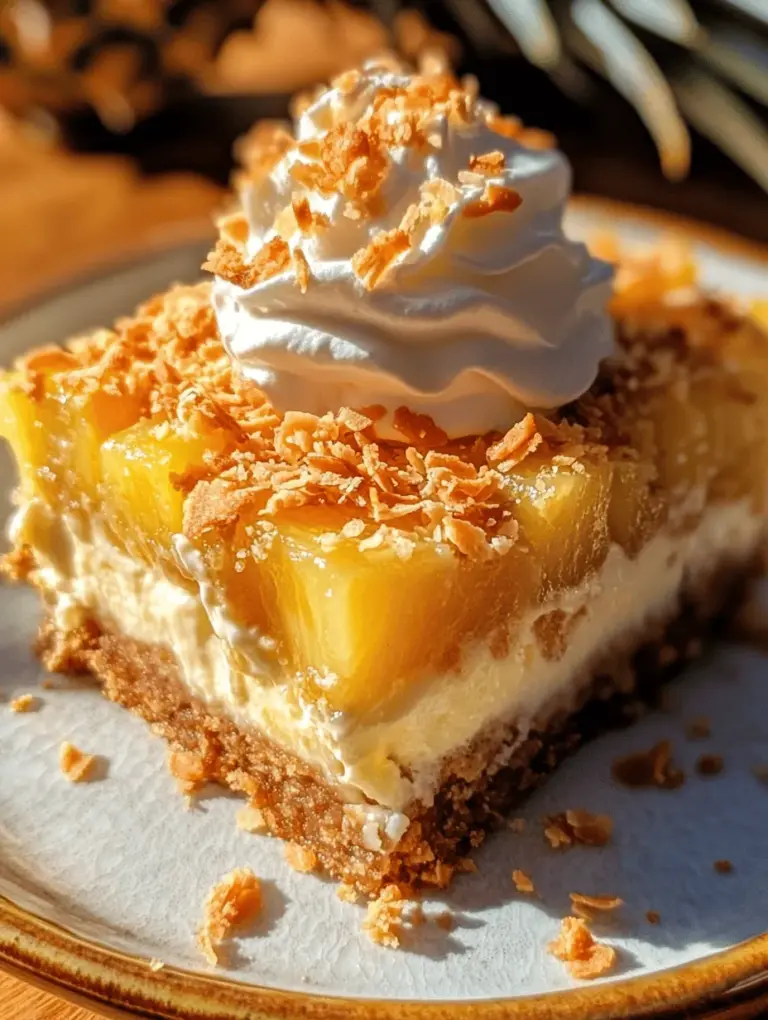
Ideas for Presentation: Using Whipped Cream and Additional Coconut
1. Whipped Cream: Serve individual bars with a dollop of freshly whipped cream on top for a light and airy contrast to the creamy filling.
2. Additional Coconut: Add a sprinkle of extra toasted coconut on top for an appealing look and enhanced flavor.
Pairing Options with Beverages Like Tropical Juices or Iced Tea
For a complete summer experience, pair your bars with refreshing beverages:
– Tropical Juices: A glass of fresh pineapple or mango juice complements the tropical flavors wonderfully.
– Iced Tea: A glass of iced tea, perhaps infused with mint or lemon, balances the sweetness of the bars beautifully.
Storage and Shelf Life
To keep your Pineapple Bliss Bars fresh and delicious, consider these storage options:
Best Practices for Storing Leftover Bars in the Refrigerator
Store any leftovers in an airtight container in the refrigerator. They will stay fresh for up to one week. If you’re storing them, place parchment paper between layers to prevent sticking.
Tips on Freezing the Bars for Longer Preservation
If you want to enjoy these bars later, they freeze beautifully:
1. Wrap Well: Cut the bars into squares and wrap each piece tightly in plastic wrap.
2. Use a Freezer Bag: Place the wrapped bars in a freezer-safe bag or container, ensuring to remove as much air as possible.
3. Thawing: When ready to enjoy, thaw in the refrigerator overnight for the best texture.
Nutritional Information
Understanding the nutritional profile of your Pineapple Bliss Bars can help you enjoy them guilt-free.
Overview of the Nutritional Aspects of the Bars
Each bar offers a delightful balance of flavors and textures, with a base of wholesome ingredients. Made with crushed pineapple, cream cheese, and a buttery crust, they provide a rich source of carbohydrates, fats, and protein.
Discussion on the Balance of Indulgence and Treat
While these bars are indulgent, they are best enjoyed in moderation. They can serve as a delightful treat for special occasions or as a way to brighten up a regular day. The tropical flavors can evoke joyful memories of summer, making them a perfect dessert to share with friends and family.
Conclusion
Pineapple Bliss Bars are the ultimate summer dessert, combining the sweetness of pineapple with a creamy filling and a buttery crust. Their tropical flavors and beautiful presentation make them a versatile choice for gatherings, parties, or even a special treat at home.
Whether you’re hosting a summer barbecue or simply looking to satisfy your sweet tooth, these bars are sure to impress. So, gather your ingredients, follow the steps, and indulge in the delightful experience of making and sharing these irresistible Pineapple Bliss Bars. Enjoy the tropical flavors and the smiles they bring!