
Introduction
The chocolate chip cookie is more than just a sweet treat; it is a beloved symbol of home baking and comfort food. Invented in the 1930s by Ruth Wakefield at the Toll House Inn in Massachusetts, this classic cookie has become a staple in American households and a favorite around the globe. Its warm, gooey, and melty chocolate chips, combined with a soft yet slightly crisp texture, evoke memories of childhood and family gatherings. Whether baked for special occasions or enjoyed as an everyday indulgence, the chocolate chip cookie stands as a testament to the joys of baking.
However, not all chocolate chip cookies are created equal. The difference between a good cookie and the best cookie lies in the quality of ingredients used and the precision of the baking methods employed. To achieve that perfectly balanced cookie—crispy on the edges, chewy in the center, and bursting with rich chocolate flavor—one must pay careful attention to every detail. This is where our recipe for the “Best Ever Chocolate Chip Cookies” comes into play.
What sets this recipe apart from the countless others? It’s a harmonious blend of quality ingredients, ideal ratios, and proven techniques that promise consistently perfect results. By following this comprehensive guide, you’ll discover the secrets to creating cookies that are not only delicious but also memorable. So, let’s embark on this baking journey and unlock the potential of the ultimate chocolate chip cookie.
Understanding the Ingredients
The foundation of any great cookie lies in its ingredients. Each component serves a specific purpose, contributing to the overall flavor and texture. Here’s a closer look at the key ingredients that make our chocolate chip cookies the best ever:
All-Purpose Flour
All-purpose flour is the backbone of cookie making, providing the structure that holds everything together. The gluten formed from the flour determines the texture of the cookies. For a perfect chocolate chip cookie, it’s essential to strike a balance between chewiness and tenderness. Using the right amount of flour ensures that the cookies are not too dense or too airy.
Baking Soda
Baking soda is a vital leavening agent in our chocolate chip cookie recipe. It reacts with the acidic ingredients (like brown sugar or butter) to produce carbon dioxide, which helps the cookies rise. This reaction not only contributes to a lighter texture but also enhances the flavor by promoting browning during baking. Properly measuring and incorporating baking soda will ensure the cookies achieve that desired lift and golden color.
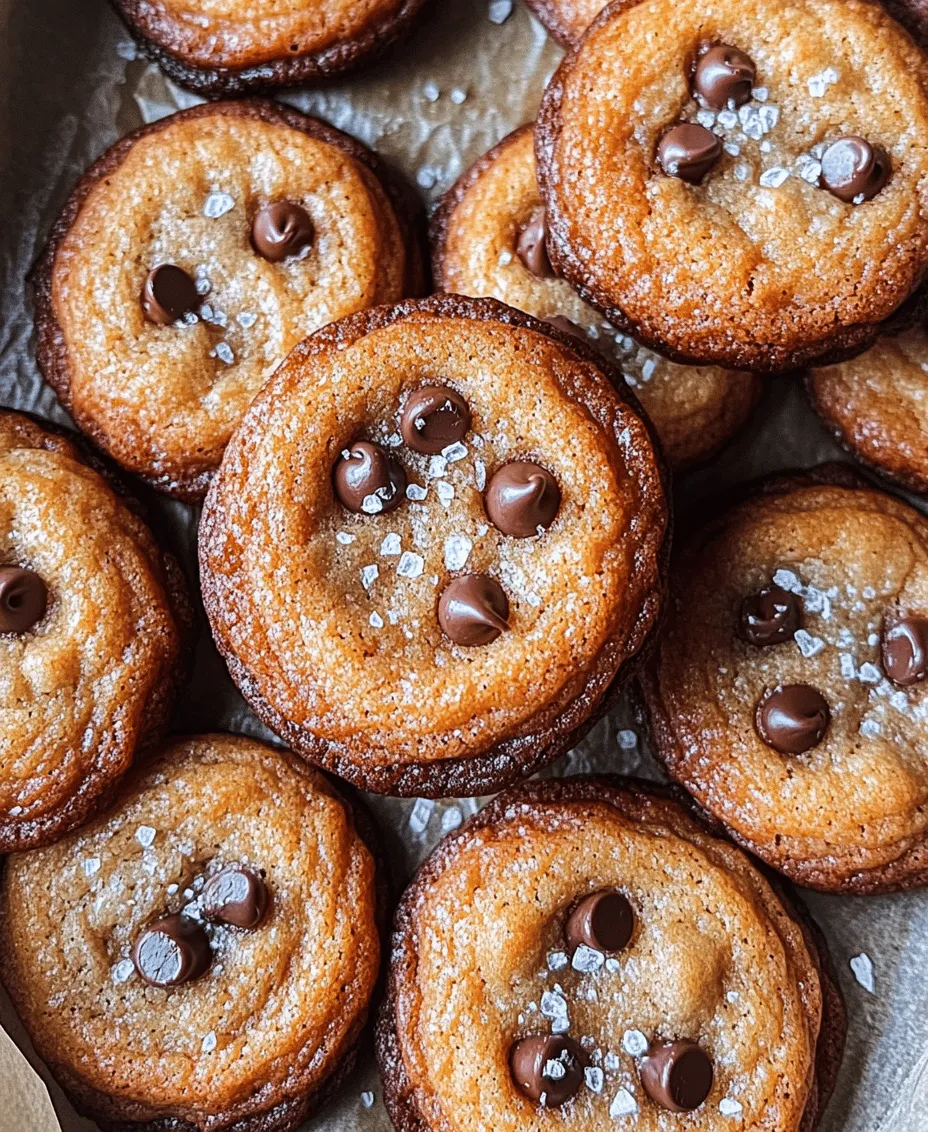
Sea Salt
Often underestimated, salt plays a crucial role in enhancing flavors and balancing sweetness. A pinch of sea salt in chocolate chip cookies elevates the overall taste profile, making the chocolate taste richer and the sweetness more pronounced. The subtle crunch of sea salt flakes also adds an interesting texture that contrasts beautifully with the soft cookie.
Unsalted Butter
Unsalted butter is the preferred fat in our chocolate chip cookie recipe due to its richness and moisture content. It contributes to the cookies’ flavor and texture, creating a tender crumb. Using unsalted butter allows for better control over the final saltiness of the cookie, ensuring that our sweet treat is perfectly balanced.
Granulated vs. Brown Sugar
The choice between granulated sugar and brown sugar significantly affects the cookies’ flavor and texture. Granulated sugar helps cookies spread out and creates a crisp edge, while brown sugar, which contains molasses, adds moisture and a slight chewiness. For the best chocolate chip cookies, a combination of both sugars is recommended. This blend leads to a cookie that is perfectly balanced, with a crispy outside and a chewy center.
Pure Vanilla Extract
Vanilla extract is the secret ingredient that adds depth and complexity to the flavor of chocolate chip cookies. Using pure vanilla extract, as opposed to imitation vanilla, ensures richer and more aromatic cookies. The warm, sweet notes of vanilla complement the chocolate and enhance the overall taste experience.
Eggs
Eggs serve multiple purposes in cookie making. They act as a binder, holding the ingredients together while also adding moisture. The inclusion of eggs helps create a chewy texture and contributes to the cookies’ rise. For the best results, use large eggs at room temperature to ensure they incorporate smoothly into the dough.
Semisweet Chocolate Chips
The quality of chocolate chips can make or break your chocolate chip cookie. Semisweet chocolate chips are a traditional choice, offering a perfect balance of sweetness and bitterness. Opt for high-quality chocolate chips or even chop up a chocolate bar for a rich, melty experience. The chocolate should be the star of the cookie, so choose a brand that you love.
Optional Nuts
While not mandatory, adding nuts such as walnuts or pecans can introduce an additional layer of texture and flavor to the cookies. Their crunchiness contrasts nicely with the softness of the cookie and the melty chocolate chips. If you’re a fan of nuts, consider folding in a cup of your favorite variety for a delightful twist.
Preparation Techniques for Success
Now that we understand the importance of each ingredient, it’s time to dive into the preparation techniques that will elevate your chocolate chip cookies to the next level.
The Importance of Room Temperature Ingredients
Before we begin mixing, it’s essential to have all your ingredients at room temperature. This includes the butter and eggs. Room temperature butter creams more easily with the sugars, creating a light and fluffy texture that is crucial for cookie dough. Similarly, using room temperature eggs ensures they blend seamlessly with the other ingredients, resulting in a well-mixed dough.
Step-by-Step Breakdown of the Mixing Process
The mixing process is critical to achieving the perfect chocolate chip cookie texture. Here’s a step-by-step guide:
1. Creaming Butter and Sugars: Start by placing the room temperature unsalted butter in a mixing bowl. Add both granulated and brown sugars to the bowl. Using an electric mixer or a stand mixer fitted with a paddle attachment, cream the butter and sugars together on medium speed until the mixture is light and fluffy. This process typically takes about 2-3 minutes. The creaming action incorporates air into the mixture, which is essential for a tender cookie.
2. Incorporating Eggs and Vanilla: Once the butter and sugar are well combined, add the eggs one at a time, mixing well after each addition. Then, pour in the pure vanilla extract. Continue mixing until the eggs are fully incorporated, and the mixture appears smooth.
3. Combining Dry Ingredients: In a separate bowl, whisk together the all-purpose flour, baking soda, and sea salt. This step ensures even distribution of the leavening agent and salt throughout the dough. Gradually add the dry ingredients to the wet mixture, mixing on low speed until just combined. Be careful not to overmix, as this can lead to tough cookies.
4. Folding in the Chocolate Chips: Finally, gently fold in the semisweet chocolate chips (and nuts, if using) using a spatula or wooden spoon. This technique ensures that the chocolate is evenly distributed throughout the dough without overworking it.
With these steps, you will be well on your way to creating the best chocolate chip cookies ever. Remember, attention to detail during the mixing process is key to achieving that perfect texture and flavor.
Stay tuned for the next part of this article, where we will cover the baking process, including important tips to ensure your cookies come out perfectly every time.
Incorporating Eggs: Tips for Optimal Mixing
Incorporating eggs into your cookie dough is a critical step that affects the texture and structure of your cookies. To achieve the best results, it’s essential to mix the eggs properly with the other ingredients. Here are several tips to enhance this process:
1. Room Temperature Eggs: For optimal mixing, ensure your eggs are at room temperature. Cold eggs can cause the fats in your dough to solidify, resulting in a lumpy mixture. To quickly bring them to room temperature, place the eggs in a bowl of warm water for about 10 minutes before adding them to your mixture.
2. Mixing Technique: When adding eggs to your butter and sugar mixture, beat them in one at a time. This allows for better emulsification, ensuring that the mixture is smooth and well-combined. Use a hand mixer or stand mixer on medium speed until the eggs are fully incorporated.
3. Adding Vanilla: Don’t forget to add vanilla extract along with the eggs. This simple addition enhances the overall flavor profile of your cookies, making them even more delicious.
Combining Dry and Wet Ingredients: Avoiding Overmixing
Once your wet ingredients are ready, the next step is to combine them with the dry ingredients. This step is crucial, as it can make or break the texture of your cookies.
1. Sift Dry Ingredients: Before combining, sift together your flour, baking soda, and salt. This ensures that any lumps are removed and that the leavening agents are evenly distributed throughout the flour.
2. Gentle Incorporation: When mixing the dry ingredients into the wet ingredients, do so gently. Use a spatula to fold the flour mixture into the wet ingredients until just combined. It’s normal for some streaks of flour to remain; overmixing can lead to tough cookies due to gluten development.
3. Monitoring Texture: The goal is a cohesive dough that is slightly sticky but holds together. If your dough is too dry, you can add a teaspoon of milk to achieve the desired consistency without overworking the dough.
Folding in Chocolate Chips and Nuts: Ensuring Even Distribution
The final step in preparing your cookie dough is folding in the chocolate chips and any additional mix-ins. Achieving an even distribution is key to ensuring every bite is as delightful as the last.
1. Choosing Your Chocolate: Whether you prefer semi-sweet, dark, or milk chocolate, make sure to use high-quality chocolate chips or chopped chocolate. This will enhance the flavor of your cookies significantly.
2. Folding Technique: Use a rubber spatula to gently fold in your chocolate chips and nuts (if using) into the dough. Aim for an even distribution without overmixing, which could affect the texture of the dough.
3. Resting the Dough: For even better flavor development, consider letting your dough rest in the refrigerator for at least 30 minutes before baking. This allows the flour to hydrate fully and the flavors to meld.
Baking Process Explained
With your cookie dough prepared, it’s time to focus on the baking process. This is where the magic happens, transforming your dough into the beloved chocolate chip cookies.
Preheating the Oven: Why Temperature Matters
Preheating your oven is a crucial step that should never be skipped. A preheated oven ensures that your cookies bake evenly and rise properly.
– Setting the Temperature: For chocolate chip cookies, the ideal baking temperature is typically 350°F (175°C). This temperature allows for a perfect balance between crispy edges and a chewy center.
– Wait Time: Make sure to allow your oven to fully preheat before placing your cookies inside. An oven thermometer can help you verify that your oven is at the correct temperature, as many home ovens can be off by several degrees.
The Ideal Baking Sheets and Spacing for Cookies
The type of baking sheet you use and the spacing of your cookies can significantly impact your baking results.
1. Choosing the Right Baking Sheet: Opt for light-colored, rimmed baking sheets or insulated cookie sheets. Dark sheets can cause the bottoms of your cookies to brown too quickly.
2. Parchment Paper or Silicone Mats: Lining your baking sheets with parchment paper or silicone baking mats helps prevent sticking and promotes even baking.
3. Spacing It Out: Place cookie dough balls about 2 inches apart on the baking sheet. This space allows the cookies room to spread as they bake, preventing them from merging into one large cookie.
Recognizing When Cookies Are Done: Visual Cues for Perfect Edges and Soft Centers
Knowing when to take your cookies out of the oven is crucial for achieving the perfect texture.
1. Visual Indicators: Cookies should be lightly golden brown around the edges, with the centers appearing slightly underbaked. They will continue to cook on the baking sheet after removal from the oven.
2. Timing: Typically, chocolate chip cookies should bake for 10-12 minutes. However, since oven temperatures can vary, keep a close eye on your cookies starting around the 9-minute mark.
Cooling Process: Importance of Cooling on Baking Sheets vs. Wire Racks
Allowing your cookies to cool properly is essential for achieving the best texture and flavor.
1. Cooling on Baking Sheets: After removing the cookies from the oven, let them cool on the baking sheet for 5-10 minutes. This allows them to firm up and makes them easier to transfer.
2. Using Wire Racks: After they’ve set, transfer the cookies to a wire rack for complete cooling. This prevents steam from building up underneath the cookies, which can make them soggy.
Variations and Customizations
One of the great aspects of chocolate chip cookies is their versatility. Here are some variations and customizations you can try:
Exploring Different Types of Chocolate
While semi-sweet chocolate chips are classic, don’t hesitate to experiment with other types of chocolate:
– Dark Chocolate: For a richer flavor, use dark chocolate chips or chunks. The higher cocoa content will create a more decadent cookie.
– Milk Chocolate: If you prefer a sweeter cookie, milk chocolate chips provide a delightful taste that’s sure to please.
– White Chocolate: For a creamy twist, white chocolate chips can be added, often paired with macadamia nuts for a tropical touch.
Substituting Ingredients for Dietary Preferences
If you have dietary restrictions or preferences, there are many substitutions you can make without sacrificing flavor:
– Gluten-Free Options: Substitute all-purpose flour with a gluten-free flour blend. Make sure it contains xanthan gum or add it separately to help bind the ingredients.
– Egg Substitutes: For egg-free cookies, use flaxseed meal (1 tablespoon of flaxseed meal mixed with 2.5 tablespoons of water to replace one egg) or applesauce (1/4 cup per egg) for moisture.
Creative Mix-Ins: Ideas for Adding Unique Flavors
Take your cookies to the next level by incorporating creative mix-ins:
– Toffee Bits: Add toffee bits for a sweet, buttery crunch.
– Dried Fruit: Chopped dried cherries or cranberries can provide a tart contrast to the sweetness of the chocolate.
– Spices: A dash of cinnamon or nutmeg can add a warm, spiced flavor profile to your cookies.
Storage and Freshness Tips
To keep your chocolate chip cookies fresh and delicious, follow these storage tips:
Best Practices for Storing Cookies to Maintain Freshness
1. Airtight Container: Store your cooled cookies in an airtight container at room temperature. This prevents them from drying out and maintains their chewy texture.
2. Layering with Parchment: If stacking cookies, place parchment paper between layers to avoid sticking.
Freezing Cookie Dough: How to Prepare and Bake from Frozen
For future cravings, consider freezing your cookie dough:
1. Preparing for Freezing: Scoop and shape the dough into balls, then flash freeze on a baking sheet until solid. Transfer them to a freezer-safe bag or container.
2. Baking from Frozen: When ready to bake, simply place the frozen dough balls on a baking sheet and add a couple of extra minutes to the baking time.
Shelf Life of Baked Cookies: Ensuring They Last Longer Without Losing Quality
Baked chocolate chip cookies can typically last:
1. Room Temperature: About 3-5 days when stored in an airtight container.
2. Freezer: Up to 3 months when properly wrapped and frozen.
Conclusion
In summary, the best chocolate chip cookies are achievable with quality ingredients, proper preparation techniques, and careful baking methods. From incorporating room temperature eggs to recognizing the ideal baking time, each step plays a role in creating cookies that are crispy on the outside and chewy on the inside.
We encourage you to try this recipe and experience the joy of homemade chocolate chip cookies. Whether you’re baking them for a special occasion or just to enjoy at home, these cookies are sure to bring smiles to everyone around. The timeless appeal of chocolate chip cookies lies not just in their flavor but also in the memories and moments they create when shared with loved ones. Happy baking!