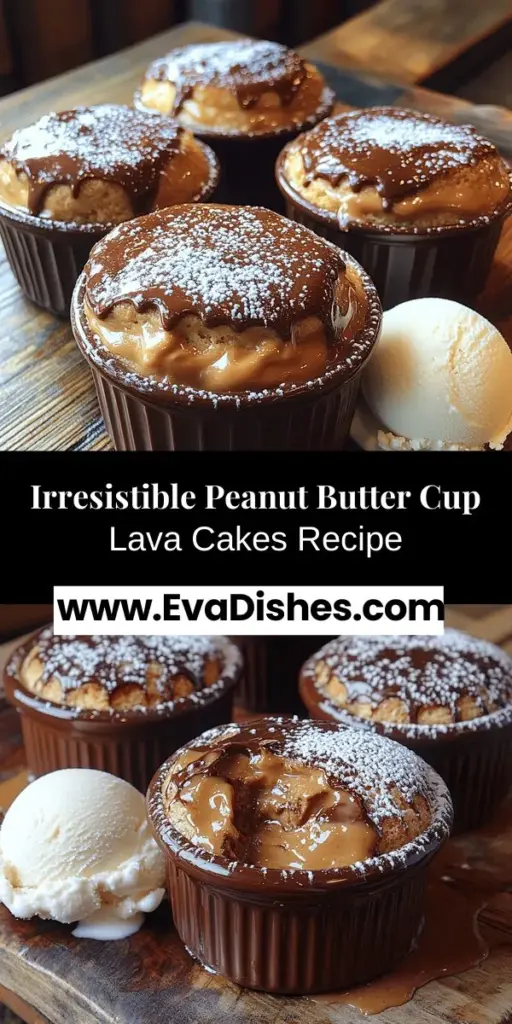
Introduction to Peanut Butter Cup Lava Cakes
If there’s one dessert that can satisfy a sweet tooth like no other, it’s the lava cake. Imagine the moment when you cut into a warm, rich chocolate cake, and a river of velvety chocolate flows out, mingling with the delightful taste of creamy peanut butter. This is the essence of Peanut Butter Cup Lava Cakes—a decadent dessert that takes the classic chocolate lava cake to an irresistible level. By incorporating mini peanut butter cups, this recipe offers a delightful surprise at the center, creating an explosion of flavor that is sure to impress your family and friends.
Lava cakes have become a beloved staple in many restaurants and homes alike, often serving as the perfect end to a romantic dinner or a festive gathering. With their gooey, molten center and rich chocolate exterior, these cakes are an indulgence that few can resist. The addition of peanut butter elevates the dish, adding a nutty twist that complements the sweetness of the chocolate, making every bite a harmonious blend of flavors. In this article, we will dive into the world of baking, guiding you through the process of creating these heavenly Peanut Butter Cup Lava Cakes from the comfort of your own kitchen.
Understanding Lava Cakes
The origins of lava cakes can be traced back to the early 1980s, when French chef Michel Bras created a dessert called “chocolat fondant,” which featured a warm chocolate center. This innovation was a game changer in the culinary world, and over time, it morphed into the lava cakes we know today. They gained immense popularity in the 1990s and quickly became a signature dessert in many high-end restaurants, celebrated for their stunning presentation and delightful flavor profile.
What makes lava cakes so appealing is their unique texture—crispy on the outside yet soft and gooey on the inside. The combination of molten chocolate and a hint of sweetness creates a dessert experience that is both comforting and luxurious. The introduction of flavors like peanut butter adds another layer of complexity, providing a satisfying contrast to the rich chocolate. As a result, peanut butter and chocolate have become a beloved pairing, celebrated in various forms, from cookies to cakes, and now, in this lava cake recipe.
Ingredients Breakdown
To create perfect Peanut Butter Cup Lava Cakes, you’ll need a selection of carefully chosen ingredients, each playing a crucial role in the cake’s texture and flavor profile. Let’s take a closer look at what you’ll need:
– Unsalted Butter: Using unsalted butter is essential for better flavor control. It allows you to adjust the saltiness of the dessert according to your taste preferences. The butter also contributes to the cake’s rich, moist texture, allowing it to melt beautifully.
– Semi-Sweet Chocolate Chips: The choice of chocolate is vital for achieving the perfect melt. Semi-sweet chocolate chips provide a balance of sweetness and rich chocolate flavor without being overly sugary. Opt for high-quality chocolate for the best results.
– Creamy Peanut Butter: The creamy texture of peanut butter not only enhances the flavor but also adds to the overall richness of the lava cakes. Choose a smooth, creamy peanut butter for a consistent distribution throughout the batter.
– Sugars: A combination of granulated and brown sugar works wonders in this recipe. Granulated sugar contributes to the sweetness, while brown sugar adds moisture and a hint of caramel flavor, enriching the overall taste of the cakes.
– Eggs: Eggs are a vital component in baking, as they provide structure and stability to the cakes. They help bind the ingredients together and contribute to the overall rise and fluffiness.
– Vanilla Extract: A splash of vanilla extract enhances the overall flavor profile, adding depth and warmth to the chocolate and peanut butter combination.
– All-Purpose Flour: This ingredient is the backbone of the cake’s structure. It helps to provide stability while allowing the cakes to rise perfectly, creating that desired gooey center.
– Salt: A pinch of salt is essential in balancing the sweetness of the dessert. It enhances the flavors and elevates the overall taste of the lava cakes.
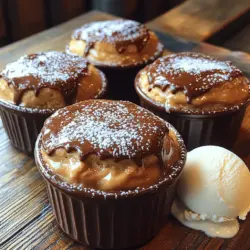
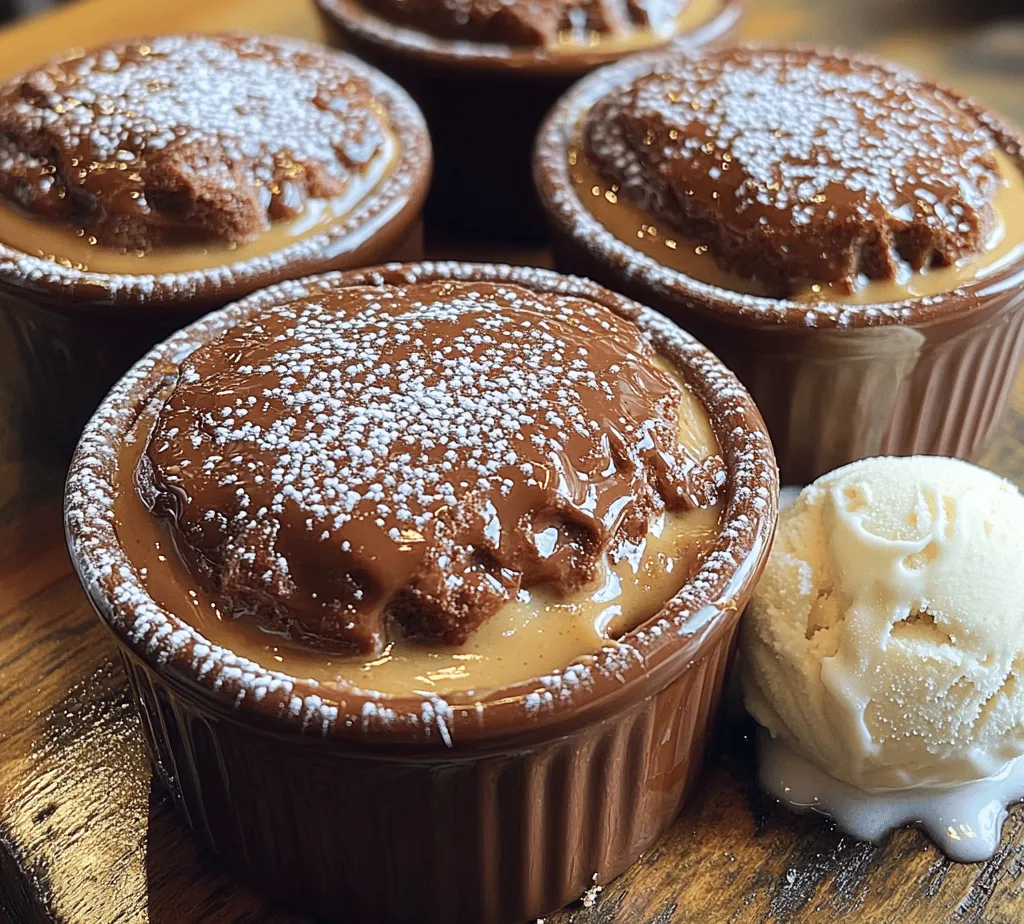
– Peanut Butter Cups: The star of this recipe! Mini peanut butter cups are nestled in the center of each cake, providing a delightful surprise. As the cakes bake, the peanut butter cups melt, creating an ooey-gooey center that pairs beautifully with the chocolate cake.
– Serving Suggestions: To elevate your dessert experience, consider serving your lava cakes with a scoop of vanilla ice cream or a dollop of whipped cream. These additions create a wonderful contrast of temperatures and textures, enhancing the enjoyment of each bite.
Step-by-Step Instructions for Baking Lava Cakes
Now that we’ve covered the essential ingredients, let’s move on to the step-by-step instructions for baking your Peanut Butter Cup Lava Cakes. This process is straightforward, and with a little patience, you’ll have delicious cakes ready to impress.
Preheating the Oven and Preparing Ramekins
The first step in creating your lava cakes is to preheat your oven to 425°F (220°C). This high temperature is crucial for ensuring that your cakes bake quickly, resulting in that iconic molten center.
While your oven is preheating, it’s time to prepare your ramekins. Greasing the ramekins properly is essential to ensure the cakes release easily after baking. Use a generous amount of unsalted butter to coat the insides of each ramekin, making sure to cover all surfaces. This step will prevent any sticking and allow for a smooth release of the cakes when they’re ready.
Once your ramekins are greased, you can sprinkle a little cocoa powder or flour into them, shaking off any excess. This not only adds a touch of flavor but also creates a barrier that further helps with the release of the cakes.
Now that your oven is preheated and your ramekins are prepared, you’re ready to move on to the exciting part—mixing your ingredients and baking these delicious Peanut Butter Cup Lava Cakes!
Melting Chocolate and Butter
To achieve the perfect texture for your Peanut Butter Cup Lava Cakes, the first crucial step is to melt the chocolate and butter together. Using a double boiler is often recommended for this task, as it allows for gentle, even heating. If you don’t have a double boiler, you can create one by placing a heatproof bowl over a saucepan of simmering water. This method helps prevent direct contact with heat, reducing the risk of burning the chocolate. Stir the chocolate and butter together regularly, ensuring they meld into a smooth, glossy mixture.
If you choose to melt them in the microwave, do so in short intervals of about 20-30 seconds, stirring in between. This technique helps avoid overheating, which can lead to a gritty, unusable chocolate. Once melted, allow the mixture to cool slightly before incorporating it into the egg mixture. This is vital, as adding hot chocolate directly to eggs can cause them to scramble, ruining your batter.
Mixing Dry Ingredients
Next, we turn our attention to the dry ingredients. Properly whisking the dry components—flour, sugar, and a pinch of salt—ensures that they are evenly distributed throughout the batter. This step is important because uneven mixing can lead to clumps of sugar or flour, which can affect the texture of your cakes. Use a fine-mesh sieve if you have one; it helps aerate the flour and sugar, making for a lighter batter.
Mixing the dry ingredients thoroughly also ensures that the salt is uniformly spread, enhancing the flavor of the chocolate and balancing the sweetness of the sugar. Once combined, set these dry ingredients aside while you prepare the wet mixture.
Combining Mixtures
Now, it’s time to bring your mixtures together. Pour the melted chocolate and butter into the bowl with the whisked eggs and sugar. Using a spatula, gently fold the two mixtures together. The key here is to combine them without overmixing. Overmixing can incorporate too much air into the batter, which will affect the molten center you’re aiming for. Instead, use a gentle folding motion, scraping the sides and bottom of the bowl, until the mixtures are just combined and no visible streaks of egg remain.
This soft and delicate approach to combining the mixtures is crucial for achieving the right texture in your lava cakes.
Folding in Flour
Once the chocolate and egg mixtures are combined, it’s time to fold in the flour. Again, a gentle hand is key. Sprinkle the flour over the chocolate mixture and use a spatula to fold it in. Begin by cutting through the center of the batter, then gently lifting and folding the mixture over itself. This technique minimizes gluten development in the flour, which can make the cakes dense instead of light and molten.
Be careful not to overmix; a few flour streaks are acceptable. The goal is to incorporate the flour just until you can no longer see it. This step is vital for maintaining the signature gooey center that makes these lava cakes so indulgent.
Preparing and Filling Ramekins
With your batter ready, it’s time to prepare the ramekins. Grease each ramekin with butter or non-stick cooking spray, ensuring you cover the bottoms and sides thoroughly. This step is essential for easy removal after baking. For an extra touch, you can dust the insides of the ramekins with cocoa powder, which enhances the chocolate flavor and helps prevent sticking.
Now, fill each ramekin about halfway with the batter. Place a peanut butter cup in the center of each, pressing it down slightly. Then, top with more batter until the ramekins are filled about three-quarters of the way. Be cautious not to overfill, as the cakes will rise during baking.
Baking the Cakes
Preheat your oven to 425°F (220°C) and bake the filled ramekins for about 12-14 minutes. The perfect lava cake should have firm edges, while the center remains soft and gooey. To check for doneness, look for a slight puffing of the edges and a set top. The center should jiggle slightly when you gently shake the ramekin.
Avoid overbaking, as this will eliminate the molten center you desire. If you’re unsure, it’s often better to err on the side of underbaking. You can always return them to the oven for an additional minute if needed.
Cooling and Serving
Once baked, remove the ramekins from the oven and let them cool for about 1-2 minutes. This brief cooling period makes it easier to invert the cakes without them breaking apart. To serve, run a knife around the edges of each ramekin to loosen the cake, then carefully invert it onto a plate. Give the ramekin a gentle shake to release the cake.
For a beautiful presentation, dust the tops with powdered sugar and serve with a scoop of vanilla ice cream or a dollop of whipped cream. The contrast between the warm, gooey cake and the cold ice cream creates a delightful experience for the palate.
Exploration of Variations
While the classic Peanut Butter Cup Lava Cake is a delight on its own, there are numerous variations you can explore. Consider substituting milk chocolate with dark or white chocolate for a different flavor profile. You can also mix in chopped nuts, such as hazelnuts or walnuts, for added texture and richness.
For a unique twist, try incorporating different fillings such as caramel or Nutella in place of the peanut butter cups. You could also add flavors by infusing the batter with extracts like almond or orange to elevate your lava cakes. These variations not only personalize your dessert but can also cater to different taste preferences in your household.
Nutritional Information and Health Considerations
While Peanut Butter Cup Lava Cakes are undeniably indulgent, it’s essential to enjoy them in moderation. Each serving typically contains around 350-400 calories, depending on the specific ingredients used. Key ingredients like dark chocolate and peanut butter provide antioxidants and protein, respectively, making them not just a treat but a source of some nutritional value.
For health-conscious bakers, consider using alternatives like reduced-fat butter or a sugar substitute. Additionally, you can experiment with whole wheat flour for a slightly healthier option. Remember, enjoying treats is part of a balanced diet, and these lava cakes can be a delightful way to celebrate special occasions or simply treat yourself after a long day.
Conclusion: The Joy of Baking Peanut Butter Cup Lava Cakes
Creating Peanut Butter Cup Lava Cakes at home is a rewarding experience that combines the joy of baking with the satisfaction of indulging in a delicious dessert. The process, from melting chocolate to the careful folding of ingredients, nurtures a sense of accomplishment. Each bite reveals a glorious molten center that is sure to impress friends and family alike.
As you embark on your baking adventure, don’t hesitate to share your experiences and any variations you try. The world of dessert-making is vast and inviting, and connecting with fellow dessert lovers can enhance your culinary journey. So gather your ingredients, unleash your creativity, and enjoy the delightful process of baking these mouthwatering Peanut Butter Cup Lava Cakes!