Introduction
In recent years, pizza-inspired snacks have taken the culinary world by storm, captivating the hearts of food lovers everywhere. From pizza rolls to stuffed crusts, these bite-sized treats combine the beloved flavors of pizza with the convenience of easy snacking. One such delectable creation that has gained immense popularity is the Cheesy Garlic Pizza Balls. These delightful morsels are not only perfect for sharing at parties but also make for a comforting treat when you’re enjoying a cozy night in.
Cheesy Garlic Pizza Balls are the epitome of comfort food, marrying gooey cheese and savory garlic in a light, fluffy dough. They’re incredibly versatile, allowing you to customize them with your favorite toppings or dips, making them a hit for both kids and adults alike. The best part? You can easily whip them up at home, filling your kitchen with the irresistible aroma of freshly baked bread and melted cheese. This recipe not only showcases the joy of homemade cooking but also emphasizes how simple it can be to create restaurant-quality snacks in your own oven.
As we dive into the process of making these Cheesy Garlic Pizza Balls, you’ll find that it requires just a handful of ingredients and straightforward techniques. Whether you’re hosting a game night, celebrating a birthday, or simply satisfying your snack cravings, this recipe is sure to become a staple in your culinary repertoire.
Understanding the Ingredients
All-Purpose Flour
The foundation of any good pizza dough is all-purpose flour. This versatile ingredient provides the necessary structure and texture to the dough. When mixed with water and yeast, the proteins in the flour develop gluten, which gives the dough elasticity and chewiness. For the best results, it’s essential to use high-quality flour, as it will directly affect the texture of your pizza balls.
Instant Yeast
Yeast is a crucial component of this recipe, as it is responsible for leavening the dough. Instant yeast, in particular, is favored for its convenience, as it can be mixed directly with the dry ingredients without needing to be activated in warm water first. This means less waiting time and a quicker path to deliciousness. The yeast ferments the sugars in the dough, producing carbon dioxide that causes the dough to rise, resulting in light and airy pizza balls.
Olive Oil
Olive oil not only adds richness and flavor to the dough but also enhances its texture. The fat in the oil helps to tenderize the dough, making it softer and more pliable. Additionally, using quality extra virgin olive oil can impart a delicious, fruity taste that elevates the overall flavor profile of your pizza balls.
Mozzarella Cheese
No pizza-inspired dish would be complete without cheese, and mozzarella is the classic choice for its meltability and mild flavor. When melted, mozzarella creates that gooey, stretchy texture that is so beloved in pizzas. For added decadence, you can use fresh mozzarella, which offers a creamier consistency and a more robust flavor compared to pre-shredded varieties.
Pepperoni
While optional, pepperoni can add a delightful touch of spice and flavor to your Cheesy Garlic Pizza Balls. This beloved pizza topping brings a savory richness that complements the cheese and garlic perfectly. You can either mix it into the dough or place a small piece inside each ball before sealing them up.
Garlic Powder and Basil
To truly capture the essence of garlic bread and pizza, you’ll want to incorporate garlic powder and dried basil into your dough. Garlic powder provides a concentrated garlic flavor that permeates each bite, while basil adds a fragrant herbal note that rounds out the flavor profile. Together, these seasonings are essential for enhancing the overall taste of your pizza balls.
Importance of Fresh Ingredients
Using fresh and high-quality ingredients is paramount to achieving the best flavor in your Cheesy Garlic Pizza Balls. Fresh ingredients lead to a more vibrant taste and better texture, ensuring that your homemade snack will stand out. Whenever possible, opt for fresh herbs, high-quality cheese, and good-quality olive oil to elevate your recipe.
Step-by-Step Guide to Making Cheesy Garlic Pizza Balls
Making the Dough
To begin the process, gather all your ingredients and find a large mixing bowl. Start by combining the dry ingredients: all-purpose flour, instant yeast, garlic powder, dried basil, and a pinch of salt. Use a whisk to blend them together evenly, ensuring that the yeast and salt are well-distributed throughout the flour. This step is crucial as it helps to activate the yeast properly and ensures that every bite of your pizza balls is flavorful.
Next, create a well in the center of the dry ingredients and pour in warm water and olive oil. The water should be warm to the touch but not too hot—ideally around 110°F (43°C)—to avoid killing the yeast. Gently stir the mixture with a wooden spoon until it starts to come together. The goal here is to mix until a sticky dough forms; it should be cohesive but still slightly tacky to the touch.
Kneading the Dough
Once your dough has come together, it’s time to knead it. This step is essential for developing the gluten structure that will give your pizza balls their chewy texture. Turn the dough out onto a lightly floured surface and begin kneading by pushing it down and away with the heel of your palm, then folding it over itself and repeating the process.
Knead the dough for about 8-10 minutes, or until it becomes smooth and elastic. You can check for readiness by performing the windowpane test: stretch a small piece of dough between your fingers; if it holds its shape without tearing easily, it’s ready. Proper kneading not only affects the texture but also contributes to the flavor development during fermentation.
First Rise
After kneading, shape the dough into a ball and place it in a lightly greased bowl. Cover the bowl with a damp cloth or plastic wrap to create a warm, humid environment, which is ideal for the dough to rise. This stage, often referred to as the first rise or fermentation, is where the magic happens. As the yeast consumes the sugars in the dough, it produces carbon dioxide, causing the dough to expand and develop flavor.
Let the dough rise in a warm, draft-free area until it doubles in size, which typically takes about 1 to 1.5 hours. To create an ideal rising environment, you can place the bowl in an oven that is turned off but has the light on, or in a slightly warmed oven (just warm enough to feel cozy, not hot). Keep an eye on it; the dough should grow significantly, becoming puffy and airy.
With these initial steps complete, you’re well on your way to crafting the perfect Cheesy Garlic Pizza Balls. The combination of simplicity and flavor makes this recipe a must-try for anyone looking to indulge in a delightful snack that’s sure to impress. Stay tuned for the next section, where we’ll cover shaping, filling, and baking your delicious creations.
Preparing the Filling
Creating the perfect filling for your Cheesy Garlic Pizza Balls is essential to achieving a burst of flavor in every bite. The classic combination of cheese, pepperoni, garlic powder, and basil provides a delightful taste that pairs beautifully with the dough.
How to Properly Mix Cheese, Pepperoni, Garlic Powder, and Basil
Start by selecting a blend of cheeses for your filling. A combination of mozzarella for its meltiness and provolone or cheddar for added flavor works wonders. Take about 1 cup of shredded mozzarella and 1/2 cup of shredded provolone or cheddar.
Next, finely chop 1/2 cup of pepperoni slices. If you prefer a vegetarian version, simply omit the pepperoni or replace it with diced bell peppers, olives, or sun-dried tomatoes for a burst of flavor.
In a mixing bowl, combine the cheese, chopped pepperoni, 1 teaspoon of garlic powder, and 1 tablespoon of dried basil. Season with a pinch of salt and pepper to enhance the flavors. Mix everything together until well-combined. The mixture should be cohesive, allowing it to be easily stuffed into the dough without spilling out.
Suggestions for Variations in Fillings
Feel free to get creative with your fillings! Here are a few suggestions to inspire you:
1. Different Cheeses: Experiment with different cheese blends such as feta for a tangy touch, or gouda for a smoky flavor. You can also try adding cream cheese for a creamy texture.
2. Herbs and Spices: Incorporate fresh herbs like parsley or oregano for a fresh taste. You could also add a pinch of red pepper flakes for a bit of heat.
3. Vegetable Add-ins: Consider adding finely chopped spinach, mushrooms, or zucchini for added nutrition. Just make sure to sauté those veggies beforehand to release excess moisture.
4. Meat Alternatives: If you want to keep it vegetarian but still enjoy that savory taste, consider adding marinated artichokes or roasted garlic for a gourmet touch.
Shaping the Pizza Balls
Once your filling is ready, it’s time to shape the dough into pizza balls.
Techniques for Dividing and Shaping Dough into Balls
Begin by taking your prepared pizza dough (which should have risen and doubled in size). Lightly flour your work surface to prevent sticking. Divide the dough into equal portions, about the size of a golf ball (around 2 ounces each). You can use a kitchen scale for accuracy if desired.
To shape the balls, take one piece of dough and flatten it slightly in your palm. Place a spoonful of your filling in the center, being careful not to overfill, as this can lead to leakage during baking.
Importance of Sealing the Filling Properly
Carefully fold the edges of the dough over the filling, pinching them together to seal the ball completely. Ensure there are no gaps, as this is crucial for preventing the cheese from oozing out during baking. Roll the ball gently between your palms to smooth it out and ensure it is well-shaped.
Repeat this process for the remaining dough portions, placing each ball on a lightly greased baking sheet or parchment paper lined tray.
Second Rise
After shaping your pizza balls, they will require a second rise to achieve that light and fluffy texture.
Explanation of the Second Rise and Its Purpose
The second rise allows the dough to relax and the yeast to develop, resulting in a softer, more airy product. This step is crucial for achieving the perfect texture in your Cheesy Garlic Pizza Balls.
Tips for Achieving the Right Conditions for Rising
Cover the shaped pizza balls with a clean kitchen towel or plastic wrap to prevent them from drying out. Let them rise in a warm, draft-free area for about 30-45 minutes. If your kitchen is cool, you can create a warm environment by preheating your oven to the lowest setting for a few minutes, then turning it off and placing the dough inside to rise.
Baking Process
Once your pizza balls have completed their second rise, it’s time to bake!
Preheating the Oven: Importance of Temperature for Baking
Preheat your oven to 400°F (200°C). A properly preheated oven is essential for even baking and achieving that golden-brown crust.
How to Brush with Olive Oil and the Effects on Browning and Flavor
Before placing the pizza balls in the oven, brush the tops with a light coating of olive oil. This not only helps with browning but also adds a subtle flavor. For an extra kick, you can mix a little garlic powder or Italian seasoning into the olive oil before brushing.
Baking Time and How to Tell When the Pizza Balls Are Done
Bake your Cheesy Garlic Pizza Balls for about 15-20 minutes or until they are golden brown on top. You’ll know they are done when they sound hollow when tapped lightly and the tops are beautifully golden.
Once baked, remove them from the oven and let them cool for a few minutes before serving.
Serving Suggestions
Your Cheesy Garlic Pizza Balls are now ready to be enjoyed! Here are some serving suggestions to elevate your culinary presentation:
Recommended Serving Methods, Including Presentation Ideas
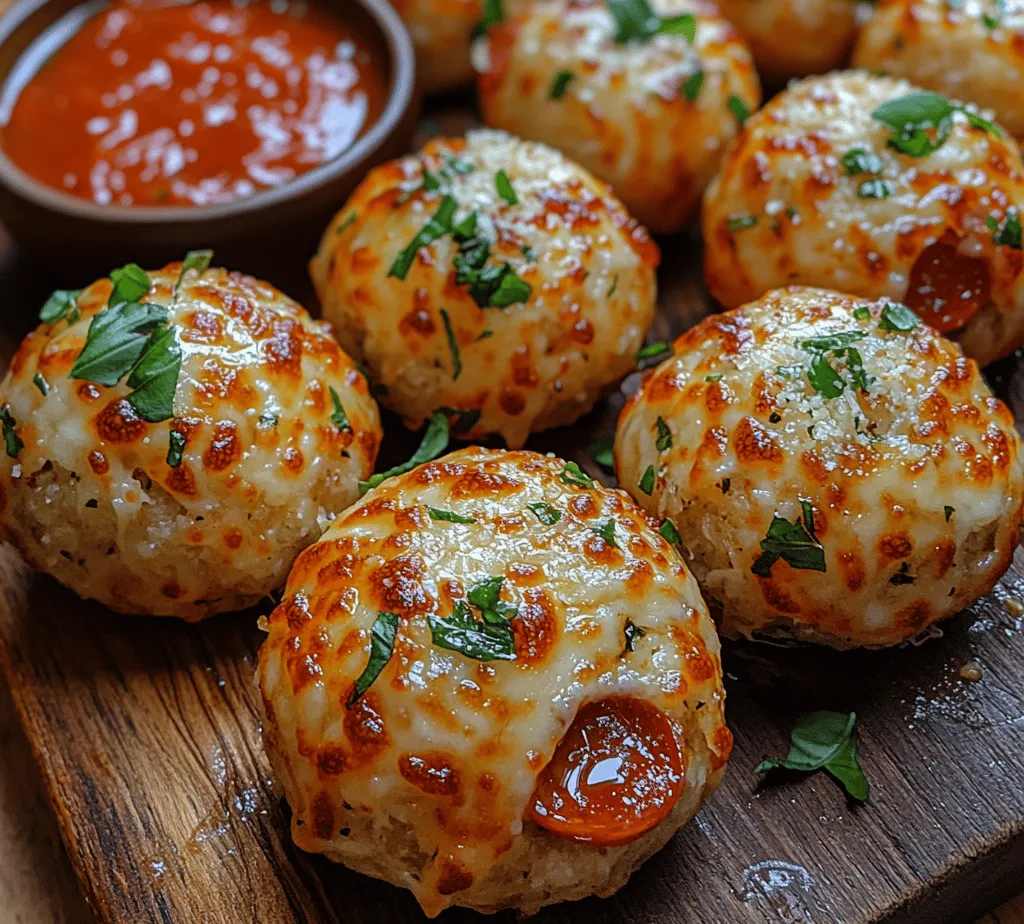
Serve the pizza balls warm, arranged on a large platter for a beautiful presentation. You can garnish with fresh basil leaves or a sprinkle of grated parmesan for an extra touch.
Best Dipping Sauces to Pair with Cheesy Garlic Pizza Balls
These pizza balls pair wonderfully with a variety of dipping sauces. Consider serving them with marinara sauce, garlic butter dip, or a zesty ranch dressing.
Ideas for Serving as an Appetizer, Snack, or Party Food
Cheesy Garlic Pizza Balls make for an excellent appetizer at gatherings or parties. They can also be served as a fun snack during movie nights or game days. For a full meal, serve them alongside a fresh salad and your favorite dipping sauce.
Nutritional Information
Understanding the nutritional value of your homemade Cheesy Garlic Pizza Balls can help you enjoy them guilt-free.
Breakdown of Calories and Macronutrients per Serving
Each pizza ball contains approximately 150-200 calories, depending on the filling and dough used. Typically, you can expect the following macronutrient breakdown per ball:
– Protein: 5-7 grams
– Carbohydrates: 20-25 grams
– Fat: 6-10 grams
Health Considerations (e.g., Vegetarian Options, Gluten-Free Alternatives)
These pizza balls can easily be made vegetarian by omitting meat fillings and using plant-based cheeses. For a gluten-free alternative, substitute regular flour with a gluten-free flour blend, ensuring that all other ingredients are also gluten-free.
Conclusion
Homemade Cheesy Garlic Pizza Balls are a delightful treat that brings joy and warmth to any table. The process of making these flavorful bites is not only satisfying but also allows for endless customization and creativity.
Encourage your loved ones to join in the fun of preparing these delicious snacks, and don’t hesitate to experiment with different fillings and dips. The joy of cooking is in sharing these experiences and flavors with those you care about. Whether enjoyed as an appetizer, a snack, or a main dish, these pizza balls are sure to become a favorite in your home. So gather your ingredients, roll up your sleeves, and get ready to indulge in the delightful world of homemade Cheesy Garlic Pizza Balls!