Introduction
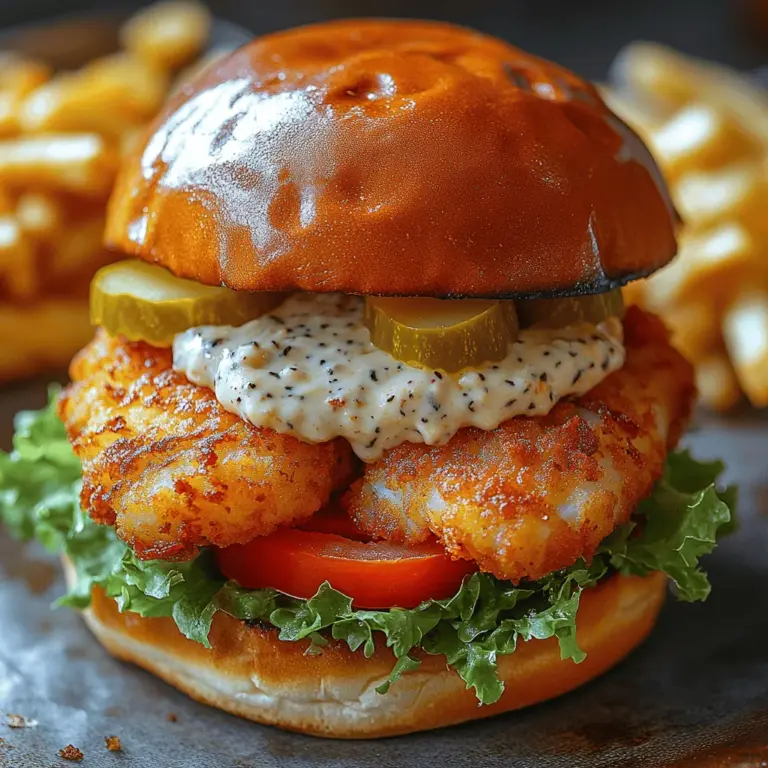
The crispy fried cod sandwich is not just a meal; it’s an experience that brings the taste of the ocean right to your plate. Imagine biting into a perfectly fried piece of cod, encased in a golden, crunchy crust, complemented by fresh toppings and a zesty sauce. This sandwich is a delightful blend of flavors and textures that is sure to please seafood lovers and casual diners alike.
The appeal of this dish lies not only in its deliciousness but also in its versatility. Cod, with its mild flavor and flaky texture, serves as a perfect canvas for customization. Whether you prefer a classic approach with simple toppings or want to jazz it up with gourmet ingredients, this sandwich can be tailored to suit your individual tastes. The popularity of seafood sandwiches like this one is on the rise, and it’s easy to see why. They bring joy to any meal, be it lunch or dinner, and are particularly perfect for those sunny days when you crave something light yet satisfying.
In this article, we will guide you through the process of creating your very own crispy fried cod sandwich, highlighting the essential ingredients, their unique contributions, and the preparation steps that will ensure your sandwich turns out perfectly every time.
Understanding the Ingredients
To create a memorable crispy fried cod sandwich, it’s crucial to understand the key ingredients that come together to form this delicious dish. Each component plays a vital role in building flavor and texture, ensuring that every bite is a delight.
Fresh Cod Fillets
The star of our sandwich is undoubtedly the fresh cod fillets. Cod is a popular choice for frying due to its firm, flaky texture and mild flavor profile. When selecting cod, freshness is paramount; fresh fish not only tastes better but also holds its shape during cooking, resulting in a sandwich that has both integrity and flavor. Fresh cod fillets should smell like the ocean, with a clean, briny aroma, and have a translucent appearance. Using frozen cod is possible, but for the best results, sourcing fresh fish will elevate your sandwich to another level. Cod is also a healthy choice, being low in fat and rich in protein, making this sandwich a guilt-free indulgence.
Breading Mixture
The breading mixture is what gives the cod its signature crunch. A well-balanced blend of all-purpose flour, spices, and seasonings creates a flavorful crust that enhances the fish. In this recipe, we use flour seasoned with paprika, garlic powder, and cayenne pepper.
– Paprika: Adds a subtle sweetness and a beautiful red color to the crust.
– Garlic Powder: Infuses the breading with a savory depth that complements the fish.
– Cayenne Pepper: Provides a gentle kick of heat, balancing the richness of the fried cod.
Combining these spices with the flour ensures that every bite of the sandwich is bursting with flavor.
Buttermilk
Buttermilk is often an underappreciated ingredient in fried dishes, yet its role is essential in creating a tender and flavorful piece of fish. The acidity in buttermilk acts as a tenderizer, breaking down proteins in the cod and allowing it to soak up flavor. Additionally, the richness of buttermilk gives the breading something to cling to, ensuring that it adheres well during frying. Marinating the cod fillets in buttermilk not only enhances the flavor but also contributes to a moist interior, making each bite of your sandwich a succulent delight.
Panko Breadcrumbs
When it comes to achieving that perfect crispy texture, panko breadcrumbs are the ideal choice. Unlike regular breadcrumbs, panko is made from crustless bread that has been processed into larger, airy flakes. This unique texture creates an exceptionally crunchy coating when fried. The lightness of panko allows for a better crisp compared to traditional breadcrumbs, resulting in a sandwich that is both satisfying and not overly greasy. The golden brown color of panko also adds visual appeal to the finished product, making your crispy fried cod sandwich a feast for the eyes as well as the palate.
Sandwich Components
While the fried cod is the star, the sandwich components are equally important in creating a well-balanced dish. Fresh produce plays a crucial role in enhancing the overall flavor and texture of the sandwich.
– Lettuce: Adds a crisp and refreshing element, balancing the richness of the fried fish.
– Tomato: Provides juiciness and acidity, cutting through the heaviness of the breaded cod.
– Sauces: A zesty tartar sauce is a classic choice, providing creaminess and a touch of tang that elevates the sandwich. You can also experiment with other sauces such as spicy mayo or a tangy remoulade to suit your palate.
These components not only enhance the flavor but also add freshness, making each bite of your crispy fried cod sandwich a harmonious blend of taste and texture.
Preparation Steps
Creating a delicious crispy fried cod sandwich might seem daunting, but by breaking down the preparation process into clear steps, you will find it to be an enjoyable experience. Here’s how to get started.
Preparing the Cod Fillets
The first step in preparing your crispy fried cod sandwich is to ensure that your cod fillets are ready for cooking. Start by rinsing the fillets under cold water to remove any residual scales or impurities. After rinsing, gently pat the fillets dry with paper towels. This step is crucial because moisture on the surface of the fish can prevent the breading from adhering properly and can also lead to a soggy texture when frying.
Once your fillets are dry, place them in a shallow dish and cover them with buttermilk. Allow them to marinate for at least 30 minutes. This marination time is essential, as it not only infuses the fish with flavor but also helps to tenderize the meat, resulting in a juicy and flavorful sandwich.
Creating the Breading Stations
While your cod fillets are marinating, it’s time to set up your breading station. This is a crucial step that ensures a smooth and efficient breading process. You will need three shallow dishes for this setup:
1. Flour Mixture: In the first dish, combine all-purpose flour with your chosen spices—paprika, garlic powder, cayenne pepper, and a pinch of salt. Mix well to ensure even distribution of the seasonings.
2. Buttermilk: The second dish will hold the buttermilk, which you have already used to marinate the cod.
3. Panko Breadcrumbs: In the third dish, pour in the panko breadcrumbs. You can also add a pinch of salt and pepper to the breadcrumbs for an extra layer of flavor.
The breading process will involve dredging each marinated cod fillet first in the flour mixture, then dipping it back into the buttermilk, and finally coating it in the panko breadcrumbs. This three-step process ensures that the fish is well-coated, which is key to achieving a crispy exterior once fried.
By following these preparation steps, you will lay the groundwork for a mouthwatering crispy fried cod sandwich that is sure to impress. Stay tuned for the next part of this article, where we will delve into the frying process and the assembly of your delicious sandwich.
Setting Up Your Breading Stations for Efficiency
When preparing a crispy fried cod sandwich, organization is key to achieving a smooth cooking process. Setting up your breading stations effectively allows you to work quickly and ensures that each piece of cod is perfectly coated for maximum crunch.
Start by gathering three shallow dishes or plates. In the first dish, add all-purpose flour, seasoned with salt, pepper, and any other spices you enjoy, such as paprika or garlic powder. This will be your dry mixture. In the second dish, crack a few eggs and whisk them until they’re well blended; this will serve as your binding agent. In the third dish, combine breadcrumbs with any additional seasonings, such as dried herbs or Parmesan cheese, to elevate the flavor.
Arrange these dishes in a line from left to right: flour, eggs, breadcrumbs. This setup provides a streamlined process where you can easily transfer the cod from one station to the next. Make sure to have a clean plate or baking sheet ready to hold the breaded cod fillets once they are coated.
Breading the Cod
To achieve that signature crunch, the breading process is crucial. Begin with your cod fillets, ensuring they are thawed and pat them dry with paper towels to remove excess moisture. This step is essential as moisture can hinder the breading from adhering properly.
1. Coat in Flour: Take one fillet and dip it into the flour mixture, ensuring it is evenly coated. Shake off any excess flour to prevent clumping.
2. Dip in Egg: Next, transfer the fillet to the egg wash. Allow the excess egg to drip off before moving on to the next step.
3. Coat in Breadcrumbs: Now, press the fillet into the breadcrumb mixture, ensuring it is fully covered. For an extra crunch, you can press the breadcrumbs firmly onto the fillet. Once coated, place the breaded cod on the clean plate or baking sheet and repeat with the remaining fillets.
This three-step breading process creates layers that will fry up beautifully, resulting in a crispy exterior that contrasts delightfully with the tender fish inside.
Heating the Oil
Safety is paramount when frying, and knowing how to heat your oil properly is crucial for a successful fry. In a large, deep skillet or a Dutch oven, pour in enough oil to submerge the cod fillets halfway—this typically requires about 1 to 2 inches of oil.
Before adding the fish, heat the oil over medium-high heat. To test if the oil is hot enough, you can use one of two methods:
1. Wooden Spoon Test: Dip the end of a wooden spoon into the oil. If bubbles form around the spoon, the oil is ready for frying.
2. Breadcrumb Test: Alternatively, drop a small piece of breadcrumb into the oil. If it sizzles and rises to the surface, your oil is at the ideal frying temperature, typically around 350°F (175°C).
Always use a thermometer if you have one, as maintaining the proper temperature is essential for achieving that perfect golden brown without overcooking the fish.
Frying the Cod
Once your oil is hot, it’s time to fry the cod. Carefully place the breaded fillets into the oil, ensuring not to overcrowd the pan, which can lower the oil temperature and lead to greasy fish. Fry the cod in batches if necessary.
1. Fry Until Golden: Cook each side for about 3 to 4 minutes or until golden brown. Use a slotted spatula or tongs to flip the fillets gently.
2. Drain Excess Oil: Once cooked, transfer the fried cod to a paper towel-lined plate to drain any excess oil, allowing the fish to remain crispy.
Frying in oil that is too cool can lead to soggy breading, while oil that is too hot can burn the outside before the inside is cooked. Keeping a consistent temperature is essential for the best results.
Assembling the Sandwich
Now that your crispy fried cod is ready, it’s time to assemble your sandwich. This part is equally important, as how you layer your ingredients can enhance the overall flavor and structure of the sandwich.
Toasting the Buns: Start by toasting your sandwich buns, which adds a delightful crunch and prevents the bread from becoming soggy. You can toast them in a skillet with a bit of butter or in a toaster oven until they are golden brown.
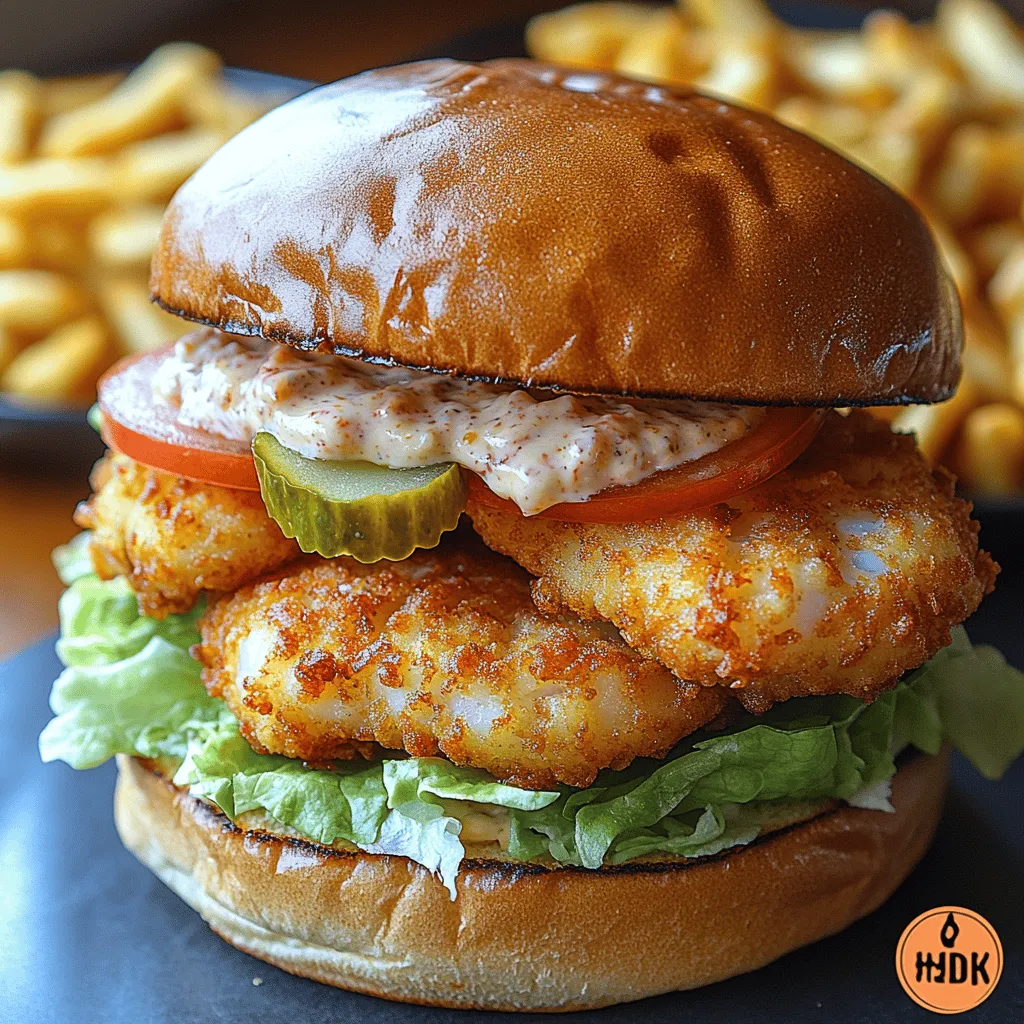
Layering Ingredients: For the ultimate fried cod sandwich, follow this order when assembling:
1. Bottom Bun: Start with the toasted bottom bun.
2. Spread Sauce: Add a generous dollop of tartar sauce or your favorite aioli to the bun.
3. Layer the Fried Cod: Place one or two pieces of the crispy fried cod on top of the sauce.
4. Add Fresh Ingredients: Enhance the sandwich with fresh toppings like shredded lettuce, sliced tomatoes, and pickles. These ingredients add freshness and a contrast in texture to the crispy fish.
5. Finish with the Top Bun: Complete your sandwich with the toasted top bun.
This layering technique not only ensures that every bite is full of flavor but also keeps the sandwich intact and easy to handle.
Serving Suggestions
A crispy fried cod sandwich is a delightful dish that pairs wonderfully with various sides and beverages, elevating your meal experience.
Ideal Side Dishes: Consider serving your sandwich with classic sides that complement its flavors. Here are a few popular options:
– French Fries: Crispy fries, whether regular or sweet potato, are a timeless choice that pairs perfectly with fried cod.
– Coleslaw: A tangy coleslaw provides a refreshing crunch that contrasts nicely with the warm, crispy fish.
– Potato Chips: For a lighter option, a side of kettle-cooked chips can add an extra crunch to your meal.
– Salads: A simple green salad with a vinaigrette can provide a fresh, healthy counterbalance to the richness of the sandwich.
Drink Pairings: To wash down your delicious sandwich, consider these beverage options:
– Light Beers: A crisp lager or pale ale complements the flavors of the fried cod while refreshing your palate.
– Lemonade or Iced Tea: For a non-alcoholic option, a glass of homemade lemonade or iced tea provides a refreshing contrast to the richness of the sandwich.
– Sparkling Water: If you prefer something lighter, a sparkling water with a slice of lemon or lime can cleanse your palate between bites.
Conclusion
The joy of making and enjoying a crispy fried cod sandwich lies in the delightful crunch of the fish combined with fresh toppings and flavorful sauces. With the right techniques, you can create a sandwich that is not only a treat for seafood lovers but also a versatile addition to any meal occasion.
Feel free to experiment with your own variations—try adjusting spices in the breading, exploring different sauces, or adding unique toppings like avocado or jalapeños for an extra kick. This crispy fried cod sandwich is sure to become a favorite in your household, celebrated for its satisfying combination of textures and flavors. Enjoy your culinary adventure and savor each bite of this delicious creation!
