
Introduction
In the world of desserts, cookie dough has carved out a special niche, captivating taste buds and evoking cherished memories of childhood baking sessions. The irresistible allure of raw cookie dough—creamy, sweet, and utterly indulgent—has inspired a myriad of desserts that celebrate this beloved flavor. Among the most popular of these creations are cookie dough truffles. These delightful treats combine the nostalgic flavors of cookie dough with the elegance of gourmet confections, making them perfect for special occasions, holiday gatherings, or simply as a sweet indulgence at home.
The beauty of cookie dough truffles lies not only in their rich taste but also in the satisfaction of creating them from scratch. Imagine crafting a dessert that brings joy to your family and friends, all while tapping into your inner chef. These truffles are not just a feast for the palate; they are a celebration of creativity in the kitchen. In this article, we will delve into the world of decadent cookie dough truffles, exploring their history, the essential ingredients, and the delightful process of preparing and shaping them.
Understanding Cookie Dough Truffles
Cookie dough truffles are bite-sized balls of edible cookie dough, often coated in a layer of chocolate, that deliver a burst of flavor with every bite. Unlike traditional cookies, these truffles are designed to be enjoyed without baking, making them an innovative twist on a classic favorite. The versatility of cookie dough truffles is one of their most appealing features; they can be customized in countless ways to suit individual tastes and preferences.
From various flavor profiles to different types of coatings, the options are endless. You can experiment with different add-ins, such as nuts, dried fruits, or even flavored extracts, to create a unique treat that reflects your personal taste. The fusion of flavors and textures is what makes cookie dough truffles particularly enticing. The creamy, sweet dough contrasts beautifully with the rich, smooth chocolate coating, creating a harmonious balance that is sure to please any dessert lover.
Key Ingredients of Decadent Cookie Dough Truffles
Before diving into the preparation of these delectable truffles, it’s essential to understand the role of each ingredient in creating the perfect cookie dough treat. Here’s a closer look at the key components that make up these indulgent delights:
– All-Purpose Flour: This staple ingredient is crucial for achieving the right texture and structure in the cookie dough. It provides the foundation for the dough and helps create that familiar cookie-like consistency.
– Unsalted Butter: Adding richness and creaminess to the dough, unsalted butter is essential for flavor. It contributes to the overall texture and ensures the truffles are melt-in-your-mouth delicious.
– Brown and Granulated Sugar: A combination of these sugars contributes to the sweetness and moisture of the truffles. Brown sugar adds a hint of caramel flavor and helps keep the dough soft, while granulated sugar provides the classic sweetness expected in a dessert.
– Milk and Vanilla Extract: These ingredients enhance the flavor and consistency of the dough. Milk adds moisture, while vanilla extract infuses a warm, aromatic quality that elevates the overall taste.
– Salt: A pinch of salt is vital for balancing the sweetness of the sugars and enhancing the flavors of the other ingredients. It also helps to bring out the richness of the butter.
– Mini Chocolate Chips: These tiny morsels add texture and bursts of chocolatey goodness throughout the truffles. They provide a delightful contrast to the smooth, creamy dough.
– Semi-Sweet Chocolate Chips: Used for coating the truffles, semi-sweet chocolate chips create a rich outer layer that complements the sweet dough inside. Their melting quality ensures a smooth and glossy finish.
– Coconut Oil: While optional, adding coconut oil to the chocolate coating can create a smoother texture and a glossy sheen. It also helps prevent the chocolate from hardening too much, making it easier to bite into the truffles.
Preparing the Cookie Dough
Now that we’ve covered the essential ingredients, let’s dive into the step-by-step preparation process for our decadent cookie dough. This section will detail how to create a delicious cookie dough base that can be shaped into truffles.
Step 1: Toasting the Flour
One of the unique steps in making cookie dough truffles is toasting the flour. This process not only enhances the flavor but also eliminates any potential raw taste, making the dough safe to eat. To toast the flour, spread it evenly on a baking sheet and bake it at 350°F (175°C) for about 5-7 minutes, or until it becomes lightly golden and fragrant. Be sure to stir it halfway through to ensure even toasting. Let it cool completely before using it in the dough.
Step 2: Creaming Butter and Sugars
In a large mixing bowl, combine the softened unsalted butter, brown sugar, and granulated sugar. Using a hand mixer or stand mixer fitted with a paddle attachment, cream the butter and sugars together on medium speed until the mixture is light and fluffy. This process typically takes about 2-3 minutes. Properly creaming these ingredients is crucial, as it incorporates air into the mixture, resulting in a lighter, more tender cookie dough.
Step 3: Combining Wet Ingredients
Once the butter and sugar mixture is fluffy, add in the milk and vanilla extract. Mix on low speed until everything is well combined. The addition of these wet ingredients not only enhances the flavor but also contributes to the overall consistency of the cookie dough.
Step 4: Adding Flour and Chocolate Chips
Next, gradually add the toasted flour to the butter mixture. Mix on low speed until the dough comes together. Be careful not to over-mix, as this can lead to a tougher texture. Once the flour is incorporated, fold in the mini chocolate chips using a spatula or wooden spoon. This step ensures that the chocolate chips are evenly distributed throughout the dough.
Step 5: Chilling the Dough
To achieve the ideal consistency for shaping, it’s important to chill the cookie dough. Transfer the dough to a bowl, cover it with plastic wrap, and refrigerate for at least 30 minutes. Chilling the dough makes it easier to handle and helps the flavors meld together, resulting in a richer taste.
Forming and Coating the Truffles
Once the cookie dough has chilled, it’s time to shape the truffles. This step is not only fun but also allows for creativity in the final presentation of your delectable treats.
Shaping the Truffles
Using a small cookie scoop or your hands, take a tablespoon-sized portion of the chilled cookie dough and roll it into a ball. Aim for uniformity in size to ensure even coating and presentation. Place the rolled balls on a parchment-lined baking sheet, leaving space between each one to prevent sticking.
Coating the Truffles
While the cookie dough balls are chilling, prepare the chocolate coating. Melt the semi-sweet chocolate chips in a microwave-safe bowl, heating in 30-second intervals and stirring in between, until smooth and glossy. If you’re using coconut oil, stir it in after the chocolate is melted for a smoother consistency.
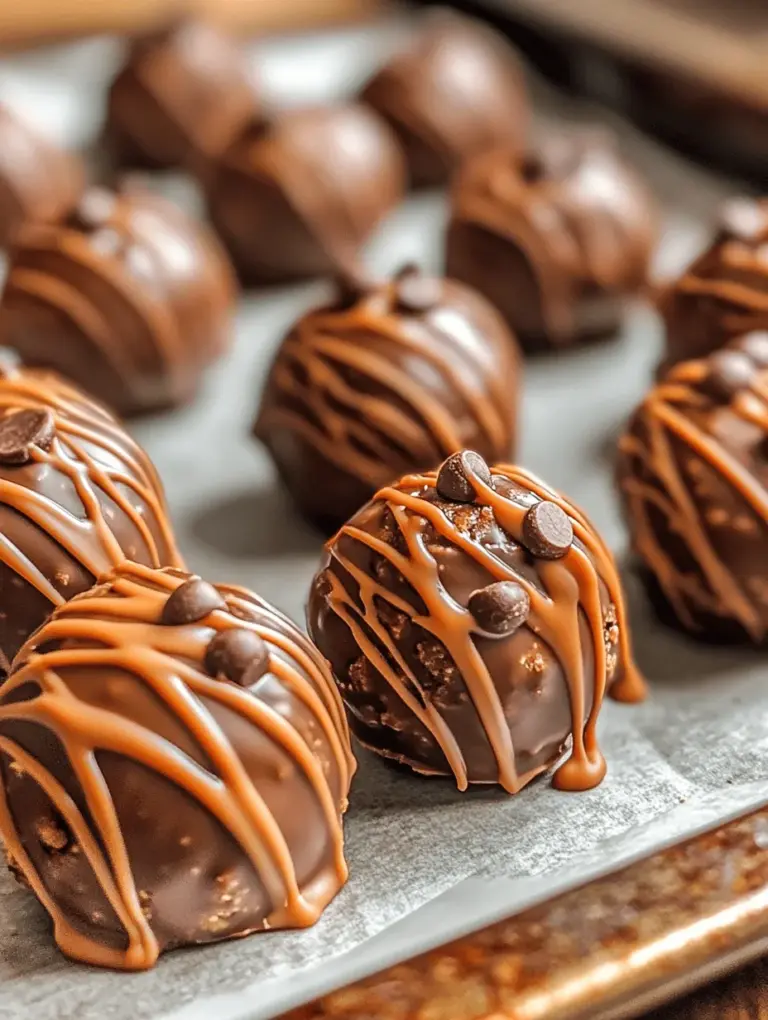
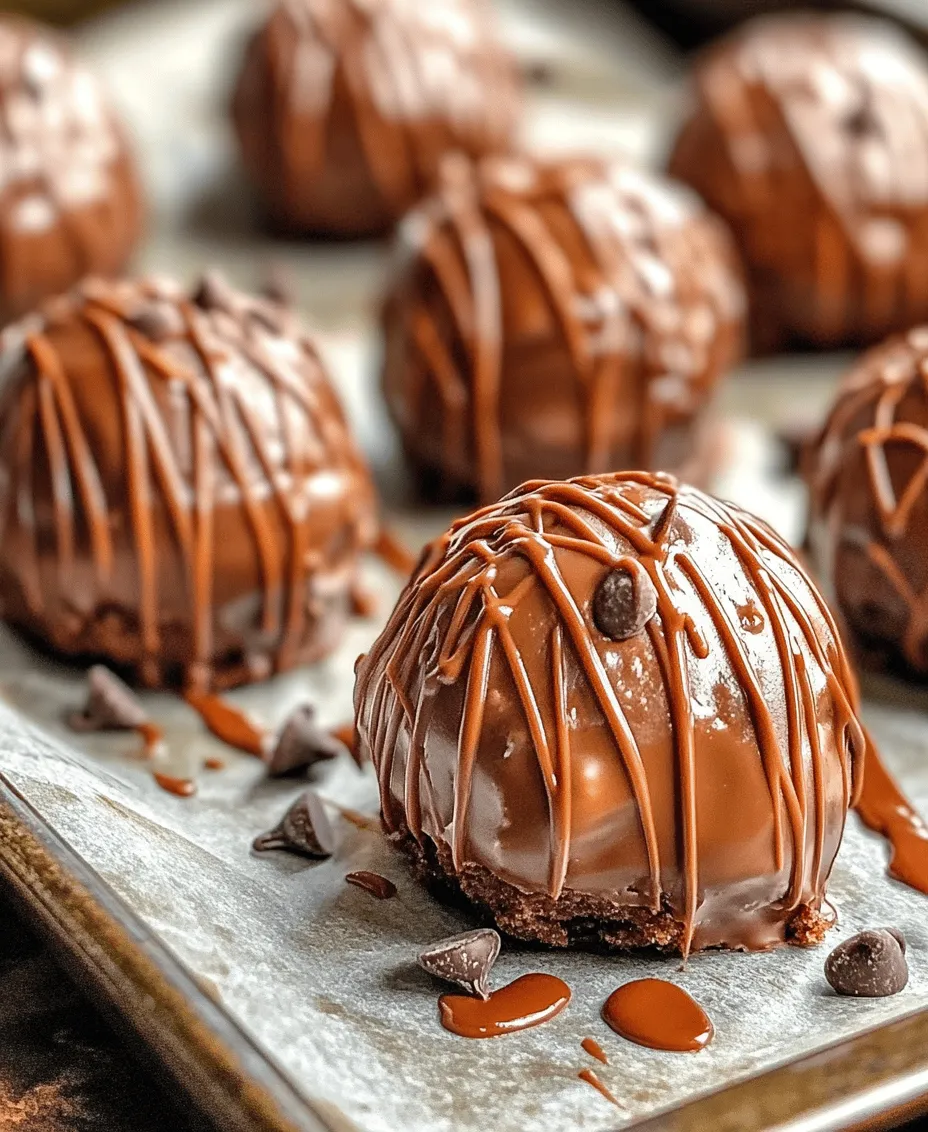
Once the chocolate is ready, dip each cookie dough ball into the melted chocolate, ensuring it is fully coated. Use a fork to lift the truffle out of the chocolate, allowing excess chocolate to drip back into the bowl. Return the coated truffle to the parchment-lined baking sheet.
This process not only adds an inviting look to the truffles but also seals in the delicious cookie dough flavor, creating a perfect balance with the rich chocolate exterior.
Final Touches
If desired, you can sprinkle some additional mini chocolate chips or sprinkles on top of the coated truffles before the chocolate sets. This adds a decorative touch and can enhance the visual appeal of your truffles.
As you continue this process, you will start to see the transformation of simple cookie dough into delightful truffles, each one a testament to your culinary skills and creativity.
In the next section, we will explore more techniques for achieving the perfect cookie dough truffles, including tips for storage, variations, and suggestions on how to serve these indulgent treats.
Stay tuned as we continue this sweet journey into the world of decadent cookie dough truffles!
Tips for Managing Stickiness When Handling the Dough
Working with cookie dough can sometimes be a sticky affair, which can make it challenging when you’re trying to roll it into perfect little truffles. Here are some effective tips for managing stickiness during the truffle-making process:
1. Chill the Dough: After mixing your cookie dough, allow it to chill in the refrigerator for about 30 minutes. This makes the dough firmer and less sticky, making it easier to handle.
2. Use Lightly Floured Hands: Dusting your hands with a little all-purpose flour or cocoa powder can help prevent the dough from sticking to your fingers. Just be careful not to add too much flour, as it can alter the texture of your truffles.
3. Scoop with a Cookie Scoop: Using a cookie or ice cream scoop can help you portion out even amounts of dough without getting your hands too messy. This also ensures uniformity in size for even cooking and presentation.
4. Cold Tools: If you have a metal spoon or scoop, chill it in the refrigerator for a few minutes before using it. Cold tools can help keep the dough from sticking to them.
Melting and Preparing the Chocolate Coating
Once your truffles are formed and chilled, it’s time to prepare the chocolate coating. The chocolate not only adds a delicious layer but also provides a beautiful glossy finish to your truffles.
Best Practices for Melting Chocolate to Avoid Burning
1. Use a Double Boiler: The best method for melting chocolate is to use a double boiler. Fill a pot with a couple of inches of water and bring it to a simmer. Place a heatproof bowl on top of the pot, ensuring it doesn’t touch the water. Add your chocolate to the bowl and stir gently as it melts.
2. Microwave Method: If you prefer using a microwave, chop your chocolate into small, even pieces and place it in a microwave-safe bowl. Heat it on high for 30 seconds, stirring in between intervals until it’s smooth. Be cautious not to overheat, as chocolate can seize quickly.
3. Add a Touch of Oil: If you’re using chocolate chips, consider adding a teaspoon of coconut oil or vegetable oil to the chocolate before melting. This will help create a smoother, thinner coating that’s easier to work with.
The Role of Coconut Oil in the Coating Process
Coconut oil can work wonders when melting chocolate for truffles. It not only helps thin out the chocolate for easier coating but also adds a subtle coconut flavor that complements the sweetness of the cookie dough. Additionally, the fat content in coconut oil improves the chocolate’s texture, yielding a shiny finish once set.
Coating the Truffles
Coating your truffles can be a fun and creative process. Here are some techniques to ensure a smooth and even coating while minimizing mess.
1. Using a Fork or Toothpick: After dipping your truffles in chocolate, use a fork or toothpick to lift them out. This allows the excess chocolate to drip off before placing them on a parchment-lined baking sheet.
2. Swirl Technique: When coating, use a gentle swirling motion with your fork to ensure even coverage. This can also help prevent clumping and uneven textures.
3. Chill Between Layers: If you desire a thicker chocolate coating, consider chilling the truffles for 10-15 minutes after the first layer before re-dipping them in chocolate. This will help the second layer adhere better.
Importance of Letting Excess Chocolate Drip Off
Allowing the excess chocolate to drip off is crucial for achieving a professional-looking truffle. If too much chocolate remains, it can create a messy, uneven appearance. After dipping, hold the truffle over the bowl for a few seconds, gently tapping the fork to encourage the extra chocolate to fall away.
Setting and Storing the Truffles
After coating your truffles, it’s essential to let them set properly to achieve that perfect bite.
Explanation of the Setting Process
1. Chilling Time: Once coated, place the truffles back in the refrigerator. Chilling them for at least 30 minutes allows the chocolate to harden and the inside to remain soft and creamy.
2. Why It’s Crucial: Allowing the chocolate to set not only improves the texture but also helps the flavors meld together, enhancing the overall taste experience.
Time Required for Chocolate to Fully Set
Typically, chocolate takes about 30 minutes to 1 hour to fully set in the refrigerator. For best results, avoid rushing this process, as improperly set chocolate can lead to a gooey mess when you bite into the truffle.
Best Practices for Storing Leftover Truffles
To keep your cookie dough truffles fresh and delicious, follow these storage tips:
1. Use an Airtight Container: Place the truffles in a single layer in an airtight container. If you need to stack them, separate layers with parchment paper to prevent sticking.
2. Optimal Storage Conditions: Store your truffles in a cool, dry place away from direct sunlight. If you live in a warm climate, it’s best to keep them in the refrigerator.
3. Shelf Life of the Truffles: When stored correctly, cookie dough truffles can last up to two weeks in the refrigerator. If you wish to keep them longer, consider freezing them for up to three months.
Serving Suggestions
Cookie dough truffles are not just delectable; they can also be presented beautifully for any occasion.
Ideas for Serving Cookie Dough Truffles
1. Presentation for Parties: Arrange your truffles on a decorative platter. Use cake stands or tiered trays for an elegant display. You can also drizzle melted chocolate or caramel sauce over them for an eye-catching effect.
2. Pairing with Beverages: These truffles pair wonderfully with a variety of drinks. Consider serving them alongside a rich cup of coffee, a glass of milk, or even dessert wines like port or sweet Riesling.
3. Creative Packaging for Gifts: If you’re looking to gift these delightful treats, consider packaging them in clear cellophane bags tied with a ribbon. Alternatively, use small decorative boxes or tins for a personal touch.
Variations and Customizations
The beauty of cookie dough truffles lies in their versatility. Feel free to experiment with different flavors and dietary adaptations.
Suggestions for Flavor Variations
1. Different Types of Chocolate: Mix it up by using white chocolate, milk chocolate, or dark chocolate for the coating. You can also blend chocolates for a unique taste.
2. Adding Nuts and Extracts: Enhance your truffles by incorporating nuts like chopped pecans or walnuts into the dough. Adding extracts such as almond or peppermint can also create a distinctive flavor profile.
3. Spices for Unique Twists: Consider adding a pinch of cinnamon or nutmeg to the dough for a warm, spicy flavor that complements the sweetness of the chocolate.
Exploring Dietary Alternatives
1. Gluten-Free Options: Substitute all-purpose flour with almond flour or oat flour to make gluten-free cookie dough truffles. Always check labels to ensure no gluten contamination.
2. Vegan Adaptations: To create vegan cookie dough truffles, replace butter with coconut oil or vegan butter and use non-dairy chocolate for the coating. Additionally, consider using flaxseed meal mixed with water as an egg substitute when needed.
Conclusion
There’s something undeniably delightful about making and sharing cookie dough truffles. The joy of crafting these sweet bites, filled with creamy cookie dough and enveloped in rich chocolate, creates a memorable experience that you can share with friends and family.
Don’t hesitate to experiment with the recipe, customizing it to suit your taste and dietary needs. Whether for a special occasion or simply to indulge in a homemade treat, cookie dough truffles are sure to impress. Their versatility allows for endless possibilities, and you may just discover a new favorite flavor combination along the way. Enjoy the satisfaction of creating these delightful morsels and the joy they bring to your gatherings.