Introduction
There’s an undeniable charm and nostalgia associated with classic desserts that have graced family gatherings and special occasions for generations. The moment you take a bite of a homemade treat, it’s almost as if you’re transported back in time, evoking memories of comforting evenings spent in the kitchen, surrounded by loved ones. Among these timeless delights, fudge icing stands out as a quintessential favorite, known for its rich chocolate flavor and velvety texture.
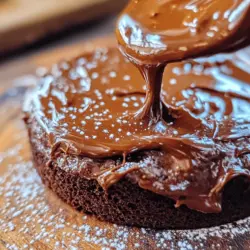
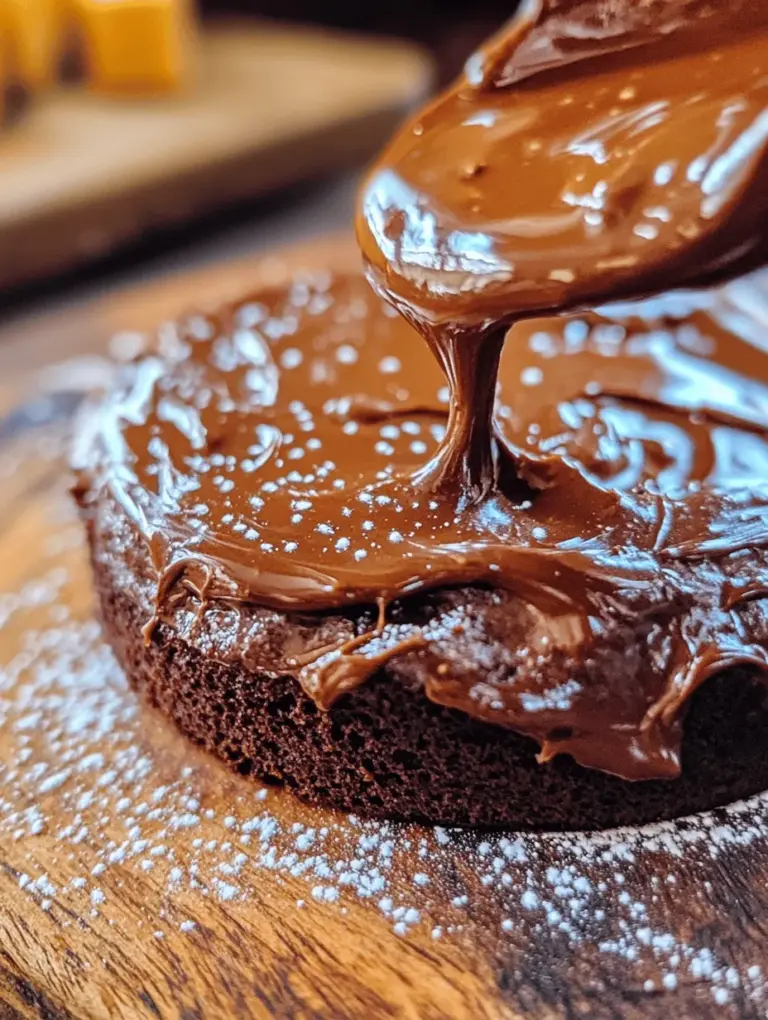
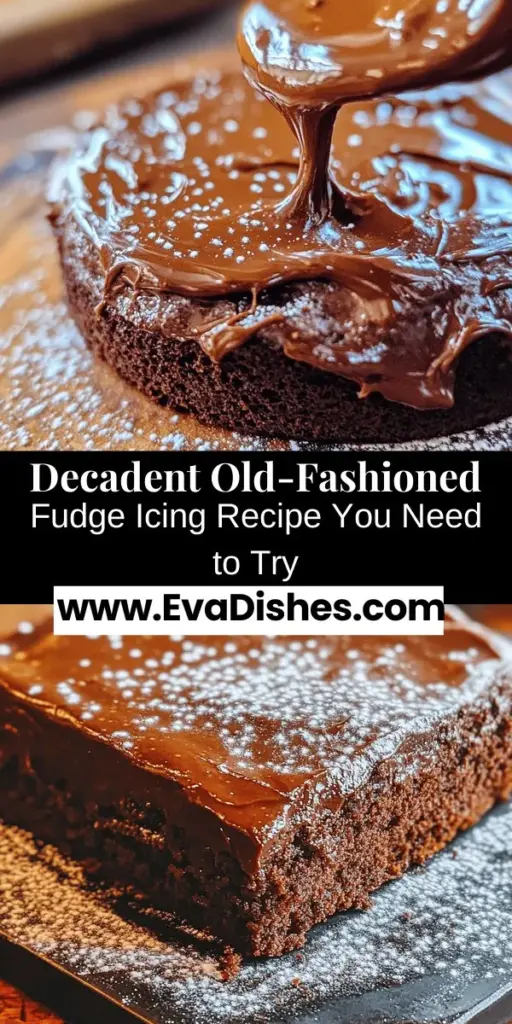
Decadent old-fashioned fudge icing is not simply a topping; it’s a transformative element that can elevate a basic cake or a batch of brownies into a show-stopping centerpiece. Its luscious, creamy consistency and deep chocolate notes can turn any dessert into a lavish experience, perfect for birthdays, holidays, or any celebration where sweet indulgence is desired. Whether spread generously across a rich chocolate cake or drizzled over warm brownies, fudge icing captures the essence of homemade goodness, making it a beloved choice for dessert lovers everywhere.
Understanding Fudge Icing
The origins of fudge icing can be traced back to the early 19th century, where it emerged as a staple in American baking. Initially, fudge was a type of soft candy, but over time, its creamy consistency and rich flavor found their way into the world of icings. Unlike other types of icing, which can be airy or overly sweet, fudge icing offers a unique blend of richness and density that complements a variety of desserts.
Fudge icing is distinct from other icings like buttercream or royal icing, primarily due to its cooking process and ingredient composition. While buttercream relies heavily on butter and sugar whipped together for a light, fluffy texture, fudge icing is cooked to achieve its signature smoothness and sheen. The combination of granulated sugar, cocoa powder, milk, and butter creates a decadent finish that not only enhances the dessert’s flavor but also adds a luxurious mouthfeel.
The magic of fudge icing lies in its ability to create a balance of flavors and textures. Each ingredient plays a crucial role, working in harmony to deliver a rich chocolate experience that is both satisfying and indulgent. This icing can be used as a glaze for cakes, a filling for pastries, or even as a dip for fruits, showcasing its versatility in the kitchen.
Key Ingredients for Decadent Old-Fashioned Fudge Icing
Creating the perfect decadent old-fashioned fudge icing requires a few key ingredients, each contributing to the overall flavor and texture. Let’s delve into the essential components that make this icing irresistible:
Granulated Sugar
Granulated sugar is the backbone of fudge icing, providing the essential sweetness that balances the rich chocolate flavor. It also plays a vital role in achieving the right texture. When cooked, granulated sugar dissolves and caramelizes slightly, contributing to the glossy finish of the icing. The precise measurement of sugar is crucial; too little can result in a bland icing, while too much can lead to an overly sweet outcome.
Cocoa Powder
The use of unsweetened cocoa powder is imperative for achieving a deep, intense chocolate flavor. It is the star ingredient that sets fudge icing apart, allowing the true essence of chocolate to shine through. Unsweetened cocoa delivers a robust taste without the added sugar, enabling the other ingredients to balance the flavor profile perfectly. Choosing a high-quality cocoa powder can significantly enhance the richness of your fudge icing.
Whole Milk
Whole milk contributes to the creamy texture of the fudge icing. The fat content in whole milk not only adds richness but also helps to create a smooth consistency when combined with the other ingredients. Milk also plays a role in dissolving the sugar and cocoa powder, ensuring a uniform mixture that results in a silky-smooth icing. For those who prefer a lighter version, you may use reduced-fat milk, but the flavor and texture may vary slightly.
Unsalted Butter
Unsalted butter is essential for creating a rich mouthfeel and enhancing the overall flavor of the icing. It adds a luscious creaminess that complements the chocolate, while also helping to achieve a smooth texture. Unsalted butter is preferred over salted butter to allow for better control over the seasoning of the icing. It’s important to use butter at room temperature for optimal incorporation into the mixture.
Vanilla Extract
A splash of vanilla extract elevates the flavor complexity of fudge icing, adding depth and warmth. Vanilla is a classic flavor enhancer that complements chocolate beautifully, making it an essential addition to the recipe. Opt for pure vanilla extract for the best results, as it offers a more authentic flavor compared to imitation vanilla.
Salt
While it may seem counterintuitive, a pinch of salt is crucial in chocolate desserts. Salt works to balance the sweetness and enhance the overall flavor of the fudge icing. It helps to bring out the rich chocolate notes, making the icing taste more vibrant and complex. Be careful with the amount; just a small pinch can make a significant difference.
Powdered Sugar
Powdered sugar, also known as confectioners’ sugar, is used to achieve a smooth, velvety texture in the fudge icing. After the initial cooking process, powdered sugar is often added to thicken the icing and create that desirable consistency. It dissolves easily, ensuring that the final product is free from any gritty texture, leading to a luxurious finish on your cakes and brownies.
Preparation Steps for Fudge Icing
Creating decadent old-fashioned fudge icing is a straightforward process, but it requires careful attention to detail. Here’s a comprehensive step-by-step guide to help you master this delicious icing:
Mixing Dry Ingredients
Begin by gathering your dry ingredients: granulated sugar, unsweetened cocoa powder, and salt. In a medium mixing bowl, combine these ingredients thoroughly. It’s essential to mix them well to ensure that the cocoa powder is evenly distributed throughout the sugar. This step is crucial because it prevents any clumps of cocoa from forming when you add the wet ingredients later. Using a whisk or a sifter can help achieve this uniformity, resulting in a smooth final product.
Incorporating Wet Ingredients
Next, it’s time to add the wet ingredients: whole milk and unsalted butter. In a saucepan over medium heat, combine the dry mixture with the milk and butter. Stir continuously to ensure that the butter melts completely and the ingredients are blended evenly. This stage is vital for creating a homogeneous mixture that will cook evenly. Be patient, as this mixture can take a few minutes to come together. Once the butter has melted and the mixture is well combined, you’re ready for the next step.
Cooking Process
The cooking process is where the magic happens. Increase the heat to medium-high, allowing the mixture to come to a boil. Continue stirring constantly to prevent the sugar from settling at the bottom and burning. As the mixture heats, you’ll notice it thickening and bubbling. This stage is critical; it’s important to maintain the boil for a specific period, usually around 2-3 minutes, to achieve the right texture. Cooking for too long can lead to a hardened icing, while not cooking long enough can result in a runny consistency.
Once the mixture has boiled for the appropriate time, remove it from the heat. Allow it to cool slightly before gradually whisking in the powdered sugar and vanilla extract. Mix until the icing reaches a smooth and spreadable consistency. At this point, you can adjust the texture by adding a little more powdered sugar if the icing feels too thin, or a splash more milk if it seems too thick.
With your decadent old-fashioned fudge icing prepared, you’re now ready to elevate your cakes and brownies to new heights. The rich, creamy chocolate goodness is sure to impress anyone lucky enough to indulge in your baking creations. As you prepare to spread this luscious icing onto your desserts, get ready for the oohs and aahs from your guests as they savor each delicious bite.

Cooling and Adding Flavor
Once your fudge icing has reached a rolling boil, it’s time to turn off the heat and allow it to cool. Cooling is a crucial step in the icing-making process, as it affects both the texture and flavor of your final product. After boiling for the recommended time, remove the saucepan from the heat and let the mixture sit undisturbed for about 10-15 minutes. This cooling period helps the icing thicken slightly and prevents it from becoming too runny when you add the powdered sugar.
Just before you’re ready to add flavor, stir in the vanilla extract. This addition not only enhances the overall flavor profile but also complements the rich chocolate notes of the fudge. Use high-quality pure vanilla extract, as it will impart a more robust flavor compared to imitation vanilla. Incorporate the extract gently into the cooled mixture, ensuring it is evenly distributed without vigorous stirring that could introduce air bubbles.
Achieving the Perfect Consistency
Now comes the exciting part: adding powdered sugar to achieve that smooth, luscious fudge icing texture. Begin by gradually sifting in about 2 cups of powdered sugar into the cooled chocolate mixture. Sifting helps to prevent lumps, which can be a common issue when working with powdered sugar. Using a whisk, gently fold the sugar into the mixture. Start slow to avoid any cloud of sugar escaping the bowl.
As you mix, you may notice the icing becoming thicker and glossier. If you find that the icing is too thick for your liking, you can adjust the consistency by adding a teaspoon of warm milk or cream at a time until you reach your desired texture. Conversely, if the icing is too runny, simply sift in more powdered sugar until it thickens up. Achieving the perfect consistency is key to a successful fudge icing that spreads beautifully over your cakes or brownies.
Tips for Perfecting Fudge Icing
To ensure your fudge icing turns out perfectly every single time, keep these tips in mind:
– Temperature Control: Maintaining a consistent medium heat while boiling is essential. Too high of a temperature can cause the sugar to scorch, leading to a bitter taste, while too low may prevent it from reaching the necessary temperature for proper texture. Use a candy thermometer to monitor the temperature closely, aiming for around 235°F to 240°F for the ideal fudgy consistency.
– Whisking Technique: When incorporating the powdered sugar, whisk gently but thoroughly. Use a figure-eight motion to ensure that all the sugar is combined smoothly, which helps in avoiding lumps. A silicone spatula can also be beneficial for scraping down the sides of the bowl as you mix, ensuring no sugar remains unblended.
– Cooling Time: Allowing the icing to cool slightly before spreading is crucial. If the icing is too hot, it will be too runny and difficult to manage. Ideally, it should be warm but not hot to the touch, allowing for a spreadable yet firm icing that sets nicely once applied to your dessert.
Serving Suggestions
The versatility of decadent old-fashioned fudge icing means it can elevate a variety of desserts. Here are some delectable serving suggestions to inspire your culinary creativity:
– On Cakes: This rich fudge icing pairs beautifully with numerous cake flavors. For a classic combination, spread it generously over a moist chocolate cake, creating a luxurious double chocolate experience. It also complements vanilla and red velvet cakes superbly, adding a deep chocolate contrast that enhances the overall flavor profile. For an attractive finish, consider swirling the icing on top or creating a smooth, glossy layer to impress guests.
– On Brownies: Elevate your brownie game by adding a layer of fudge icing on top. The decadent chocolate flavor enhances the richness of the brownies, making them even more indulgent. For an extra touch, sprinkle crushed nuts or chocolate chips on top of the icing for added texture and visual appeal.
– As a Dip: Make dessert fun and interactive by using your fudge icing as a dip. Serve it in a small bowl alongside fresh fruits like strawberries, bananas, or apple slices. You can also pair it with cookies like shortbread or graham crackers for a delightful dipping experience. This approach not only makes for a unique dessert presentation but also allows guests to enjoy the fudge icing in a new way.
Storing and Reheating Fudge Icing
If you happen to have leftover fudge icing, proper storage is key to maintaining its deliciousness.
– Storage Tips: Allow the icing to cool completely before transferring it to an airtight container. Store it in the refrigerator, where it will remain fresh for about 1-2 weeks. When ready to use, check for any changes in texture or flavor. If it appears too thick after refrigeration, you can gently reheat it.
– Reheating Methods: When reheating fudge icing, it’s essential to do so gently to avoid burning or altering its consistency. The best method is to use a microwave-safe bowl and heat the icing in short increments of 10-15 seconds, stirring in between until it softens and becomes pourable again. Alternatively, you can place the container in a bowl of warm water, allowing the icing to gradually return to the desired consistency.
Conclusion
In conclusion, making decadent old-fashioned fudge icing is a rewarding endeavor that can elevate any dessert to new heights. Its rich flavor, smooth texture, and versatility make it a staple in any home baker’s repertoire. Whether you’re spreading it over a luscious cake, slathering it on brownies, or using it as a fun dip, this icing is sure to impress.
By following the detailed steps and tips outlined in this guide, you can confidently create fudge icing that rivals any bakery. Embrace the joy of homemade treats and the satisfaction that comes from crafting something delicious from scratch. So gather your ingredients, ignite your creativity, and start icing your way to dessert perfection!