Introduction
Crullers, with their unique twisted shapes and airy interiors, hold a special place in the world of French pastries. Known for their light and delicate texture, these delightful treats have become a staple in pastry shops around the globe. Their origins can be traced back to traditional French cuisine, where they were often enjoyed during celebrations and gatherings. The joy of creating crullers at home allows pastry enthusiasts to explore their culinary skills while indulging in the satisfying process of making desserts from scratch.
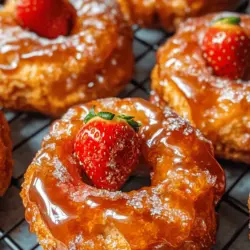
Among the various variations of crullers, strawberry glazed French crullers stand out for their vibrant color and burst of fruity flavor. The luscious strawberry glaze complements the airy texture of the cruller, making it a favorite among both children and adults alike. Whether you are preparing a special breakfast or a sweet treat for an afternoon gathering, these crullers are sure to impress.
In this recipe, we will take you step-by-step through the process of crafting these delightful strawberry glazed French crullers, from understanding the ingredients to perfecting the dough. Get ready to embark on a culinary adventure that will fill your kitchen with the sweet aroma of freshly baked pastries!
Understanding French Crullers
To appreciate the artistry behind strawberry glazed French crullers, it is essential to understand what crullers are and how they differ from other types of doughnuts. Crullers are a type of choux pastry, which is a light pastry made from a mixture of flour, water, butter, and eggs. The dough is unique because it is cooked twice, first on the stovetop and then baked or fried, resulting in a light and airy texture that melts in your mouth.
Historically, crullers have a rich heritage, with roots in both French and Dutch cuisine. The name “cruller” is derived from the Dutch word “krullen,” which means “to curl.” This reference is fitting, as crullers are often twisted into intricate shapes before frying. Unlike traditional doughnuts, which are typically made with yeast and rise during the cooking process, crullers are leavened primarily through the steam produced during cooking. This method gives crullers their distinctive airy quality, setting them apart from their yeast-based counterparts.
A perfect cruller should be light, airy, and crisp on the outside, with a tender interior. The texture is a crucial factor in achieving that melt-in-your-mouth experience. When you take a bite, the delicate layers should dissolve effortlessly, leaving you with a satisfying taste that beckons for another.
Ingredients Breakdown
Now that we have a foundational understanding of crullers, let’s delve into the essential ingredients that will create the perfect strawberry glazed French crullers. Each ingredient plays a vital role in achieving the cruller’s signature texture and flavor.
Key Ingredients:
1. All-Purpose Flour: This is the base of our cruller dough. All-purpose flour provides the right balance of protein to create structure while still allowing for a light texture.
2. Butter: Unsalted butter is used for richness and flavor. It also helps in creating the tender crumb of the cruller. The butter must be combined with water to create a rich paste that forms the core of the dough.
3. Water: Water is essential for the cooking process, as it helps to create steam when combined with the butter and flour. This steam is what gives crullers their light and airy texture.
4. Eggs: Eggs are crucial for binding the ingredients and providing moisture. They also contribute to the structure of the cruller, helping it rise and create that signature airy interior.
5. Sugar: Granulated sugar adds sweetness to the dough, enhancing the overall flavor of the cruller. It also aids in browning during frying.
6. Salt: A pinch of salt enhances the flavor of the crullers and balances the sweetness.
7. Strawberry Glaze Ingredients: For the strawberry glaze, you will need powdered sugar, fresh strawberries (or strawberry puree), and a dash of lemon juice. The glaze adds a fruity dimension and glossy finish to the crullers.
Importance of Each Ingredient
– Quality Ingredients: The success of your crullers largely depends on the quality of the ingredients used. Opting for high-quality butter and fresh strawberries will elevate the flavor profile of your crullers.
– Freshness: Ensure that your eggs are fresh for the best results. Fresh eggs will provide better emulsification and a more vibrant color in the dough.
– Precision: Measuring your ingredients accurately is crucial in pastry-making. Even a small deviation in ingredient proportions can affect the texture and flavor of your crullers.
Preparing the Dough
Creating the perfect cruller dough involves a few essential steps, starting with boiling water and butter. Follow these instructions carefully to ensure your crullers turn out light and airy.
Step 1: Boil Water and Butter
Begin by measuring out 1 cup of water and ½ cup of unsalted butter. In a medium saucepan, combine the water and butter over medium heat. Stir occasionally until the butter has completely melted and the mixture comes to a rolling boil. The boiling point is critical, as this will help create the steam necessary for the cruller’s rise.
Step 2: Incorporate the Flour
Once the mixture reaches a boil, quickly add 1 cup of all-purpose flour and a pinch of salt. Stir vigorously with a wooden spoon or spatula until the mixture forms a cohesive dough that pulls away from the sides of the pan. This process is known as “drying out” the dough and is essential for achieving the right consistency. Continue to stir for another minute to ensure the flour is fully incorporated.
Step 3: Cooling the Dough
Remove the saucepan from the heat and allow the mixture to cool for about 5-10 minutes. This cooling period is important, as it prevents the eggs from cooking when added later. Allowing the dough to cool slightly will result in a smoother incorporation of the eggs, ensuring a uniform texture.
Egg Incorporation and Final Dough Consistency
After the dough has cooled sufficiently, it’s time to add the eggs, which will transform the dough into its final state.
Step 4: Adding the Eggs
Crack four large eggs into a bowl and whisk them lightly. Gradually add the beaten eggs to the cooled dough, mixing thoroughly after each addition. It may seem daunting at first, but the dough will gradually absorb the eggs, becoming smooth and glossy. The addition of eggs not only enhances the flavor but also provides moisture, contributing to the soft interior of the cruller.
Step 5: Achieving the Right Texture
Continue mixing until the dough reaches a thick but pipeable consistency. You should be able to draw a figure-eight with the dough on a spatula without it breaking. If it is too thick, you can add a small amount of water or additional egg to achieve the desired texture. The final dough should be smooth, shiny, and hold its shape when piped.
With the dough prepared and properly mixed, you are now ready to move on to the frying stage, where your strawberry glazed French crullers will come to life!
This detailed exploration of crullers, their ingredients, and the preparation of the dough sets the foundation for what promises to be a delicious journey into the world of pastry-making. Stay tuned for the next steps, where we will guide you through frying the crullers to golden perfection and creating that irresistible strawberry glaze that makes these treats truly special.
Tips on Recognizing When the Dough is Ready for Frying
Before frying your crullers, it’s crucial to ensure that your dough has reached the right consistency. The dough should be smooth, glossy, and slightly sticky, but not overly wet. Here are some practical tips to help you recognize when your dough is ready for frying:
1. Texture Check: The dough should hold its shape when you scoop it with a spatula and should not easily fall apart. It should be thick enough to hold its form but pliable enough to be piped easily.
2. Touch Test: Lightly press your finger into the dough. If it springs back quickly, it’s ready. If it leaves an indentation, it may need a little more mixing.
3. Piping Test: Before frying, pipe a small amount of dough onto a piece of parchment paper. If it holds its shape and doesn’t spread out too much, you’re good to go. If it flattens, consider adding a bit more flour and mixing again.
Frying the Crullers
Overview of the Frying Process and Oil Temperature
Frying crullers requires careful attention to oil temperature for optimal results. The ideal frying temperature for crullers is around 350°F (175°C). If the oil is too hot, the outside will burn before the inside cooks through, while oil that is too cool can result in greasy, undercooked pastries.
To maintain the oil temperature, use a deep-frying thermometer. If you don’t have one, you can test the oil by dropping a small piece of dough into it. If it sizzles and rises to the surface within a few seconds, the oil is ready.
Techniques for Piping the Dough into the Oil
Piping the dough into the oil can seem daunting, but with practice, it becomes easier. Here’s a step-by-step guide:
1. Prepare Your Piping Bag: Fit a large piping bag with a large star tip. Fill the bag with the dough, making sure to remove any air pockets.
2. Pipe the Crullers: Hold the piping bag vertically above the oil, about 1 inch away. Pipe a ring about 3-4 inches in diameter, then pipe another circle inside the first to create a doughnut shape.
3. Release and Fry: Release the pressure on the piping bag to cut the stream of dough. Carefully let the cruller slide into the oil. Repeat with additional crullers, ensuring not to overcrowd the pot.
Tips for Ensuring Even Frying and Preventing Cruller Deformation
To achieve perfectly formed crullers, consider these tips:
– Do Not Overcrowd: Fry only a few crullers at a time. Overcrowding can lower the oil temperature and cause uneven cooking.
– Monitor the Temperature: Keep an eye on the oil temperature throughout the frying process and adjust the heat as needed to maintain a steady 350°F.
– Turn Gently: Using a slotted spoon, gently turn the crullers halfway through frying to ensure they brown evenly on both sides.
– Drain Properly: Once golden brown, remove the crullers from the oil and let them drain on a paper towel-lined plate to remove excess oil.
Creating the Strawberry Glaze
Step-by-Step Instructions for Making the Strawberry Glaze
The strawberry glaze adds a beautiful finish to your crullers, enhancing both flavor and appearance. Here’s how to create it:
1. Ingredients:
– 1 cup fresh strawberries, hulled and chopped
– 1 cup powdered sugar
– 1-2 tablespoons milk or water (as needed)
– 1 teaspoon vanilla extract
2. Make the Strawberry Purée: In a blender, combine the chopped strawberries and blend until smooth. Strain through a fine-mesh sieve to remove seeds for a smoother glaze if desired.
3. Mix the Glaze: In a bowl, whisk together the strawberry purée, powdered sugar, and vanilla extract. Gradually add milk or water until the desired consistency is reached.
4. Adjust Consistency: If the glaze is too thick, add more liquid, a teaspoon at a time. If it’s too thin, add more powdered sugar until you achieve a thick, pourable glaze that coats the back of a spoon.
Importance of Fresh Strawberry Purée and Its Impact on Flavor
Using fresh strawberries for the purée is essential. Fresh strawberries provide a vibrant flavor and natural sweetness that elevates the glaze. The bright color and natural acidity from fresh strawberries also contribute to a well-balanced glaze that complements the sweetness of the crullers.
Garnishing and Serving Suggestions
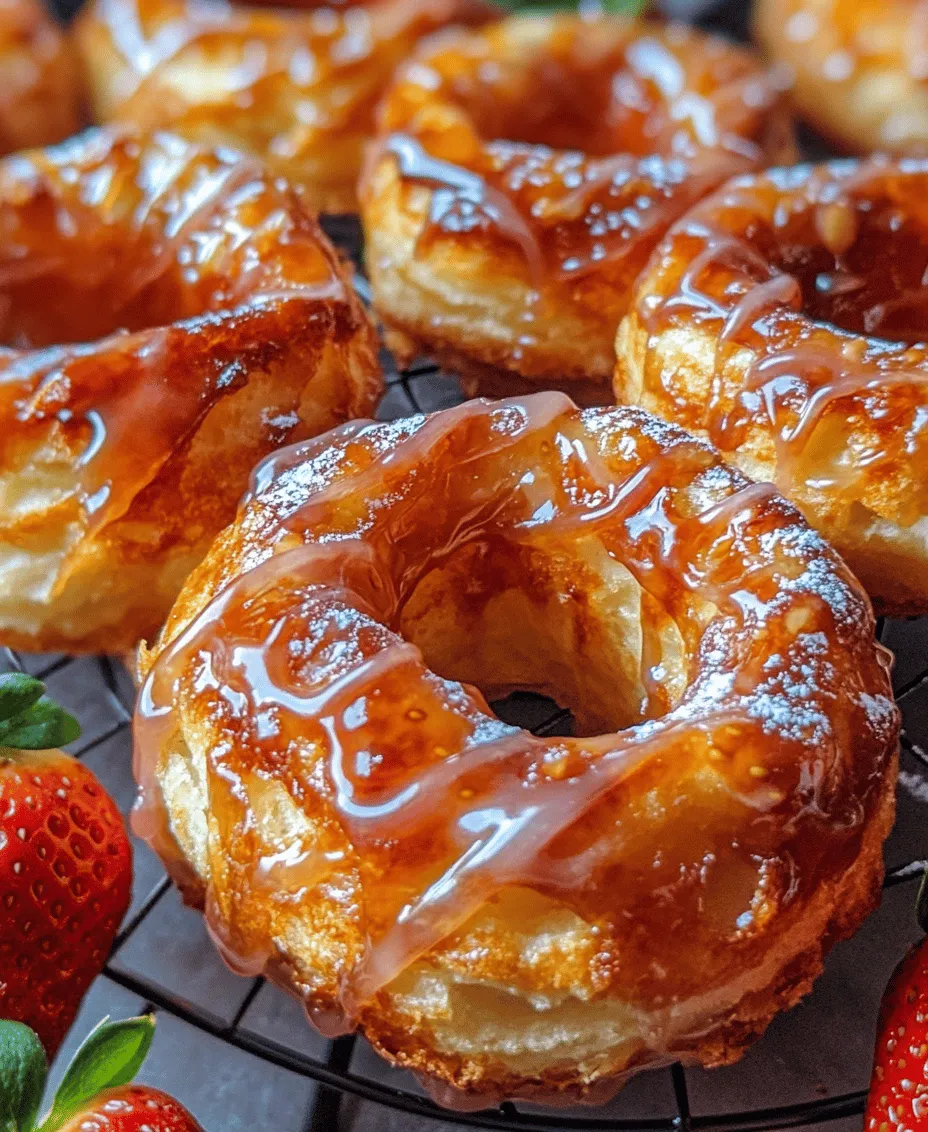
How to Properly Dip Crullers in the Glaze
To achieve a beautiful glaze on your crullers, follow these steps:
1. Cool the Crullers: Allow the crullers to cool for a few minutes after frying. This prevents the glaze from melting off.
2. Dip Technique: Hold each cruller by the edges and dip the top half into the glaze. Rotate it gently to ensure even coverage.
3. Drip Off Excess: Lift the cruller out of the glaze and allow any excess to drip off. Place it on a wire rack to let the glaze set.
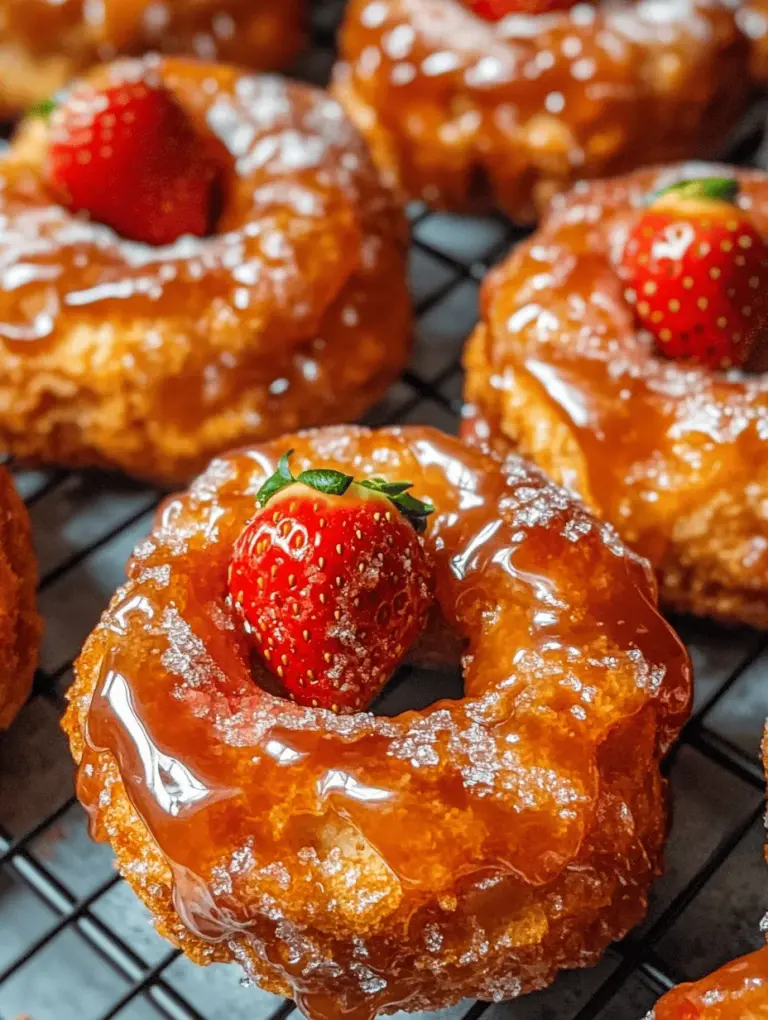
Ideas for Garnishing with Fresh Strawberries
To enhance the presentation, consider garnishing your crullers with fresh strawberries:
– Slice Strawberries: Thinly slice fresh strawberries and arrange them around the crullers on a serving plate.
– Strawberry Compote: Create a simple strawberry compote by simmering chopped strawberries with a bit of sugar and lemon juice until soft. Drizzle this over the crullers for extra flavor.
– Mint Leaves: Add a pop of color by decorating with fresh mint leaves alongside the strawberries.
Presentation Tips for Making the Dessert Visually Appealing
The visual appeal of your crullers can enhance the overall dining experience. Here are some presentation tips:
– Serving Plate: Use a white or light-colored plate to make the vibrant strawberry glaze stand out.
– Height Variation: Stack a couple of crullers slightly offset from one another to create height on the plate.
– Dusting: For an elegant touch, lightly dust the plate with powdered sugar before arranging the crullers.
Nutritional Information
Breakdown of Nutritional Values Per Serving
While delicious, it’s important to be mindful of the nutritional content of strawberry glazed French crullers. Here’s a general breakdown per cruller (based on standard recipe yields):
– Calories: Approximately 200 calories
– Fat: 10g
– Carbohydrates: 30g
– Sugar: 12g
– Protein: 2g
Discussion on Indulgence and Moderation in Desserts
Desserts like crullers can be a delightful indulgence. Enjoying them occasionally, as part of a balanced diet, is perfectly acceptable. The key is to savor each bite and appreciate the effort that goes into making them.
Potential Adjustments for Healthier Alternatives
If you’re looking for a lighter version of this treat, consider the following adjustments:
– Use Whole Wheat Flour: Substitute half of the all-purpose flour with whole wheat flour for added fiber.
– Reduce Sugar: Decrease the amount of sugar in the glaze by using a sugar substitute or natural sweeteners like honey or maple syrup.
– Baking Instead of Frying: For a healthier option, bake the crullers instead of frying them. Pipe the dough onto a baking sheet and bake at 375°F for about 15-20 minutes until golden.
Conclusion
Making strawberry glazed French crullers is not just about the final product; it’s an experience that brings joy and satisfaction. The delightful crunch of the cruller combined with the sweet, vibrant glaze creates a pastry that is hard to resist.
We encourage you to try this recipe, embrace the process, and share the delicious results with your loved ones. Cooking and baking can be a wonderful way to connect, celebrate, and create lasting memories. Homemade pastries remain a cherished part of culinary traditions, and each cruller you make is a testament to your skills and creativity in the kitchen. So roll up your sleeves, gather your ingredients, and dive into the delightful world of crullers!