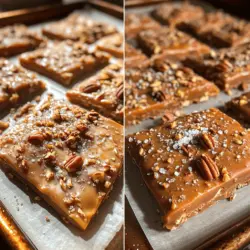
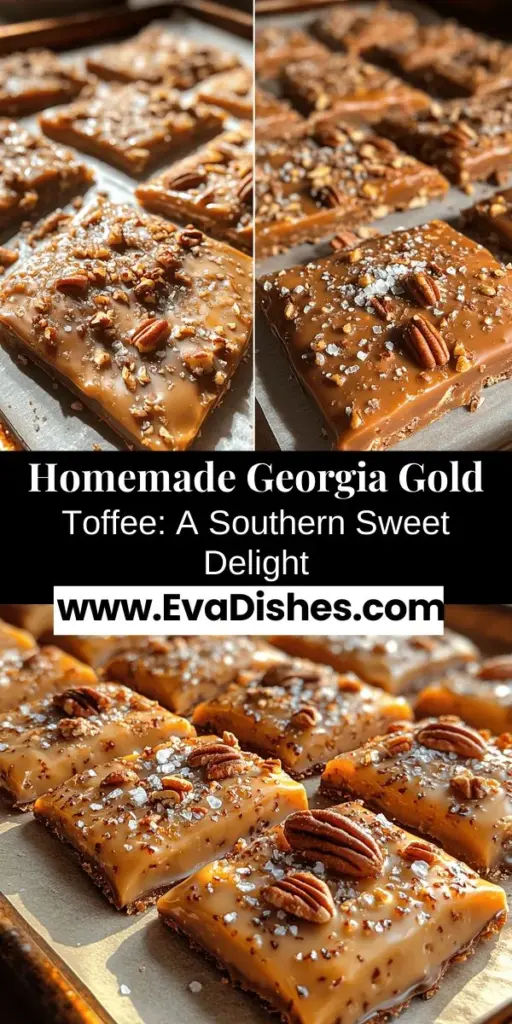
In the world of confections, few treats can rival the delightful crunch and rich flavor of homemade toffee. Among the myriad varieties, Georgia Gold Toffee stands out as a regional favorite, celebrated for its buttery taste, nutty pecans, and a luscious chocolate coating. This sweet indulgence is not just a dessert; it is a part of Southern tradition, evoking memories of family gatherings, holidays, and special occasions. With its golden hue and satisfying crunch, Georgia Gold Toffee has become synonymous with warmth and hospitality in the heart of Georgia.
As we embark on the journey of crafting this delectable treat, we will delve into the intricacies of the recipe, offering a comprehensive guide along with fascinating insights into the origins of toffee, tips for perfecting your creation, and creative serving suggestions. Whether you are a seasoned confectioner or a novice in the kitchen, this guide will equip you with the knowledge and confidence to create your own batch of Georgia Gold Toffee.
The Allure of Toffee: A Sweet Tradition
Exploring the History of Toffee
Toffee has a storied history that dates back centuries, with its roots believed to lie in the United Kingdom. The word “toffee” is thought to have originated in the 19th century, and the confection itself has evolved over time, with various regions developing unique recipes and techniques. In the Southern United States, toffee took on a special significance, often associated with celebrations and cherished family recipes passed down through generations.
Georgia Gold Toffee, in particular, embodies the essence of Southern hospitality. The incorporation of local ingredients, such as pecans, reflects the agricultural bounty of the region and adds a distinctive flavor profile that sets it apart from other toffees. This treat is often made during the holidays, sharing the joy of creating and indulging in sweet confections with loved ones. As you prepare to make your own Georgia Gold Toffee, you will not only be creating a delicious dessert but also participating in a long-standing tradition that celebrates the sweetness of life in the South.
Understanding the Ingredients
To create the perfect batch of Georgia Gold Toffee, it is crucial to understand the role each ingredient plays in the overall composition of the treat. The quality of your ingredients directly impacts the flavor, texture, and success of your toffee. Here’s a breakdown of the essential components:
– Butter: The star ingredient of any toffee recipe, butter brings richness and a creamy texture to the confection. It’s important to use high-quality unsalted butter for optimal flavor.
– Granulated Sugar: This is the primary sweetener and contributes to the caramelization process. It is vital for achieving that signature golden color and crunch.
– Brown Sugar: Adding depth and a hint of molasses flavor, brown sugar enhances the toffee’s taste profile. The combination of granulated and brown sugar creates a balanced sweetness.
– Water: Used to dissolve the sugars, water helps control the cooking process, ensuring even heat distribution and preventing the sugars from crystallizing prematurely.
– Pecans: A hallmark of Georgia cuisine, pecans lend a nutty flavor and a delightful crunch to the toffee. Toasting the nuts enhances their flavor and texture, making them an essential addition.
– Vanilla Extract: This ingredient adds a warm, aromatic note that elevates the overall flavor of the toffee, making it even more irresistible.
– Chocolate: The final layer of indulgence, chocolate coating not only enhances the taste but also provides a beautiful finish that complements the buttery toffee.
By carefully selecting high-quality ingredients, you set the foundation for a successful toffee-making experience. Remember, the better the ingredients, the better your final product will be.
Crafting Georgia Gold Toffee: A Step-by-Step Guide
Essential Equipment for Making Toffee
Before diving into the toffee-making process, it is essential to gather the necessary kitchen tools. The right equipment will make the experience smoother and more enjoyable. Here’s a list of must-have items:
1. Heavy-bottomed Saucepan: A heavy-bottomed saucepan is crucial for even heat distribution and preventing the sugars from burning. Look for a pan that is at least 2-3 quarts in size to accommodate the mixture.
2. Candy Thermometer: A reliable candy thermometer is essential for monitoring the temperature of the toffee as it cooks. This tool ensures you reach the right temperature for the perfect texture.
3. Wooden Spoon or Silicone Spatula: Use a sturdy wooden spoon or a heat-resistant silicone spatula for stirring the mixture. This will help prevent any sticking and ensure even cooking.
4. Baking Sheet: A rimmed baking sheet is necessary for spreading the toffee. Make sure it is large enough to accommodate the entire batch.
5. Parchment Paper: Lining your baking sheet with parchment paper prevents the toffee from sticking and makes cleanup a breeze.
6. Cooling Rack: After pouring the toffee onto the baking sheet, a cooling rack will help it cool evenly and quickly.
By having all your equipment ready before you start, you can focus on the cooking process and ensure everything goes smoothly.
Preparing Your Baking Sheet: Tips for Success
Properly preparing your baking sheet is a crucial step in the toffee-making process. Start by lining your rimmed baking sheet with parchment paper, ensuring it covers the entire bottom and edges. This will prevent the toffee from sticking and allow for easy removal once it has cooled.
For added insurance, lightly grease the parchment paper with a small amount of butter or cooking spray. This additional step will help ensure that the toffee releases easily without any mess. Once your baking sheet is prepared, set it aside and move on to the next steps of the recipe.
Melting the Butter: The First Step to Toffee Perfection
The first step in crafting your Georgia Gold Toffee is melting the butter. Begin by placing your unsalted butter in your heavy-bottomed saucepan over medium heat. Stir the butter gently as it melts, ensuring it does not burn or brown.
Temperature control is key during this stage. Too high of a heat setting can cause the butter to scorch, imparting a burnt flavor to your toffee. As the butter melts, it will start to bubble and foam slightly. You want to achieve a smooth and creamy consistency without any browning.
Once the butter is completely melted, it’s time to move on to the next step: combining the sugars and water.
Combining Sugars and Water: Creating the Base
With your butter melted, it’s time to introduce the sugars and water to the mix. Add both granulated sugar and brown sugar to the melted butter, followed by a splash of water. Using your wooden spoon or spatula, gently stir the mixture until the sugars are fully dissolved.
This step is critical as it sets the stage for the caramelization process. The water helps to dissolve the sugars and prevents them from crystallizing too early. Continue to stir the mixture over medium heat until it begins to boil.
As the mixture heats, be sure to monitor it closely. You want to ensure that the sugars completely dissolve into the butter without any granules remaining. Once you achieve a smooth mixture, you can proceed to the next phase of cooking the toffee.
Cooking the Toffee: Achieving the Perfect Color and Texture
Cooking the toffee to the right temperature is where the magic happens. After bringing the sugar mixture to a boil, increase the heat to medium-high and allow it to continue boiling without stirring. This is crucial for achieving that desired toffee texture.
Using your candy thermometer, monitor the temperature of the mixture closely. You will want to cook the toffee until it reaches the hard crack stage, which is between 300°F to 310°F (149°C to 154°C). At this point, the sugars will have caramelized, resulting in a beautiful golden-brown color.
As you approach the target temperature, keep a close eye on the mixture. It can go from perfect to burnt in a matter of seconds. As soon as it hits the desired temperature, promptly remove it from the heat to prevent overcooking.
Incorporating Flavor: The Role of Vanilla
Once your toffee has reached the perfect temperature and color, it’s time to add the finishing touch: vanilla extract. Remove the saucepan from the heat and carefully stir in a teaspoon of pure vanilla extract. This addition will enhance the flavor profile of your Georgia Gold Toffee, giving it that signature sweetness and aroma.
Be cautious while adding the vanilla, as the mixture may bubble up slightly. Stir it in thoroughly to ensure an even distribution of flavor throughout the toffee. After incorporating the vanilla, you are ready to pour the toffee onto your prepared baking sheet.
With the first part of our Georgia Gold Toffee recipe set in motion, you are well on your way to creating a classic Southern treat that is sure to impress. Stay tuned for the next steps in this delicious journey, where we will explore pouring the toffee, adding the pecans, and finishing with the chocolate coating. Each step brings us closer to enjoying this rich confection that embodies the essence of Southern sweetness.
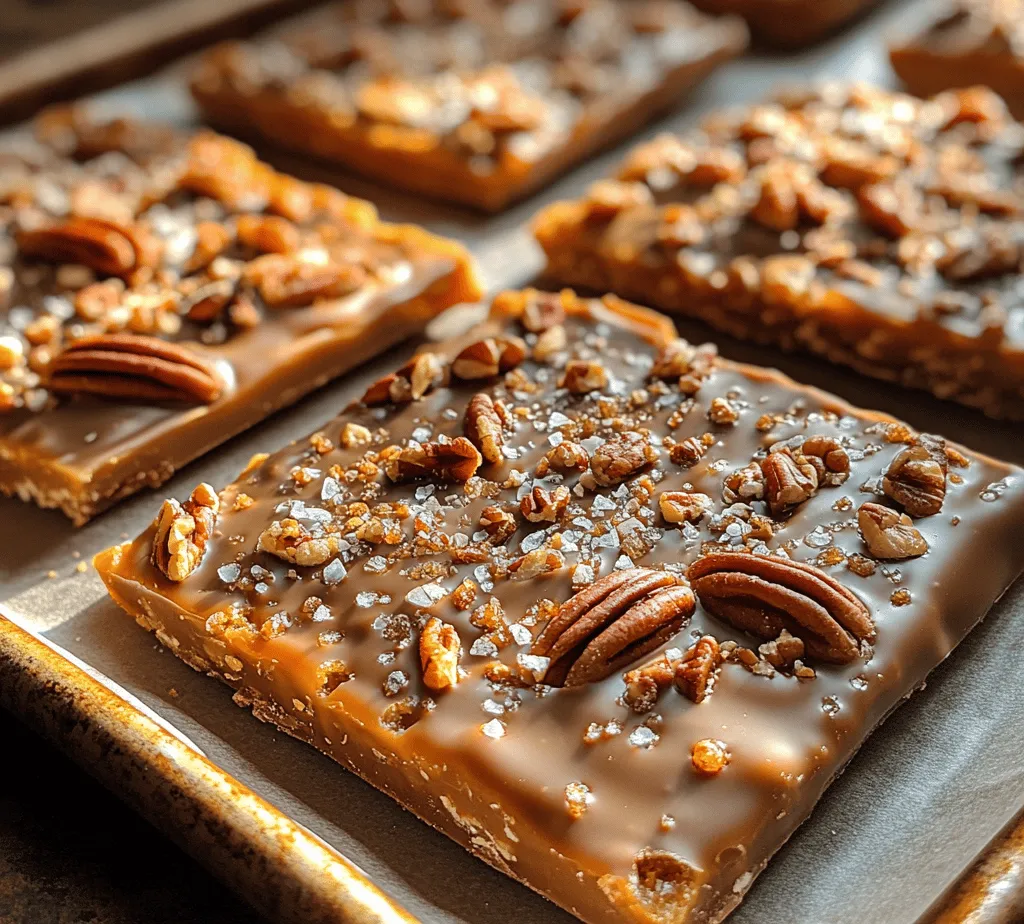
Folding in Pecans: Adding Crunch and Flavor
Once your toffee mixture has reached the perfect amber color, it’s time to fold in the pecans. Pecans not only add a delightful crunch but also contribute a rich, buttery flavor that complements the caramel notes of the toffee. When selecting pecans, consider using toasted ones for an enhanced nutty taste. The toasting process brings out the oils in the nuts, intensifying their flavor and providing an extra layer of complexity to your Georgia Gold Toffee.
To fold in the pecans, gently stir them into the hot toffee using a silicone spatula or a wooden spoon. Ensure that they are evenly distributed throughout the mixture, allowing every piece of toffee to showcase that signature pecan crunch. Be careful not to overmix, as this could cause the mixture to begin cooling too rapidly before you pour it out, which we definitely want to avoid.
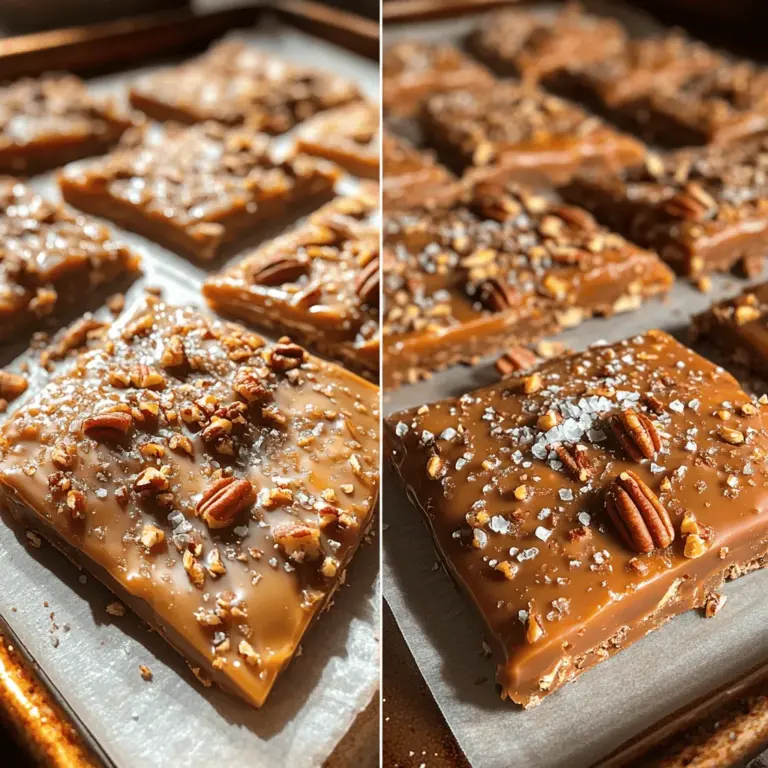
Pouring and Spreading: The Art of Toffee Application
Once the pecans are thoroughly incorporated into the toffee mixture, the next step is pouring and spreading it onto your prepared baking sheet. This step is crucial for achieving a uniform thickness, which is key to ensuring that your toffee sets evenly and has a consistent texture.
Begin by carefully pouring the hot toffee mixture onto the center of the parchment-lined baking sheet. Using an offset spatula or the back of a spoon, gently spread the toffee outward toward the edges of the pan. Work quickly but carefully, as the toffee will begin to cool and harden rapidly. The goal is to create an even layer approximately ¼-inch thick, which will yield a perfect balance of crunch and chewiness once set.
If you find that the toffee is sticking to your spatula, lightly grease it with butter or cooking spray to help it glide smoothly across the surface. Take your time with this step; a well-spread layer will not only look more appealing but will also ensure that each bite has a consistent texture.
Creating the Chocolate Layer: Tips for Melting and Spreading
After pouring and spreading the toffee, it’s time to create the decadent chocolate layer that will crown your confection. For this, you can use semisweet, dark, or even milk chocolate, depending on your personal preference. The key to a smooth, glossy finish lies in how you melt the chocolate.
To melt the chocolate, you have a couple of options. The microwave method is quick and convenient. Simply chop the chocolate into small pieces and place it in a microwave-safe bowl. Heat in 30-second intervals, stirring in between, until the chocolate is fully melted and smooth. Be cautious not to overheat the chocolate, as this can lead to a grainy texture.
Alternatively, you can use a double boiler method, which provides more control over the melting process. Fill the bottom pot with water and bring it to a gentle simmer. Place your chopped chocolate in the top pot, making sure it doesn’t touch the water. Stir occasionally until melted and silky.
Once the chocolate is melted, immediately pour it over the toffee layer. Using an offset spatula, gently spread the chocolate to cover the entire surface of the toffee. This will create a beautiful, glossy finish that not only enhances the aesthetic appeal of the Georgia Gold Toffee but also adds a delightful richness to every bite.
Garnishing with Sea Salt: A Touch of Elegance
The final touch to elevate your Georgia Gold Toffee is a sprinkle of flaky sea salt. This seemingly simple addition transforms your toffee from delicious to extraordinary. The salt enhances the sweetness of the toffee and chocolate, creating a complex flavor profile that is both indulgent and satisfying.
After spreading the melted chocolate, sprinkle the flaky sea salt generously over the top while the chocolate is still warm. This will allow the salt to adhere to the chocolate, ensuring that each piece of toffee boasts that perfect salty-sweet balance. Not only does the sea salt enhance the flavor, but it also adds a touch of visual appeal, contrasting beautifully against the rich brown chocolate.
Cooling and Setting: The Final Steps
Understanding the Cooling Process
Now that your toffee is beautifully layered with chocolate and topped with sea salt, it’s time to let it cool and set. Cooling is a crucial step that affects both the texture and flavor of your Georgia Gold Toffee. As the toffee cools, it will harden into that perfect crunchy texture we all love.
For the best results, allow the toffee to cool at room temperature for about 1 to 2 hours. If you are eager to speed up the process, you can place it in the refrigerator for about 30 minutes. However, avoid rushing the cooling process, as this could lead to a less desirable texture. You want to achieve that perfect snap when you break the toffee.
Breaking and Serving Georgia Gold Toffee
Once your Georgia Gold Toffee has completely cooled and set, it’s time to break it into pieces. To do this, remove the entire sheet of toffee from the baking sheet, lifting it by the edges of the parchment paper. Place it on a cutting board, and using a sharp knife or a heavy-duty mallet, gently break the toffee into irregular pieces. This rustic look adds to the charm of homemade treats.
For serving, consider presenting the toffee in a decorative tin or a clear cellophane bag tied with a ribbon. It makes for a wonderful gift or an impressive addition to any dessert table. If you’re feeling creative, you can also layer the pieces in a glass jar, which not only showcases your delicious creation but also serves as an eye-catching centerpiece.
Variations and Creative Twists on Georgia Gold Toffee
Exploring Flavor Additions and Substitutions
While the classic Georgia Gold Toffee is undoubtedly delightful on its own, there’s always room for experimentation. Consider incorporating different types of nuts, such as almonds or walnuts, to create a unique flavor profile. You might also try mixing in dried fruits like cranberries or apricots for a fruity twist that adds both color and taste.
In terms of chocolate, think beyond the traditional. White chocolate or even flavored chocolates, like mint or orange, can add an unexpected and delightful surprise. For an extra layer of flavor, consider infusing the toffee with spices such as cinnamon or nutmeg, which can elevate the overall taste experience.
Seasonal and Holiday Themes
The versatility of Georgia Gold Toffee makes it perfect for seasonal and holiday themes. During the fall, you can add pumpkin spice to the toffee mix for a festive touch. For the holidays, consider packaging the toffee in holiday-themed bags or boxes adorned with seasonal decorations. Adding a few festive sprinkles or colored sugar to the chocolate layer can provide a cheerful holiday flair.
You can also create themed variations by adjusting the nuts and flavors to match different seasons. For instance, during summer, consider adding toasted coconut for a tropical vibe, while in winter, a hint of peppermint can evoke the comforting essence of the season.
Conclusion: Enjoying the Sweet Rewards of Homemade Toffee
Making Georgia Gold Toffee is not just about creating a delicious treat; it’s a heartfelt experience that embodies the warmth and sweetness of Southern hospitality. The rich flavors of toffee combined with crunchy pecans, smooth chocolate, and a sprinkle of flaky sea salt come together to create a confection that is sure to impress.
Whether you’re indulging in this homemade delight yourself or sharing it with friends and family, each piece of toffee tells a story of love and craftsmanship. The joy of creating something from scratch, combined with the satisfaction of seeing others enjoy your creation, makes this recipe a cherished tradition.
So, roll up your sleeves and dive into the delightful world of homemade Georgia Gold Toffee. With its irresistible taste and the ability to be customized for any occasion, this recipe is sure to become a favorite in your kitchen. Whether enjoyed as a personal treat or gifted to loved ones, Georgia Gold Toffee captures the essence of togetherness and celebration, making every bite a sweet reward.