Introduction
Apple pie is more than just a dessert; it’s a symbol of comfort, tradition, and the heart of American culture. Often referred to as “American as apple pie,” this classic dish has been passed down through generations, embodying the warmth of home and the love of family. There’s something incredibly nostalgic about the smell of apples and cinnamon wafting through the kitchen, reminiscent of family gatherings, holidays, and cozy evenings spent together.
Growing up, my fondest memories revolve around my grandmother’s kitchen, where she would whip up her classic apple pie every fall. The recipe was simple yet perfect, a blend of sweet and tart flavors encased in a flaky, buttery crust. Each bite transported me back to my childhood, where laughter and love filled the air, and the kitchen was always bustling with activity. It was in her kitchen that I learned the importance of quality ingredients and the magic of homemade cooking. Today, I’m excited to share Grandma’s classic apple pie recipe with you, a recipe that captures the essence of those cherished moments while delivering a slice of pure deliciousness.
In this guide, we will walk through the process of creating this beloved dessert step by step. From the flaky pie crust to the perfectly spiced apple filling, you’ll learn how to create a pie that not only tastes fantastic but also tells a story of love and nostalgia. Let’s dive into the ingredients and techniques that make this apple pie a timeless classic.
Understanding the Ingredients
The Pie Crust
The foundation of a great apple pie lies in its crust. A flaky, buttery crust is essential for achieving that perfect balance of texture and flavor. Here are the key ingredients that come together to create this delightful pie crust:
– Flour: All-purpose flour is the backbone of the crust. It provides structure and stability, ensuring that the crust holds its shape during baking. For the best results, use unbleached all-purpose flour, which has a higher protein content, contributing to a sturdier crust.
– Salt: A pinch of salt enhances the overall flavor of the crust. It may seem like a minor ingredient, but it plays a crucial role in balancing the sweetness of the pie.
– Sugar: Adding a bit of sugar to the crust not only sweetens it slightly but also aids in browning, giving the crust a beautiful golden color as it bakes.
– Butter: Unsalted butter is essential for achieving that rich, buttery flavor. The key to a flaky crust is using cold butter, which, when mixed into the flour, creates pockets of fat that expand during baking.
– Ice Water: The final ingredient, ice water, is what brings the dough together. The cold temperature prevents the butter from melting before it goes into the oven, ensuring a flaky texture.
Understanding these ingredients is vital, as each one plays a unique role in the final outcome of your pie crust. The combination of cold butter and ice water is particularly important; they work together to create a light and flaky texture that is a hallmark of a good pie crust.
The Apple Filling
The filling is where the magic truly happens in an apple pie. For Grandma’s classic recipe, the choice of apples is critical. We recommend using Granny Smith apples, known for their tartness. This tartness is the perfect counterbalance to the sweetness of the sugar and the warmth of the spices, making each bite a delightful experience.
In addition to the apples, here are the other ingredients that come together to create the perfect apple filling:
– Lemon Juice: A splash of lemon juice brightens the filling and enhances the flavors of the apples. It also helps to prevent the apples from browning too quickly.
– Sugar: Depending on your preference for sweetness, granulated sugar is added to balance the tartness of the apples. You can adjust the amount to suit your taste.
– Cinnamon and Nutmeg: These warm spices are what make apple pie feel like home. They add depth and complexity to the filling, enhancing the natural flavors of the apples.
– Flour: A bit of flour is added to help thicken the filling as it bakes. It absorbs the juices released by the apples, creating a perfectly cohesive filling that doesn’t run when you cut into the pie.
With these ingredients in mind, you’re well on your way to creating a delicious apple filling that will make your pie unforgettable.
Preparing the Perfect Pie Crust
Now that we’ve covered the ingredients, it’s time to get hands-on and prepare the pie crust. Follow these detailed steps to ensure that your crust turns out perfectly every time.
Mixing the Dry Ingredients
Start by gathering your ingredients and tools. You’ll need a large mixing bowl, a whisk, and a pastry cutter or fork.
1. Combine Flour, Salt, and Sugar: In the mixing bowl, whisk together 2 ½ cups of all-purpose flour, 1 teaspoon of salt, and 1 tablespoon of granulated sugar. This step is crucial as it ensures that the salt and sugar are evenly distributed throughout the flour, preventing any clumps.
Incorporating the Butter
Next, it’s time to bring in the cold butter, which is key to achieving that flaky texture.
2. Add Cold Butter: Cut 1 cup (two sticks) of unsalted cold butter into small cubes. Add the butter to the flour mixture.
3. Work the Butter into the Flour: Using a pastry cutter, fork, or your fingertips, gently mix the butter into the flour mixture. The goal is to create a crumbly texture, with pea-sized pieces of butter remaining. Be careful not to overwork the dough; you want to see bits of butter for that flaky finish.
Forming the Dough
Once the butter is well incorporated, it’s time to form the dough.
4. Add Ice Water: Gradually add ice water, one tablespoon at a time, starting with about 6 tablespoons. Use a fork to mix the water into the flour until the dough just begins to hold together. You may not need all the water, so add it gradually.
5. Bring the Dough Together: Once the dough is slightly moistened, use your hands to gently knead it a few times in the bowl. Form the dough into a ball, then flatten it into a disk shape. This will help with rolling it out later.
6. Chill the Dough: Wrap the disk of dough in plastic wrap and refrigerate it for at least 1 hour, or up to overnight. Chilling the dough is essential, as it allows the gluten to relax and the butter to firm up, which helps to achieve that desired flaky crust.
Creating the Delicious Apple Filling
While the dough is chilling, you can prepare the apple filling. This step will set the stage for your pie to shine.
Preparing the Apples
1. Peel, Core, and Slice: Start with about 6 cups of Granny Smith apples, which is approximately 6-8 medium-sized apples. Using a peeler, remove the skin from each apple, then core and slice them into thin wedges. Aim for uniform thickness to ensure even cooking.
2. Toss with Lemon Juice: As you prepare the apples, toss them with 1 tablespoon of lemon juice to prevent browning and add brightness to the flavor.
Mixing the Filling Ingredients
Once all the apples are prepared, it’s time to combine them with the other filling ingredients.
3. Combine Ingredients: In a large mixing bowl, add the sliced apples, ¾ cup of granulated sugar, 1 tablespoon of lemon juice, 1 teaspoon of ground cinnamon, ¼ teaspoon of ground nutmeg, and 2 tablespoons of all-purpose flour.
4. Mix Well: Stir the mixture gently to coat the apples evenly with the sugar, spices, and flour. Allow the filling to sit for about 15-20 minutes to let the flavors meld together and the apples to release some of their juices.
With the pie crust prepared and the apple filling ready, you are now equipped to assemble your pie. This step is where the magic of Grandma’s classic apple pie truly comes to life, and the anticipation builds as you prepare to bake a dessert that is sure to delight friends and family alike.
Stay tuned for the next part of the guide, where we will cover how to assemble and bake this timeless dessert, transforming simple ingredients into a comforting, delicious apple pie that evokes the cherished memories of Grandma’s kitchen.
Importance of Letting the Mixture Sit to Meld Flavors
Before you dive into assembling your pie, it’s essential to let the apple filling sit for a bit. This resting period allows the sugars and spices to meld beautifully, enhancing the flavor profile of your filling. When the apples sit with the sugar, they release their natural juices, creating a rich syrup that will soak into the crust during baking. This not only intensifies the flavor but also prevents your pie from becoming too watery, which can compromise the texture of the crust.
Assembling the Pie
Rolling Out the Dough
Once your apple mixture has had time to meld, it’s time to assemble your pie. Begin by rolling out your chilled pie dough. Dust your work surface and rolling pin lightly with flour to prevent sticking. Take one disc of dough and place it in the center of your floured surface. Using even pressure, start rolling from the center outward, turning the dough a quarter turn after each roll to maintain a circular shape.
Tips for Rolling Out the Dough to the Proper Thickness
Aim for a thickness of about 1/8 inch. Too thin and your crust may tear or burn; too thick and it may not cook through properly. If you find the dough sticking, add a little more flour to your surface and rolling pin. Keep your dough cold and avoid overworking it, as this can lead to a tough crust.
Techniques for Transferring the Dough to the Pie Plate Without Tearing
Once your dough is rolled out, it’s time to transfer it to the pie plate. To do this, gently lift the edge of the dough and drape it over your rolling pin. Carefully roll the dough onto the pin and then unroll it over the pie plate. If any edges tear, you can easily patch them with excess dough. Once the crust is in place, gently press it into the dish, ensuring there are no air pockets underneath.
Filling the Pie
With the bottom crust in place, it’s time to fill it with your beautifully prepared apple mixture. Make sure to evenly distribute the filling, allowing it to mound slightly in the center for an appealing look. This will help the filling cook evenly and achieve that perfect texture. If you have any leftover juices from the apple mixture, pour them evenly over the apples to enhance flavor and moisture.
Creating the Top Crust
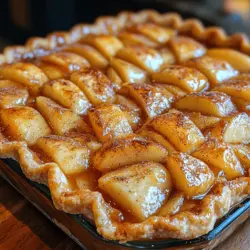
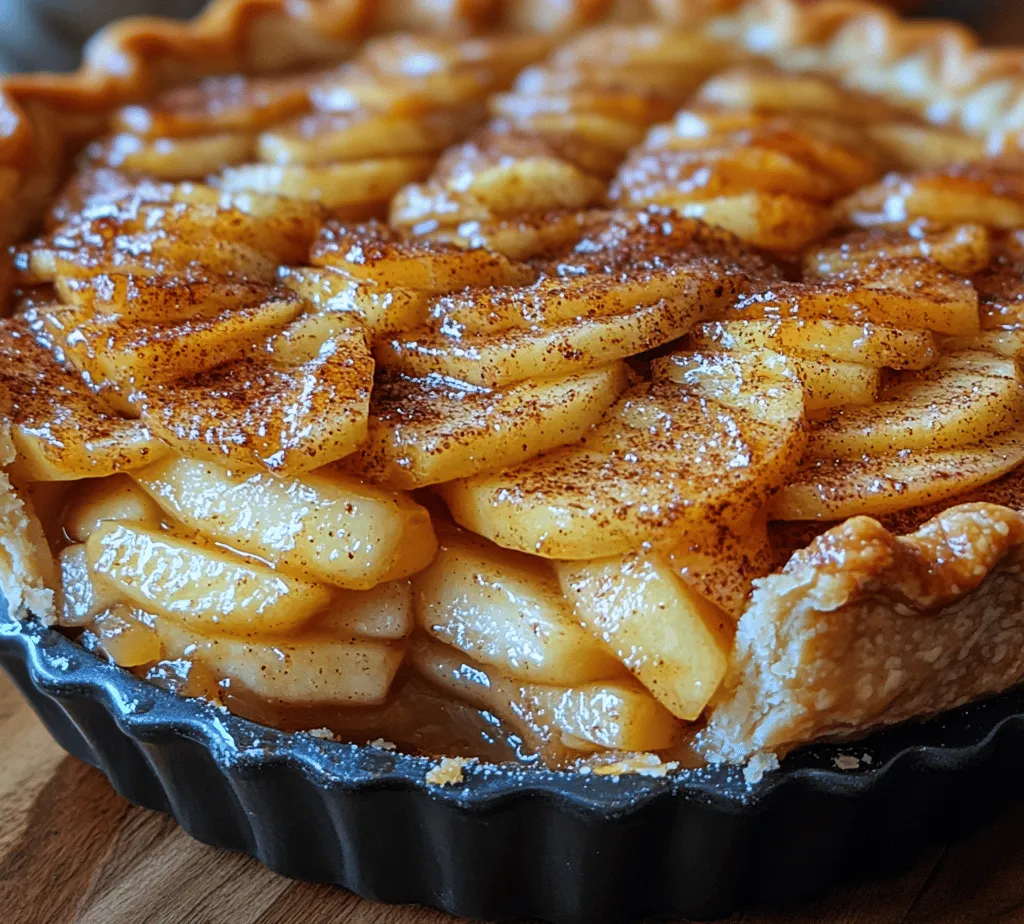
Next, roll out the second disc of dough using the same techniques as before. Once rolled to the desired thickness, place it over the filled pie. You can choose to create a traditional full crust or cut slits to form a lattice top for a beautiful presentation. If you opt for a full crust, remember to cut several slits in the top to allow steam to escape.
Importance of Sealing the Edges and Cutting Slits for Steam Escape
Sealing the edges effectively will prevent the filling from bubbling over during baking. To seal, press the edges of the top crust down onto the bottom crust, crimping them together with your fingers or a fork for a decorative touch. The slits you cut into the top are crucial, as they release steam and help the filling cook evenly, ensuring a perfectly baked pie.
Achieving the Perfect Golden Finish
Preparing the Egg Wash
To achieve that beautiful golden crust, prepare an egg wash by whisking together one egg with a tablespoon of water or milk. This mixture will give your crust a shiny, appealing finish. Using a pastry brush, gently apply the egg wash over the surface of the crust, taking care not to let it drip down the sides.
Baking the Pie
Preheat your oven to 425°F (220°C). Place the pie on a baking sheet lined with parchment paper to catch any drips. Bake the pie for 15 minutes at this high temperature, which helps to set the crust. After 15 minutes, reduce the temperature to 350°F (175°C) and continue baking for an additional 30-40 minutes. The pie is done when the crust is golden brown, and you can see bubbling juices through the slits.
Importance of Monitoring the Pie for Even Browning
Keep an eye on the pie as it bakes. If the edges start to brown too quickly, shield them with strips of aluminum foil to prevent burning while the rest of the pie continues to bake. It’s essential to ensure even browning for both aesthetic appeal and taste.
Cooling and Serving the Pie
Cooling Time
Once your pie is beautifully baked, it’s crucial to let it cool for at least two hours. This cooling time allows the filling to set properly, making it easier to slice and serve. Cutting into the pie too early may result in a runny filling, so patience is key here.
Serving Suggestions
There are countless ways to serve Grandma’s classic apple pie. A scoop of vanilla ice cream on top adds a delightful creaminess that complements the warm spices. Alternatively, a dollop of freshly whipped cream can elevate your pie to a whole new level. For a more rustic touch, consider serving it with a slice of sharp cheddar cheese for a sweet and savory combination.
If you’re looking to store any leftovers, allow the pie to cool completely before covering it with plastic wrap or aluminum foil. It can be kept at room temperature for up to two days or in the refrigerator for up to a week. For longer storage, consider freezing individual slices, wrapped tightly in plastic wrap and placed in a freezer-safe container.
Conclusion
Making Grandma’s classic apple pie is not just about baking; it’s about creating a comforting experience filled with the aroma of cinnamon, sugar, and baked apples wafting through your home. This timeless recipe is not only a dessert; it’s a way to connect with generations of family traditions and memories. Each slice shared among loved ones becomes a cherished moment, reminding us of the simplicity and joy of homemade treats.
As you embark on this baking adventure, take the time to enjoy the process. The laughter, the aromas, and the anticipation of that first slice all contribute to the magic of homemade pie. So gather your family, roll up your sleeves, and create this classic dessert that will continue to delight for generations to come. Happy baking!