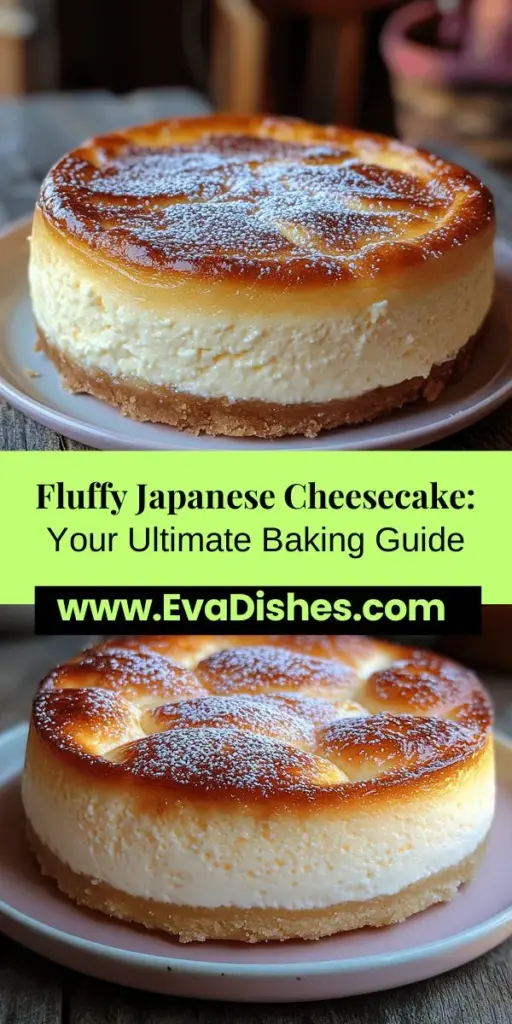
Introduction
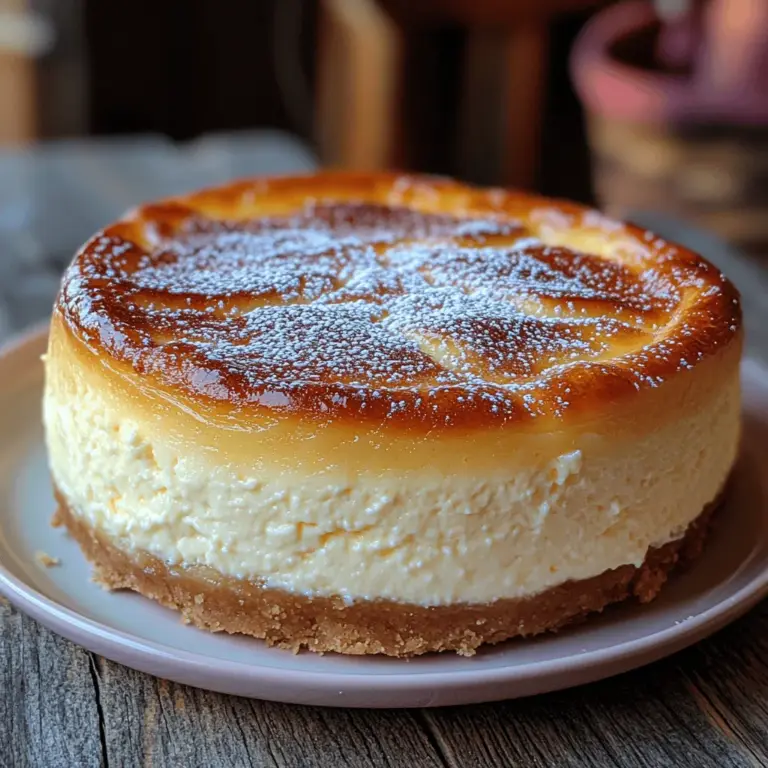
Japanese cheesecake, often referred to as “soufflé cheesecake,” has taken the dessert world by storm with its unique characteristics that set it apart from traditional cheesecakes. This delightful treat is known for its ethereal, airy texture and subtle sweetness, making it a favorite among dessert lovers. Unlike its denser Western counterpart, Japanese cheesecake is incredibly light, almost like a fluffy cloud, yet it retains the rich flavor of cream cheese. This dessert’s appeal lies not only in its taste but also in its visually stunning presentation, which has captured the hearts of bakers and food enthusiasts alike.
Mastering the art of Japanese cheesecake is a rewarding experience for both novice and seasoned bakers. The process may seem daunting at first, but with the right guidance and a bit of patience, anyone can achieve a fluffy, melt-in-your-mouth cheesecake that will impress family and friends. This article will take you through the journey of creating the perfect Heavenly Light Japanese Cheesecake, from understanding its origins to the essential ingredients and step-by-step instructions for success.
Understanding Japanese Cheesecake
The origins of Japanese cheesecake can be traced back to the 1960s, when it emerged as a popular dessert in Japan. It is believed that the concept of this light and fluffy cheesecake was inspired by European cheesecakes, yet the Japanese version has evolved into a distinct delicacy that reflects the country’s culinary finesse. This dessert holds cultural significance, often enjoyed during special occasions and gatherings, symbolizing hospitality and warmth.
When comparing Japanese cheesecake to traditional cheesecakes, several key differences become apparent. Traditional cheesecakes are typically dense and creamy, often made with a graham cracker crust and baked in a water bath to ensure a smooth texture. On the other hand, Japanese cheesecake is characterized by its soufflé-like consistency, which is achieved through the careful folding of whipped egg whites into the cream cheese mixture. The result is a lighter flavor profile, often described as subtly sweet with a hint of tanginess from the cream cheese.
In recent years, Japanese cheesecake has gained immense popularity, especially in the age of social media. Food bloggers and influencers have showcased this dessert’s enchanting appearance and unique texture, leading to a surge in home bakers eager to recreate the magic in their own kitchens. Its rise to fame on platforms like Instagram and TikTok has helped solidify its place in modern dessert trends, inspiring a new generation of bakers to experiment with this delightful recipe.
Essential Ingredients for Heavenly Light Japanese Cheesecake
To create a Heavenly Light Japanese Cheesecake, you will need a selection of essential ingredients, each playing a crucial role in achieving the desired texture and flavor. Let’s take a closer look at these ingredients:
– Cream Cheese: This is the foundation of the cheesecake, providing its rich flavor and creamy texture. It’s essential to use high-quality cream cheese for the best results.
– Unsalted Butter: Butter adds richness and moisture to the cheesecake, contributing to that melt-in-your-mouth experience. Using unsalted butter allows for better control of the overall saltiness of the dessert.
– Eggs: Eggs are vital for structure and texture. In this recipe, you will separate the yolks from the whites to maximize fluffiness. The yolks add richness, while the whipped egg whites create the airy lift.
– Granulated Sugar: Sugar is essential for achieving the right level of sweetness. It also helps stabilize the egg whites during whipping, contributing to the cake’s light texture.
– Whole Milk: Whole milk enhances the flavor and moisture content of the cheesecake, making it rich without being heavy.
– Cake Flour and Cornstarch: These two ingredients are key to ensuring a light and tender texture. Cake flour has a lower protein content compared to all-purpose flour, which helps prevent the cheesecake from becoming too dense. Cornstarch adds additional lightness and helps stabilize the batter.
– Cream of Tartar (Optional): This ingredient is used to stabilize whipped egg whites, helping them hold their shape and volume. While it’s not strictly necessary, it can improve the overall stability of your cheesecake.
– Salt: A pinch of salt enhances the overall flavor, balancing the sweetness and bringing out the richness of the cream cheese.
Preparing for Success: Tools and Equipment Needed
Before diving into the baking process, it’s crucial to gather the right tools and equipment to ensure a smooth experience. Here’s a list of essential kitchen tools you’ll need:
– Mixing Bowls: A set of mixing bowls in various sizes is essential for combining ingredients and separating components like egg yolks and whites.
– Electric Mixer: An electric mixer will make it easier to whip the egg whites to stiff peaks, which is fundamental for achieving that light texture.
– Double Boiler Setup: This can be achieved by placing a heatproof bowl over a pot of simmering water. The gentle heat will help melt the cream cheese and butter without risk of burning.
– 7-Inch Round Cake Pan: A 7-inch round cake pan is ideal for this recipe, providing the perfect size for a tall, fluffy cheesecake.
– Aluminum Foil: Used to wrap the cake pan for the water bath, aluminum foil helps create a steam effect that keeps the cheesecake moist during baking.
– Baking Dish for the Water Bath: A larger baking dish will be used to hold water, creating a humid environment for baking the cheesecake. This method prevents the cake from cracking and contributes to its delicate texture.
– Parchment Paper: Lining the bottom of the cake pan with parchment paper ensures easy removal of the cheesecake once it’s baked and cooled.
Step-by-Step Instructions for the Perfect Cheesecake
Preparing the Baking Pan
The first step to achieving a flawless Heavenly Light Japanese Cheesecake is preparing your baking pan. Start by greasing the sides and bottom of the 7-inch round cake pan with butter or cooking spray. This will help prevent sticking. Next, cut a piece of parchment paper to fit the bottom of the pan, placing it on top of the greased surface. This additional layer will ensure that your cheesecake slides out easily once it’s fully cooled.
After preparing the base, wrap the outside of the pan in aluminum foil, ensuring it covers the bottom and sides completely. This step is essential as it will protect the cheesecake from water seeping in during the water bath process.
Setting Up the Water Bath
The water bath is a crucial component to baking Japanese cheesecake, as it provides a moist environment that helps prevent the cake from drying out or cracking. To set up the water bath, place your prepared cake pan inside a larger baking dish. Once the pan is in position, carefully pour hot water into the larger dish until it reaches about halfway up the sides of the cake pan. This technique helps regulate the baking temperature and ensures even cooking.
Creating the Cream Cheese Mixture
Now that your baking pan and water bath are ready, it’s time to create the cream cheese mixture. Begin by breaking your cream cheese into smaller chunks and placing it in a heatproof bowl. Add the unsalted butter to the bowl, and set it over your double boiler setup. Gently heat the mixture, stirring occasionally, until both the cream cheese and butter are fully melted and combined into a smooth, creamy consistency. Be careful not to let the mixture boil, as this can affect the final texture of your cheesecake.
Once melted, remove the bowl from the heat and allow it to cool slightly. Then, whisk in the granulated sugar, egg yolks, and whole milk until everything is well incorporated. It’s important to use room temperature ingredients to ensure a smooth batter without lumps. After combining these ingredients, sift in the cake flour and cornstarch, mixing gently until just combined. Be careful not to overmix, as this can lead to a denser cheesecake.
In the next part of this article, we will cover the crucial step of whipping the egg whites and folding them into the cream cheese mixture, creating the light and airy texture that defines the Heavenly Light Japanese Cheesecake. Stay tuned for the continuation of this delicious journey!
Tips for Cooling the Mixture Properly
Cooling the mixture is a critical step in making the perfect Japanese cheesecake. After combining your wet ingredients, it’s essential to allow the mixture to cool slightly before adding it to the whipped egg whites. This helps avoid cooking the egg whites prematurely, which can lead to a dense and heavy texture. To cool the mixture effectively, you can transfer it to a large bowl and place it in an ice bath. This method allows for rapid cooling without the risk of introducing water into your batter, which can negatively affect the final product.
Combining Wet and Dry Ingredients
Once your mixture has cooled adequately, it’s time to combine your wet and dry ingredients. Start by sifting your dry ingredients — flour, cornstarch, and baking powder — into a separate bowl. Sifting not only eliminates any lumps but also incorporates air into the flour, which is crucial for achieving that light and airy texture characteristic of Japanese cheesecake.
Carefully pour the sifted dry ingredients into the cooled wet mixture, mixing gently with a spatula. Use a folding technique, which will minimize gluten development and help maintain the fluffiness of the batter. Avoid vigorous stirring, which can incorporate too much air and result in a denser cake.
Importance of Sifting Dry Ingredients and Folding Techniques
Sifting your dry ingredients is vital for two main reasons. First, it breaks up any lumps that may have formed and ensures an even distribution of the leavening agents throughout the flour. Second, it adds air, which contributes to the overall lightness of the cheesecake.
When folding the ingredients together, aim to cut through the batter with your spatula and lift it from the bottom, then turn it over gently. This method helps incorporate the ingredients without overworking the batter, ensuring that your cheesecake maintains its delicate structure.
Achieving a Lump-Free Batter
To achieve a lump-free batter, patience is key. When you combine the wet and dry ingredients, take your time to ensure they are thoroughly mixed but not overworked. If you encounter stubborn lumps, using a whisk can help break them down gently. However, if lumps persist, consider straining the batter through a fine-mesh sieve to ensure an ultra-smooth mixture.
Whipping the Egg Whites
Whipping the egg whites is one of the most crucial steps in making Japanese cheesecake. Start with room temperature egg whites for best results; this allows them to whip up more easily and achieve maximum volume. Use a clean, dry mixing bowl and beaters to prevent any fat from interfering with the egg whites.
Techniques for Achieving Stiff Peaks
When whipping the egg whites, begin on a low speed and gradually increase to medium-high as they start to foam. As the egg whites begin to thicken, add cream of tartar. This stabilizing agent helps the egg whites hold their structure, making it easier to achieve stiff peaks. Continue to whip until the egg whites form peaks that stand straight up when the beaters are lifted.
The Role of Cream of Tartar in Stabilizing Egg Whites
Cream of tartar is an acid that helps stabilize whipped egg whites by increasing their volume and preventing them from collapsing. It contributes to the overall structure of the cheesecake, ensuring that the batter retains its light and airy quality. If you don’t have cream of tartar on hand, you can substitute it with an equal amount of vinegar or lemon juice.
Folding Mixtures Together
With your whipped egg whites ready, it’s time to fold them into the batter. Start by adding a small amount of the egg whites to the batter to lighten it. This step makes it easier to incorporate the rest of the egg whites without deflating them. Gently fold the mixture together, using a spatula to scoop from the bottom and turn over the batter until just combined. The goal is to maintain as much air as possible, which is essential for achieving that signature fluffy texture.
Best Practices for Maintaining Airiness in the Batter
To maintain airiness while folding, use a gentle hand and avoid overmixing. The key is to stop folding as soon as no streaks of egg whites remain visible. If you overmix, you risk losing the air that you’ve carefully whipped into the egg whites, resulting in a denser cheesecake.
Importance of Gentle Folding Techniques
Gentle folding techniques are crucial when working with whipped egg whites. The more gently you incorporate them into the batter, the more air you retain, leading to a lighter final product. Always remember to be patient and take your time with this step; it’s worth the effort for that perfect fluffy texture.
Preparing for Baking
Now that your batter is ready, it’s time to prepare for baking. Begin by ensuring that your baking pan is properly lined. Use parchment paper to line the bottom and sides of a springform pan for easy removal after baking. Gently pour the batter into the prepared pan, smoothing the top with a spatula for an even surface.
Ensuring the Batter is Evenly Poured and Smoothed
Pour the batter into the pan in one go to avoid creating air bubbles. Use a spatula to gently spread the batter evenly across the pan, making sure there are no gaps or uneven areas. This will help ensure that your cheesecake bakes evenly and has a consistent texture throughout.
Setting Up the Water Bath Correctly for Even Baking
To create a water bath, wrap the outside of the springform pan with aluminum foil to prevent any water from leaking in. Place the pan in a larger baking dish and fill it with hot water until it reaches about halfway up the sides of the springform pan. The water bath promotes gentle, even baking, helping to prevent cracks and ensure a smooth texture.
Baking the Cheesecake
Once everything is set up, it’s time to bake the cheesecake. Preheat your oven to 320°F (160°C) and place the baking dish with the water bath in the oven. The ideal baking time ranges from 50 to 60 minutes, but this can vary based on your oven.
Ideal Baking Conditions and Monitoring the Cheesecake
It’s important to monitor the cheesecake closely during baking. The top should turn a light golden color, and the edges should be firm while the center remains slightly jiggly. Avoid opening the oven door too often, as this can cause temperature fluctuations that may affect the baking process.
Recognizing Doneness: Color and Toothpick Test
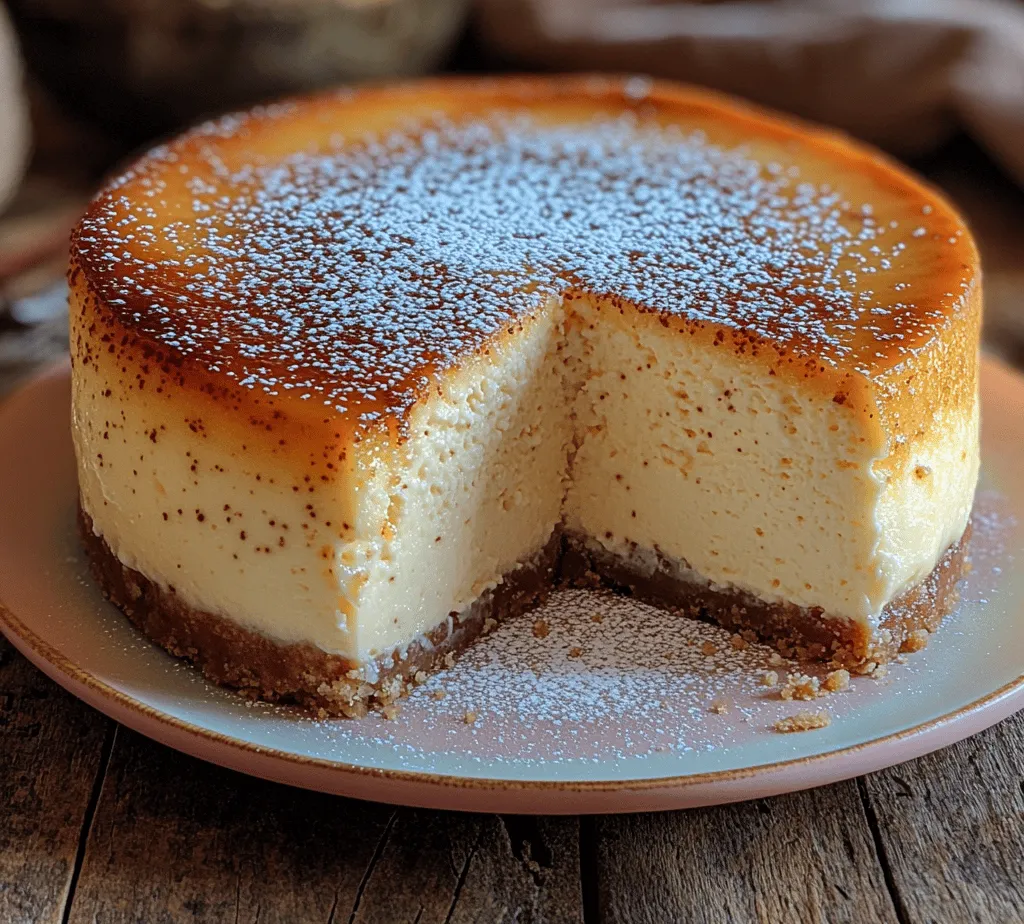
To check for doneness, insert a toothpick into the center of the cheesecake. It should come out clean or with a few moist crumbs attached. If the toothpick comes out with wet batter, continue baking for an additional five to ten minutes and check again. Remember, the cheesecake will continue to set as it cools, so it’s better to underbake slightly than to overbake.
Cooling and Chilling
Once the cheesecake is done baking, it’s crucial to cool it gradually. Turn off the oven and crack the door open, allowing the cheesecake to cool inside for about an hour. This gradual cooling process helps prevent the cheesecake from cracking and collapsing.
Importance of Gradual Cooling to Prevent Collapse
Rapid temperature changes can lead to a collapsed cheesecake. By cooling it slowly, you help maintain its structure and achieve that desired light texture. After the hour, remove the cheesecake from the oven and allow it to cool to room temperature on a wire rack before transferring it to the refrigerator.
Best Practices for Chilling to Enhance Texture and Flavor
For optimal texture and flavor, chill the cheesecake in the refrigerator for at least four hours, or ideally overnight. This resting period allows the flavors to develop and the cheesecake to firm up, making it easier to slice and serve.
Serving Suggestions and Presentation
When it’s time to serve your heavenly light Japanese cheesecake, consider garnishing it with a light dusting of powdered sugar for an elegant touch. Fresh fruits such as strawberries, raspberries, or blueberries can add a burst of color and flavor, while a drizzle of fruit sauce or a dollop of whipped cream can elevate the dessert further.
Ideas for Garnishing the Cheesecake
For a simple yet stunning presentation, consider placing a few fresh berries atop the cheesecake or surrounding it with a berry compote. Edible flowers can also add a beautiful touch, making your dessert not only delicious but visually appealing.
Pairing Options: Fruits, Sauces, or Whipped Cream
Pair your cheesecake with complementary flavors. A light citrus sauce can enhance the flavors, or you can serve it alongside a fresh fruit salad for a refreshing contrast. Whipped cream, lightly sweetened or flavored with vanilla, also pairs beautifully, adding creaminess to each bite.
Presentation Tips for an Appealing Dessert Display
For an appealing dessert display, slice the cheesecake into even portions and arrange them on a decorative plate. Consider using a cake stand to elevate the presentation or add some fresh herbs for a pop of color. A sprinkle of cocoa powder or a drizzle of caramel sauce can also enhance the visual appeal.
Common Challenges and Troubleshooting
Even experienced bakers may face challenges when making Japanese cheesecake. Here are some common issues and solutions:
– Cracks: Cracks can occur if the cheesecake is baked at too high a temperature or cooled too quickly. To prevent cracks, ensure your oven temperature is accurate and cool the cheesecake gradually.
– Collapse: If your cheesecake collapses after baking, it may have been overbaked or cooled too rapidly. Always monitor the baking time and follow the cooling instructions closely.
– Over-Baking: Over-baking can lead to a dry cheesecake. Always check for doneness using the toothpick test and remember that the cheesecake will continue to set as it cools.
Solutions and Preventive Measures to Ensure Success
To ensure success, follow the instructions closely and take your time with each step. Practice makes perfect — each time you bake this cheesecake, you’ll refine your technique and improve your results.
Importance of Patience and Practice in Perfecting the Recipe
Baking is as much about art as it is about science, and patience is key. Allow yourself the time to practice and perfect your technique. Each attempt will teach you something new, leading to a more successful outcome.
Nutritional Information and Serving Size
For those mindful of their dietary intake, here’s a breakdown of the nutritional information per serving of this heavenly light Japanese cheesecake:
– Calories: Approximately 150-180 calories
– Fat: 8g
– Carbohydrates: 15g
– Protein: 5g
Discussion on Portion Control and Dietary Considerations
When serving, portion control is important, especially for rich desserts like cheesecake. Consider slicing smaller portions to allow everyone to enjoy this delightful treat without overindulgence.
Conclusion
Creating a light and fluffy Japanese cheesecake is a rewarding experience that brings joy to both the baker and those who get to savor the final product. The process may have its challenges, but the result is a delicate, airy dessert that is sure to impress.
Don’t be afraid to experiment with flavors, perhaps by incorporating citrus zest or vanilla bean into the batter, or trying different garnishes. Each variation can lead to a new favorite version of this classic dessert.
Baking this delightful cheesecake not only allows you to enjoy a delicious treat but also builds confidence in your baking skills. Happy baking!
