
Introduction
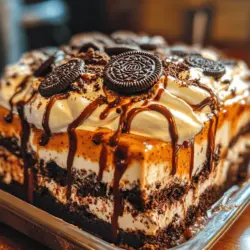
Desserts featuring Oreo cookies have long captured the hearts (and taste buds) of dessert lovers everywhere. Their rich chocolate flavor, paired with a creamy filling, makes them an irresistible treat. Whether served solo or incorporated into a dessert, Oreos provide a delightful crunch and a burst of flavor that enhances any sweet creation. Among the numerous recipes that celebrate this iconic cookie, the Heavenly Oreo Dessert stands out as a crowd-pleaser. This layered dessert combines the delightful crunch of Oreos with smooth cream cheese, light whipped topping, rich chocolate pudding, and a hint of butter, resulting in a symphony of textures and flavors that is nothing short of heavenly.
What makes the Heavenly Oreo Dessert truly special is its unique layering. Each component contributes to the overall experience, creating a harmonious balance between rich and light, crunchy and creamy. The layers are easy to prepare, making it a go-to choice for gatherings, family dinners, or any occasion that calls for a sweet indulgence. Best of all, this dessert requires minimal prep time, allowing you to spend more time enjoying the company of your loved ones rather than laboring in the kitchen.
In this article, we will explore the key ingredients that make up this delightful dessert, followed by a detailed step-by-step preparation guide to help you create the perfect Heavenly Oreo Dessert.
Understanding the Ingredients
Oreo Cookies: The Base of the Dessert
At the heart of the Heavenly Oreo Dessert lies the iconic Oreo cookie. These delectable cookies are not just a base; they are the foundation that holds everything together. The deep chocolate flavor of Oreos provides a robust contrast to the creaminess of the layers above, ensuring every bite is packed with rich taste. The crunchy texture of the crushed cookies adds depth, creating a satisfying contrast to the smoother components of the dessert.
When it comes to choosing the right Oreos for your dessert, the options are plentiful. While classic Oreos are always a safe bet, feel free to experiment with different varieties. Double-stuffed Oreos can add an extra layer of creaminess, while seasonal flavors like Pumpkin Spice or Peppermint Cream can infuse your dessert with a festive twist. No matter which type you choose, Oreos will undoubtedly elevate your Heavenly Oreo Dessert to new heights.
Cream Cheese: The Creamy Layer
The next key ingredient in this dessert is cream cheese. Cream cheese is essential for creating that luxurious, creamy layer that contrasts beautifully with the crunchy Oreo crust. It provides a rich, tangy flavor that balances the sweetness of the other ingredients, ensuring that the dessert is indulgent without being overwhelmingly sugary.
For the best results, it is crucial to use softened cream cheese. Softening the cream cheese allows it to blend smoothly with the other ingredients, avoiding any unpleasant lumps. To soften cream cheese quickly, simply leave it out at room temperature for about 30 minutes or microwave it in short bursts, checking frequently to avoid melting it. The result is a velvety layer that beautifully complements the crunchy Oreo base and fluffy topping.
Whipped Topping: Lightness and Airiness
Next, we have whipped topping, a critical component that brings a light and airy quality to the Heavenly Oreo Dessert. Whipped topping not only adds volume but also contributes a sweet creaminess that harmonizes perfectly with the denser layers. The lightness of whipped topping creates a delightful contrast to the other ingredients, making each bite feel indulgent yet not too heavy.
You can use either store-bought whipped topping or homemade whipped cream, depending on your preference. Store-bought options are incredibly convenient and provide consistent results, while homemade whipped cream can give you a fresher taste and allow you to control the sweetness. If you choose to make your own, simply whip heavy cream with a bit of sugar and vanilla extract until soft peaks form. No matter which option you select, the whipped topping will play a crucial role in achieving the dreamy texture of this dessert.
Chocolate Pudding: The Indulgent Layer
Adding to the richness of the Heavenly Oreo Dessert is the chocolate pudding layer. This component introduces a luscious element that enhances the dessert’s overall depth of flavor. The chocolate pudding is creamy and indulgent, providing a satisfying contrast to the lighter layers. It serves as a perfect bridge between the crunchy Oreo crust and the fluffy whipped topping.
When selecting a chocolate pudding mix, look for high-quality options that promise rich chocolate flavor. You can also opt for instant pudding for ease of preparation or cook-and-serve pudding for a more decadent experience. Either way, following the package directions will ensure that your pudding sets beautifully and adds that luxurious touch to your dessert.
Butter: The Binding Agent
Finally, we have melted butter, which plays a crucial role in creating a cohesive crust for the Heavenly Oreo Dessert. The combination of crushed Oreo cookies and melted butter binds the ingredients together, forming a solid base that holds the layers above. The butter adds richness and a subtle flavor that complements the chocolate cookies, ensuring that each bite is as delicious as the last.
If you’re looking for alternatives, margarine or vegan butter can be used in place of traditional butter without sacrificing texture or flavor. The key is to ensure that whatever binding agent you choose is melted and fully combined with the crushed Oreos, allowing for an even and stable crust.
Step-by-Step Preparation Guide
Preparing the Oreo Crust
Now that we’ve explored the essential ingredients of the Heavenly Oreo Dessert, it’s time to dive into the preparation process. The first step is to create the perfect Oreo crust, which serves as the foundation for this delightful dessert.
1. Gather Your Ingredients: Start by collecting 24 Oreo cookies and ½ cup of melted butter. If you are using a different variety of Oreos, adjust the quantity as needed to ensure you have enough cookie crumbs for the base.
2. Crush the Oreos: Place the Oreo cookies in a food processor and pulse until they form fine crumbs. If you don’t have a food processor, you can also place the cookies in a resealable plastic bag and crush them with a rolling pin until you achieve a similar texture. The key is to ensure that the crumbs are fine and uniform for a smooth crust.
3. Combine with Butter: In a mixing bowl, combine the crushed Oreos with the melted butter. Stir the mixture until all the crumbs are evenly coated with butter. The consistency should be similar to wet sand, allowing it to hold together when pressed.
4. Press into the Pan: Transfer the Oreo crumb mixture into a 9×13-inch baking dish (or your preferred size) and press it firmly into an even layer across the bottom. Use the back of a measuring cup or your fingers to pack it down tightly, ensuring there are no gaps.
5. Chill the Crust: Once the crust is pressed firmly, place the baking dish in the refrigerator for about 10-15 minutes to allow it to set. This chilling step will help the crust hold its shape better when you add the subsequent layers.
With the crust prepared and chilled, you are now ready to move on to the next layers of the Heavenly Oreo Dessert, where the real magic happens. Stay tuned for the upcoming sections, where we will guide you through the remaining steps to create this deliciously indulgent treat.
Importance of Baking the Crust and Letting It Cool
The crust is the foundation of your Heavenly Oreo Dessert, providing both structure and flavor. By baking the crust, you enhance its flavor and ensure it holds together when layered with the creamy filling. It’s important to allow the crust to cool completely before proceeding to the next steps. This cooling period prevents the cream cheese layer from melting and ensures that each layer maintains its intended texture. A warm crust can lead to a soupy dessert, which is not the goal here. So, take those extra few minutes to let it rest; trust us, it’s worth it!
Creating the Cream Cheese Layer
The cream cheese layer is where the magic begins, adding a rich and tangy flavor that balances the sweetness of the dessert. Here’s how to create it perfectly:
Step-by-Step Guide to Mixing Cream Cheese, Powdered Sugar, and Vanilla Extract
1. Gather Your Ingredients: You will need 8 ounces of softened cream cheese, 1 cup of powdered sugar, and 1 teaspoon of vanilla extract.
2. Beat the Cream Cheese: In a mixing bowl, use an electric mixer to beat the softened cream cheese until it’s smooth and creamy.
3. Add Sugar and Vanilla: Gradually add in the powdered sugar and vanilla extract. Mix until the ingredients are well combined and the mixture is fluffy.
4. Texture Check: The mixture should be smooth without lumps. If you encounter lumps, continue to beat until they are fully incorporated.
Tips for Achieving a Fluffy Consistency When Folding in Whipped Topping
1. Choose the Right Whipped Topping: Use a high-quality whipped topping for the best results. Thaw it in the refrigerator before use to maintain its consistency.
2. Gently Fold: Once your cream cheese mixture is ready, gently fold in 1 cup of whipped topping using a spatula. This method retains the airiness of the whipped topping, ensuring a light and fluffy layer.
3. Don’t Overmix: Be careful not to overmix, as this can deflate the whipped topping. Stop when you see no streaks of cream cheese remaining.
Layering the Dessert
Now that your cream cheese layer is ready, it’s time to assemble your dessert. Proper layering adds to the aesthetics and ensures that each bite is a perfect mix of flavors.
Instructions on How to Evenly Spread Each Layer for a Beautiful Presentation
1. Start with the Crust: After the crust has cooled, spread half of the cream cheese mixture evenly over it. Use an offset spatula for a smooth finish.
2. Chocolate Pudding Layer: Next, prepare your chocolate pudding (detailed below) and pour it over the cream cheese layer, ensuring it spreads evenly to the edges.
3. Final Cream Cheese Layer: Take the remaining cream cheese mixture and spread it over the pudding layer gently to maintain the distinct layers.
4. Whipped Topping Layer: Finally, spread the remaining whipped topping over the top layer. This creates a beautiful, fluffy finish.
Visual Cues to Ensure Proper Layering
When layering, it’s essential to see the distinct layers. Each layer should be about the same thickness for a balanced look. To achieve this,:
– Use a measuring cup to scoop and spread each layer uniformly.
– Smooth out the tops of each layer before adding the next to avoid mixing.
Making the Chocolate Pudding Layer
The chocolate pudding layer adds a rich and creamy texture that is a favorite among many. Here’s how to make it without lumps:
Detailed Instructions on Whisking Techniques to Prevent Lumps
1. Prepare the Pudding: Start by mixing 1 package (about 3.9 oz) of instant chocolate pudding mix with 2 cups of cold milk in a bowl.
2. Whisk Vigorously: Using a whisk, combine the pudding mix and milk. Start slowly to incorporate the mix into the milk, then increase speed.
3. Whisk Until Thickened: Continue whisking for about 2 minutes until the pudding thickens. If you notice any lumps, keep whisking until they’re gone.
Importance of Letting the Pudding Thicken Properly
Allowing the pudding to thicken is crucial for creating that luscious layer in your dessert. If it’s too runny, it won’t hold its shape once layered. Let it sit for a few minutes after whisking to ensure a perfect consistency.
Topping and Chilling
The final preparations involve topping your dessert and allowing it to chill, which enhances the flavor and texture.
Guidance on Spreading the Final Whipped Topping Layer and Adding Crushed Oreos
1. Spread the Topping: Once your layers are assembled, spread the whipped topping evenly over the top layer using the spatula.
2. Crushed Oreos: For an added crunch and visual appeal, sprinkle crushed Oreos generously on top of the whipped topping. Use about 1/2 cup of crushed Oreos for this purpose.
Explanation of Why Chilling is Crucial for Flavor Melding and Texture
Chilling the dessert for at least 4 hours, or overnight if possible, allows the flavors to meld together beautifully. The chilling time also ensures that each layer sets properly, making it easier to cut and serve. This step is essential for achieving the desired creamy texture and prevents any layers from sliding apart when slicing.
Serving Suggestions
Your Heavenly Oreo Dessert is now ready to impress. Here are some creative serving suggestions to elevate your dessert experience.
Presentation Ideas
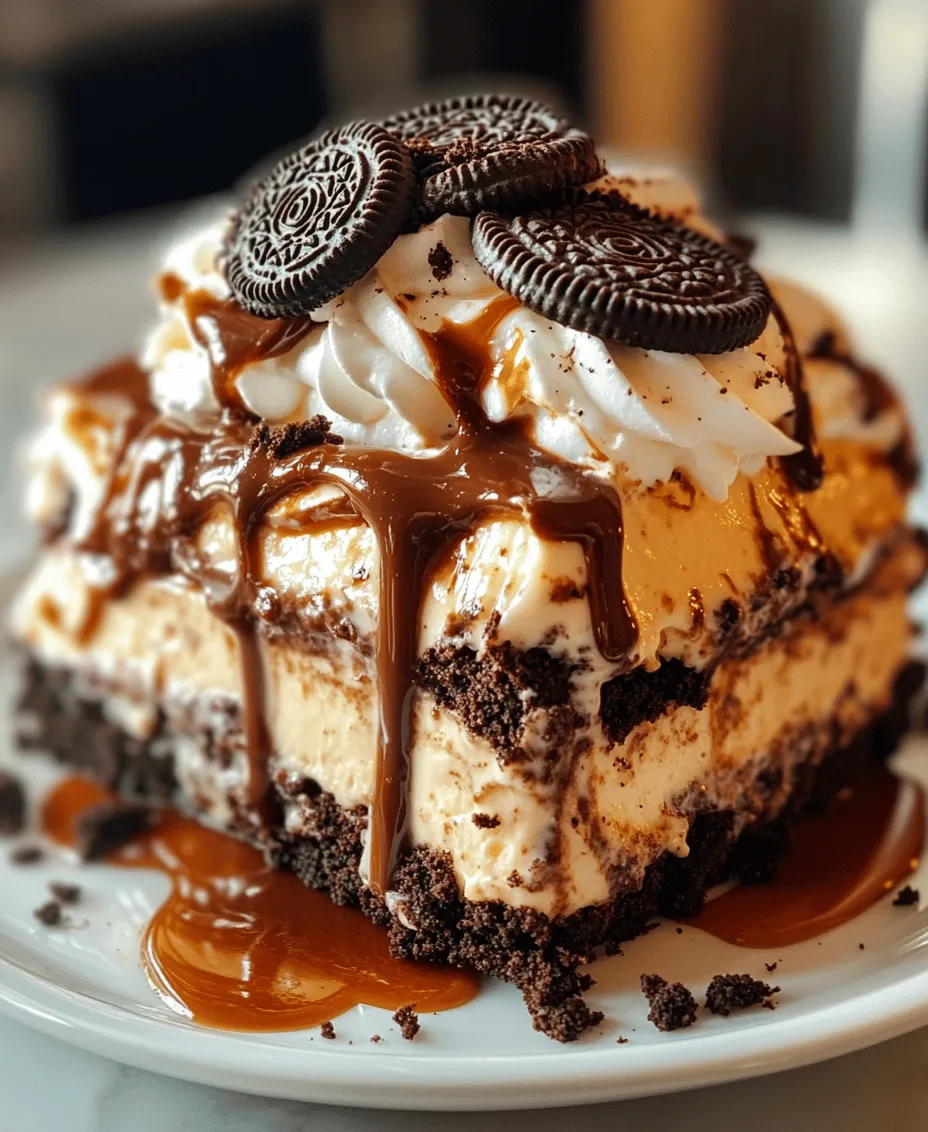
1. Creative Cuts: Cut the dessert into squares for a classic presentation. Alternatively, use a round cookie cutter to create parfaits for a fun twist.
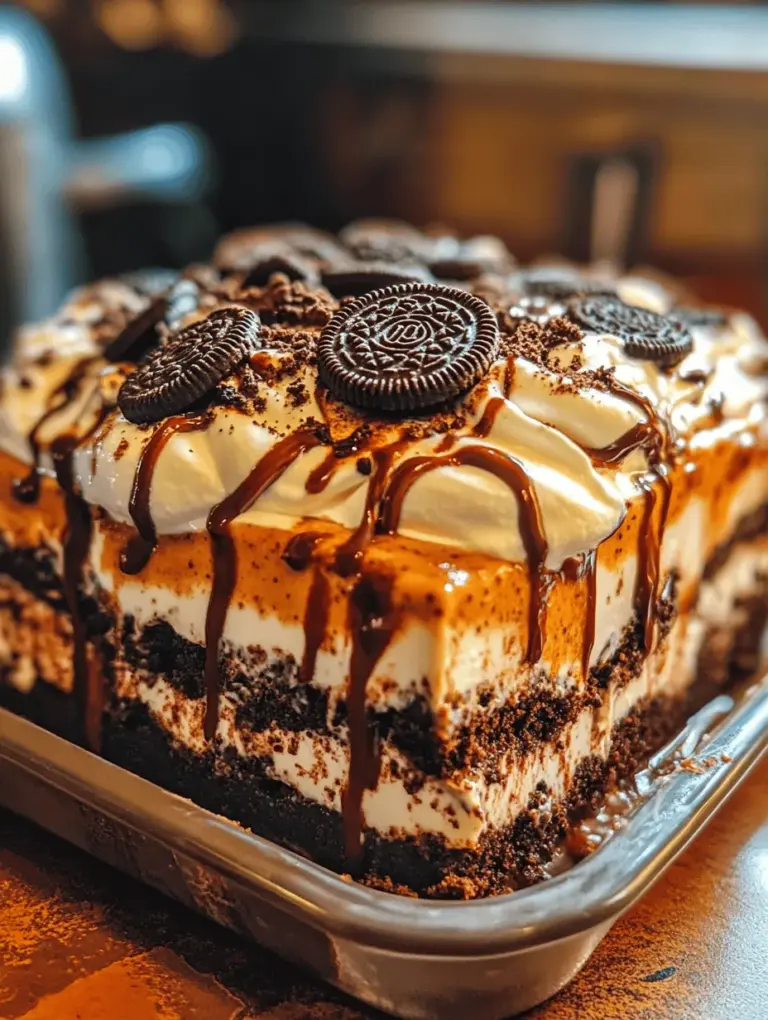
2. Garnishing: Drizzle chocolate syrup over the top just before serving. Garnish with additional crushed Oreos for an extra touch of elegance.
Suggestions for Garnishing with Chocolate Syrup and Additional Crushed Oreos
1. Use a Squeeze Bottle: If you have a squeeze bottle, fill it with chocolate syrup to create beautiful swirls or dots on each plate.
2. Layer Garnishes: Consider layering crushed Oreos on top of the chocolate syrup for a delightful visual contrast.
Pairing with Beverages
To complement the rich flavors of your dessert, consider pairing it with a beverage that balances its sweetness.
1. Coffee: A cup of hot coffee can cut through the richness, making it an ideal pairing.
2. Milk: For a classic combination, serve with a tall glass of cold milk to enhance the chocolate flavors.
3. Dessert Wines: For adults, consider a sweet dessert wine, such as a Moscato, which pairs beautifully with chocolate desserts.
Nutritional Information
Understanding the nutritional aspects of your Heavenly Oreo Dessert can help you enjoy it in moderation.
1. Overview of Nutritional Aspects: This dessert is rich in calories due to the cream cheese, whipped topping, and sugar content. A single serving can be quite indulgent.
2. Discussion on Portion Control and Indulgence in Moderation: Enjoying this dessert in moderation is key. Consider serving smaller portions, especially if there are other dessert options at your gathering.
Conclusion
Creating the Heavenly Oreo Dessert is a delightful experience that culminates in a luscious, multi-layered treat that everyone will love. From the crunchy crust to the creamy layers and the rich chocolate pudding, this dessert is sure to please crowds at any gathering. Whether you’re celebrating a special occasion or just satisfying a sweet craving, this recipe is one you’ll want to share. So gather your ingredients and get ready to indulge in this delectable dessert that is sure to be a hit!