
Introduction
As the leaves turn golden and the air becomes crisp, the flavors of fall beckon us to indulge in seasonal delights. One dessert that perfectly captures this essence is the Apple Crisp Cheesecake. This recipe is not just a treat for the taste buds; it is a celebration of the comforting blend of creamy cheesecake and the nostalgic warmth of spiced apples and crunchy topping. The Apple Crisp Cheesecake is an ideal centerpiece for autumn gatherings, holiday dinners, or simply a cozy evening at home.
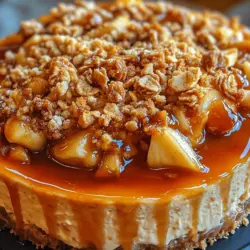
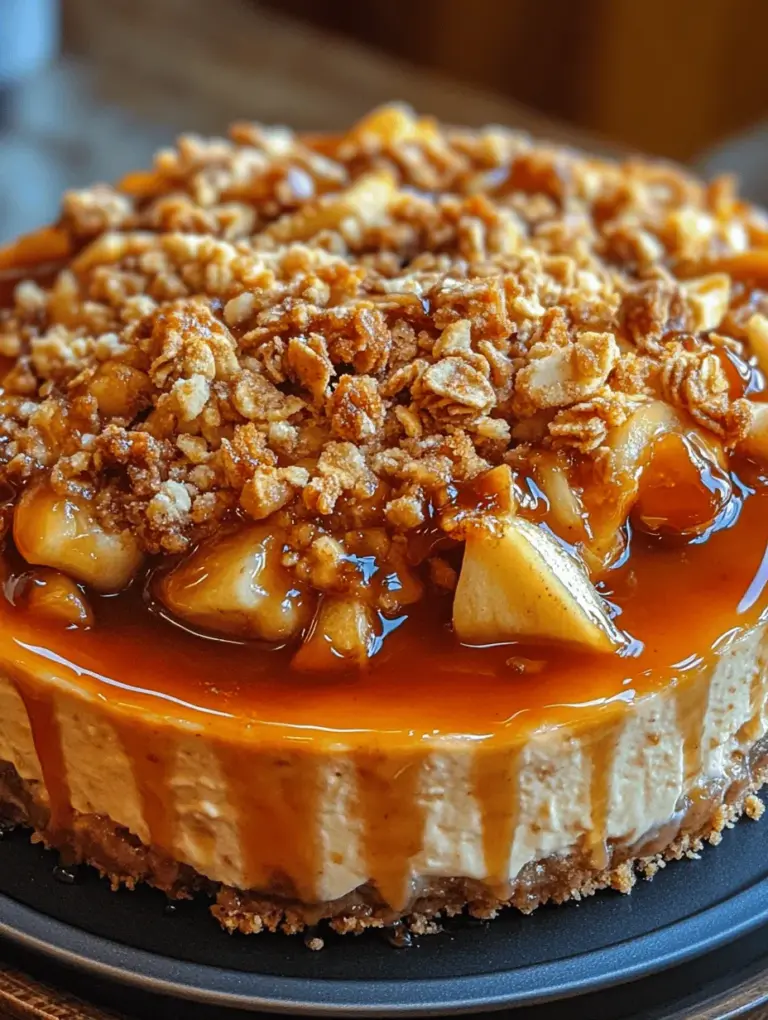
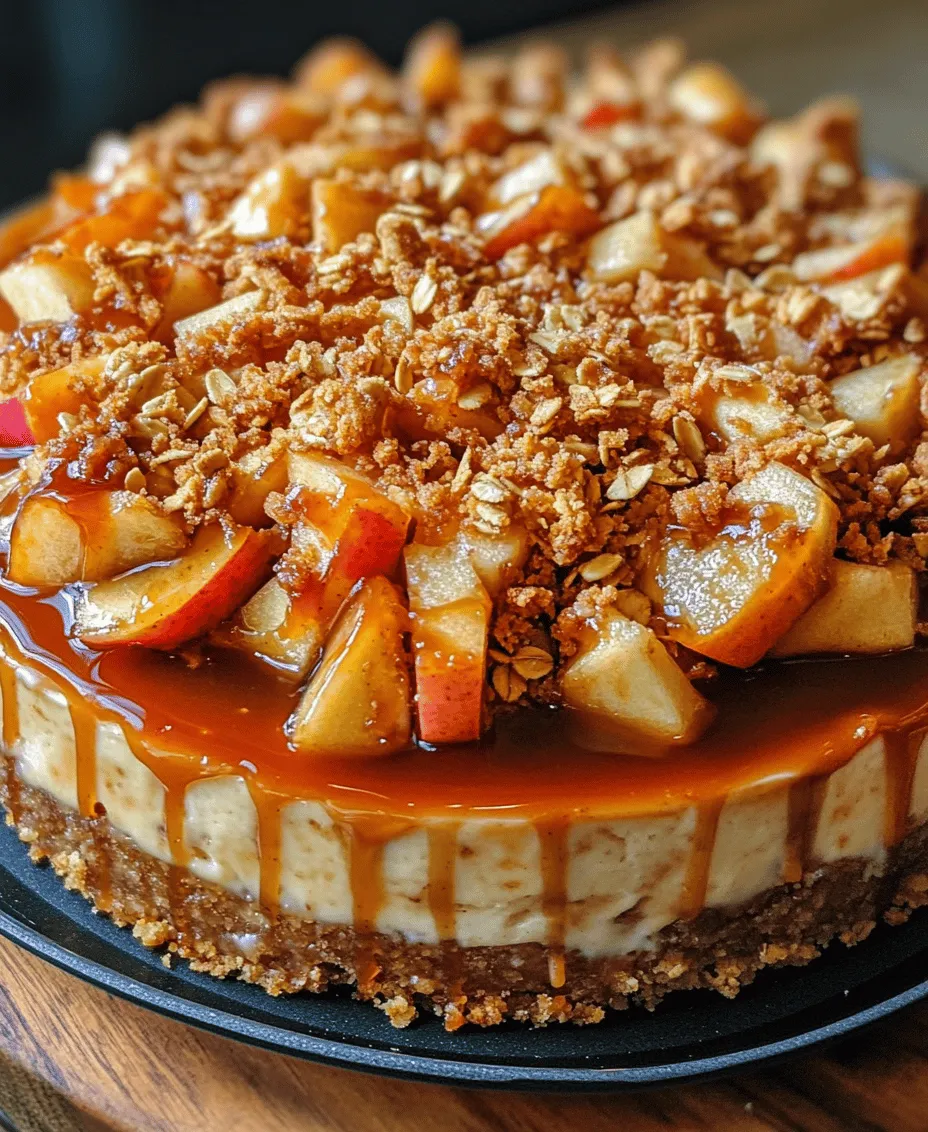
Imagine the scene: a rich, velvety cheesecake layered with a sweet and tart apple filling, all topped with a crunchy oat crisp that adds delightful texture. Each bite offers a harmonious blend of flavors, reminiscent of a warm apple pie yet elevated by the luxurious creaminess of cheesecake. In this article, we will guide you through the essential components of this dessert, the step-by-step preparation process, and tips to ensure your creation is nothing short of perfection.
Understanding the Components of Apple Crisp Cheesecake
To appreciate the magic behind Apple Crisp Cheesecake, it’s essential to understand the unique contributions of each layer. This dessert consists of four main components: the crust, the cheesecake filling, the apple filling, and the crisp topping. Each element plays a vital role in creating a well-balanced and flavorful dessert.
The Crust: A Nutty Foundation
The foundation of any good cheesecake lies in its crust. For our Apple Crisp Cheesecake, we will use a crust made from almond flour, butter, brown sugar, and a hint of cinnamon.
– Almond Flour: This gluten-free alternative provides a nutty flavor and a slightly crumbly texture, which complements the richness of the cheesecake.
– Butter: Essential for binding the crust together, butter adds moisture and richness.
– Brown Sugar: This ingredient introduces a subtle caramel flavor that enhances the overall taste of the crust.
– Cinnamon: A warm spice that not only adds flavor but also evokes the essence of autumn.
The combination of these ingredients creates a sturdy crust that holds the cheesecake filling while adding a depth of flavor that contrasts beautifully with the creamy layers above. A well-prepared crust is crucial in cheesecake recipes, as it provides stability and a delightful crunch.
The Cheesecake Filling: Creamy and Dreamy
The heart of our Apple Crisp Cheesecake is undoubtedly the cheesecake filling. This layer is made up of several key ingredients: cream cheese, sugar, eggs, vanilla extract, sour cream, and lemon juice.
– Cream Cheese: The star ingredient, cream cheese, gives the cheesecake its creamy texture and rich flavor. It should be softened to room temperature to ensure a smooth mixture.
– Sugar: This sweetener balances the tanginess of the cream cheese and enhances the overall flavor.
– Eggs: Essential for structure, eggs help the cheesecake set and provide richness.
– Vanilla Extract: Pure vanilla extract contributes a wonderful aroma and flavor that elevates the cheesecake.
– Sour Cream: Adding a touch of tartness, sour cream also helps to achieve a creamy texture.
– Lemon Juice: A splash of lemon juice brightens up the flavors and adds a hint of acidity that complements the sweetness.
For a smooth and creamy filling, it is important to mix these ingredients gently but thoroughly. Overmixing can incorporate too much air, leading to cracks in the surface of the cheesecake as it bakes. The magic happens when all these flavors meld together, resulting in a rich and luscious filling that perfectly balances the sweet apple layer and the crispy topping.
The Apple Filling: Sweet and Tart Harmony
Choosing the right apples is crucial for the apple filling. For this recipe, we recommend using a combination of Granny Smith and Fuji apples.
– Granny Smith: These apples are tart, providing the perfect contrast to the sweetness of the cheesecake and crisp topping.
– Fuji: Known for their sweetness and crunch, Fuji apples add a pleasant flavor and texture to the filling.
The key to achieving a balanced apple filling is to strike the right harmony between sweetness and acidity. After peeling and slicing the apples, they should be tossed with sugar, cinnamon, and a touch of lemon juice. This mixture should be allowed to rest, which lets the flavors meld and helps to release the juices, creating a more flavorful filling.
The Crisp Topping: A Crunchy Contrast
The final layer of our Apple Crisp Cheesecake is the crisp topping, which brings a delightful crunch to each bite. This layer consists of oats, brown sugar, flour, butter, and cinnamon.
– Oats: Rolled oats provide a hearty texture that contrasts with the creaminess of the cheesecake.
– Brown Sugar: Just like in the crust, brown sugar here adds a rich caramel flavor.
– Flour: A small amount of flour helps to bind the topping together while maintaining a crumbly texture.
– Butter: Melted butter ensures the topping becomes golden brown and crispy.
– Cinnamon: Once again, this warm spice enhances the autumnal flavor profile of the dessert.
The combination of these ingredients creates a topping that complements the creaminess of the cheesecake while adding an irresistible crunch that will have your guests coming back for seconds.
Step-by-Step Instructions for Crafting Apple Crisp Cheesecake
Now that we have broken down the essential components of Apple Crisp Cheesecake, it’s time to dive into the preparation process. Follow these detailed steps to ensure that your cheesecake turns out perfectly every time.
Prepping for Success: Preheating and Pan Preparation
Before you begin mixing ingredients, it’s crucial to preheat the oven to 325°F (163°C). Preheating ensures that the cheesecake bakes evenly, preventing the formation of cracks.
Additionally, preparing your springform pan is key to a successful cheesecake. Lightly grease the sides with butter or cooking spray, which will help the cheesecake release easily once it’s set. To further prevent sticking, you can line the bottom of the pan with parchment paper, cutting it to fit precisely.
Creating the Crust: The Solid Base
With your oven preheated and your pan prepared, it’s time to create the crust. Here’s how:
1. Mix the Ingredients: In a medium bowl, combine 1 ½ cups of almond flour, ½ cup of melted butter, ¼ cup of brown sugar, and 1 teaspoon of cinnamon. Mix until the mixture resembles wet sand.
2. Press into the Pan: Transfer the crust mixture into the prepared springform pan. Press it firmly into an even layer across the bottom and slightly up the sides of the pan. This pressing action is essential for creating a solid base that will hold up against the creamy filling.
3. Bake the Crust: Place the pan in the preheated oven and bake for 10-12 minutes, or until the crust is lightly golden. This pre-baking step helps to set the crust and prevents it from becoming soggy once the filling is added.
Once the crust is baked, remove it from the oven and allow it to cool slightly while you prepare the cheesecake filling.
With these foundational steps, you’re well on your way to creating a delicious Apple Crisp Cheesecake that will impress everyone at your next gathering. In the following sections, we will explore how to make the creamy cheesecake filling, prepare the apple layer, and finally, assemble the entire dessert for baking. Stay tuned for more delicious details!
Tips for Pressing and Achieving an Even Layer
The foundation of a great cheesecake begins with a well-pressed crust. To achieve an even layer for the crust, follow these tips:
1. Use the Right Tools: A flat-bottomed measuring cup or a tart tamper can help you press the crust mixture evenly into the bottom of the pan. This will also ensure that the crust holds together well during baking and slicing.
2. Moisten the Crust Mixture: When mixing your crust ingredients, make sure the melted butter is evenly distributed. If the mixture seems too dry, add a teaspoon of water or milk to help it bind better.
3. Chill Before Baking: After pressing the crust into the pan, place it in the refrigerator for at least 15–30 minutes. Chilling the crust will help it set and prevent it from crumbling during baking.
4. Even Pressure: When pressing the crust, apply even pressure across the entire surface. Start from the center and work your way to the edges, ensuring there are no gaps or uneven spots.
Crafting the Apple Filling: A Flavorful Layer
Now that the crust is set, it’s time to prepare the apple filling, a fundamental layer that adds flavor and texture to the cheesecake.
Instructions for Preparing the Apple Filling
1. Choose the Right Apples: For a balanced flavor, select a mix of sweet and tart apples, such as Granny Smith and Honeycrisp. Peel, core, and slice them into thin wedges.
2. Cook the Apples: In a large skillet over medium heat, melt 2 tablespoons of butter. Add the sliced apples, ½ cup of granulated sugar, 1 teaspoon of cinnamon, and a pinch of nutmeg. Cook for about 5–7 minutes, stirring occasionally until the apples begin to soften but still retain some crunch.
3. Thicken the Mixture: To thicken the apple filling, sprinkle 1 tablespoon of cornstarch over the mixture and continue to cook for an additional 2 minutes. This will help absorb excess moisture and create a nice filling consistency.
4. Resting for Flavor: Once the apples are cooked, remove them from the heat and let them sit for about 10–15 minutes. This resting period allows the flavors to meld and enhances the overall taste of the filling.
Making the Cheesecake Filling: The Heart of the Dessert
The cheesecake filling is the heart of this dessert, blending creamy textures with rich flavors.
Detailed Mixing Instructions for a Smooth Consistency
1. Soften the Cream Cheese: Start with 24 ounces of cream cheese at room temperature. This step is crucial for avoiding lumps. Beat the cream cheese in a large mixing bowl with an electric mixer on medium speed until smooth and creamy.
2. Add Sugar and Vanilla: Incorporate 1 cup of granulated sugar and 1 teaspoon of vanilla extract into the cream cheese. Mix until fully combined and fluffy.
3. Incorporate Eggs Gradually: Add four large eggs, one at a time, mixing on low speed after each addition. This gradual mixing helps maintain a smooth consistency and prevents over-mixing, which can lead to cracks in your cheesecake.
4. Add Sour Cream: Finally, blend in 1 cup of sour cream until just combined. The sour cream adds a nice tanginess that balances the sweetness.
Layering for Perfection: Building the Cheesecake
Layering is essential in creating a visually appealing and delicious cheesecake.
Guide to Layering the Cheesecake Components
1. First Layer – Crust: Pour the prepared crust mixture into the bottom of your springform pan. Press it down firmly and evenly as previously discussed.
2. Second Layer – Apple Filling: Gently spread the apple filling over the crust, ensuring it reaches the edges. Use a spatula to create an even layer without disturbing the crust.
3. Third Layer – Cheesecake Filling: Pour the cheesecake filling over the apple layer. Use a spatula to smooth the top evenly. Ensure the apple filling is completely covered by the cheesecake mixture to prevent it from burning during baking.
Visual Cues for Ensuring Even Distribution
As you layer, keep an eye on the consistency and distribution of each layer. The apple filling should not rise above the cheesecake layer, and the cheesecake should sit evenly on top, creating a smooth surface that is visually appealing.
Preparing the Crisp Topping: Crunchy Goodness
The final touch that elevates your Apple Crisp Cheesecake is the delightful crisp topping.
Instructions for Mixing the Crisp Topping
1. Combine Dry Ingredients: In a medium bowl, mix 1 cup of rolled oats, ¾ cup of all-purpose flour, ½ cup of brown sugar, and 1 teaspoon of cinnamon.
2. Incorporate Butter: Melt ½ cup of unsalted butter and pour it into the dry mixture. Use a fork or your fingers to combine until the mixture resembles coarse crumbs. The key is to have a mix of larger and smaller crumbs for a varied texture.
3. Spread Evenly: Once mixed, sprinkle the crisp topping evenly over the cheesecake layer, ensuring every corner has a generous amount of topping.
Baking the Cheesecake: The Perfect Bake
Baking is a critical step that requires attention to detail to achieve the ideal cheesecake texture.
Guidelines for Baking Time and Temperature
1. Preheat the Oven: Preheat your oven to 325°F (160°C).
2. Bake: Place the layered cheesecake in the oven and bake for 60–70 minutes. The cheesecake is done when the edges are set, but the center still has a slight jiggle.
3. Avoid Over-Baking: Over-baking can lead to cracks and dryness. If the top begins to brown excessively, cover it with aluminum foil midway through baking.
Tips for Checking Doneness and Cooling Properly
– Toothpick Test: Insert a toothpick into the center of the cheesecake; if it comes out clean or with a few moist crumbs, it’s ready.
– Cooling in the Oven: Once baked, turn off the oven and crack the door open. Allow the cheesecake to cool in the oven for about an hour. This gradual cooling process helps prevent cracks.
Cooling and Chilling: Essential Steps for Texture
Proper cooling and chilling are vital for the best texture and flavor development.
Importance of Cooling in the Oven
Allowing the cheesecake to cool slowly in the oven helps maintain moisture and reduces the risk of cracks. This method also ensures that the cheesecake sets evenly without sudden temperature changes.
Recommended Chilling Time for Optimal Flavor Development
After cooling in the oven, remove the cheesecake and refrigerate it for at least 4 hours, but preferably overnight. Chilling allows the flavors to meld and enhances the creamy texture of the cheesecake.
Serving Suggestions: Presenting Your Masterpiece
Serving your Apple Crisp Cheesecake beautifully will enhance the dining experience.
How to Properly Remove the Cheesecake from the Pan
1. Loosen the Edges: Once chilled, run a butter knife around the edges of the cheesecake to loosen it from the sides of the pan.
2. Release the Springform: Carefully unclasp the sides of the springform pan, allowing the cheesecake to be released without any damage.
3. Slice with Care: Use a sharp, warm knife to slice the cheesecake into 12 even pieces. Wiping the knife with a damp cloth between cuts will ensure clean edges.
Ideas for Garnishing and Serving
– Whipped Cream: Top each slice with a dollop of freshly whipped cream for added creaminess.
– Cinnamon Dust: Sprinkle a light dusting of cinnamon on top for a decorative touch.
– Fresh Apples: Add thin apple slices or a few apple chips on top for garnish.
The Option of Serving with Caramel Sauce
For an extra indulgent touch, drizzle warm caramel sauce over each slice before serving. This enhances the flavors and adds a delightful sweetness that complements the apple filling.
Nutritional Information and Serving Size
Understanding the nutritional content can be helpful for those mindful of their dietary choices.
Breakdown of Nutritional Values per Serving
– Calories: Approximately 350 calories
– Total Fat: 22g
– Saturated Fat: 12g
– Cholesterol: 90mg
– Sodium: 250mg
– Total Carbohydrates: 35g
– Dietary Fiber: 2g
– Sugars: 18g
– Protein: 5g
Information on Portion Size (12 Slices)
This recipe yields 12 generous slices, making it perfect for gatherings or special occasions.
Conclusion
The Apple Crisp Cheesecake is more than just a dessert; it’s an experience that combines the best of fall’s flavors into a single, stunning dish. With its creamy texture, sweet and tart apple filling, and crunchy topping, this cheesecake is sure to impress. Whether for a festive occasion or a cozy family gathering, mastering this recipe will surely make it a go-to favorite in your dessert repertoire. Enjoy the process of baking and the delicious rewards that follow!