Introduction
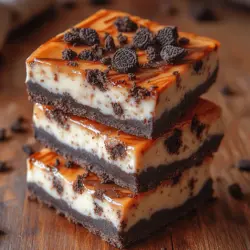
In the world of desserts, few things can compete with the allure of no-bake treats. With their simple preparation and delightful flavors, no-bake desserts have captured the hearts of home bakers and dessert lovers alike. Among these, Oreo Cheesecake Bars stand out as a quintessential favorite. Combining the rich flavors of creamy cheesecake with the beloved crunch of Oreo cookies, these bars are not only easy to make but also guarantee to satisfy any sweet tooth.
In today’s fast-paced world, the demand for quick and delicious recipes has never been higher. Whether you’re hosting a gathering, celebrating a special occasion, or simply indulging in a sweet treat at home, having a reliable no-bake dessert recipe at your fingertips can make all the difference. This is where our No-Bake Oreo Cheesecake Bars come into play! In this article, we’ll delve into the origins and appeal of no-bake desserts, break down the ingredients, and guide you through the step-by-step process of creating these delightful bars that are sure to impress.
Understanding No-Bake Desserts
No-bake desserts are, as the name suggests, treats that don’t require any baking. Instead of relying on the oven, these recipes utilize refrigeration or freezing to set and solidify, making them incredibly convenient for those who may not have the time or inclination to bake. This method is particularly appealing for busy lifestyles, where efficiency in the kitchen is key. No-bake desserts also allow for creativity, enabling cooks to experiment with flavors and textures without the constraints of traditional baking.
One of the most popular ingredients in no-bake desserts is undoubtedly the Oreo cookie. Known for their distinctive chocolate wafers and creamy filling, Oreos have become a staple in countless dessert recipes. Their versatility makes them ideal for crusts, toppings, and even as a primary ingredient in fillings. The combination of Oreos with creamy cheesecake not only enhances the flavor profile but also adds an enjoyable crunch, making each bite a delightful experience.
Ingredients Breakdown
To create the perfect No-Bake Oreo Cheesecake Bars, understanding each ingredient’s role is essential. Here’s a detailed breakdown of what you’ll need:
Crust
The crust is the foundation of any great cheesecake bar, and in this case, the combination of Oreo cookies and butter creates a delectable base.
– Oreo Cookies: The star of the crust, Oreos provide a rich chocolate flavor and a crunchy texture that pairs perfectly with the creamy filling. For the best results, finely crush the Oreos to achieve a smooth and firm crust that holds together when cut into bars.
– Butter: Melted butter is added to the crushed Oreos to bind the crumbs together. It not only enhances the flavor but also contributes to the overall texture, ensuring that the crust is neither too dry nor too greasy.
Cheesecake Filling
The filling is where the magic happens, transforming simple ingredients into a rich and creamy cheesecake experience.
– Cream Cheese: This is the primary ingredient in the filling and must be at room temperature for easy mixing. Softened cream cheese provides the characteristic smooth texture of cheesecake, allowing it to blend seamlessly with the other ingredients.
– Powdered Sugar: Added for sweetness, powdered sugar dissolves easily and contributes to the velvety texture of the filling. It is crucial to use powdered sugar instead of granulated sugar to avoid a gritty consistency.
– Heavy Cream: Whipping heavy cream adds volume and airiness to the filling, creating a light and fluffy texture. The whipped cream acts as a stabilizer, helping the filling set properly and maintain its shape.
Topping
To elevate both the flavor and presentation of your No-Bake Oreo Cheesecake Bars, consider adding a topping.
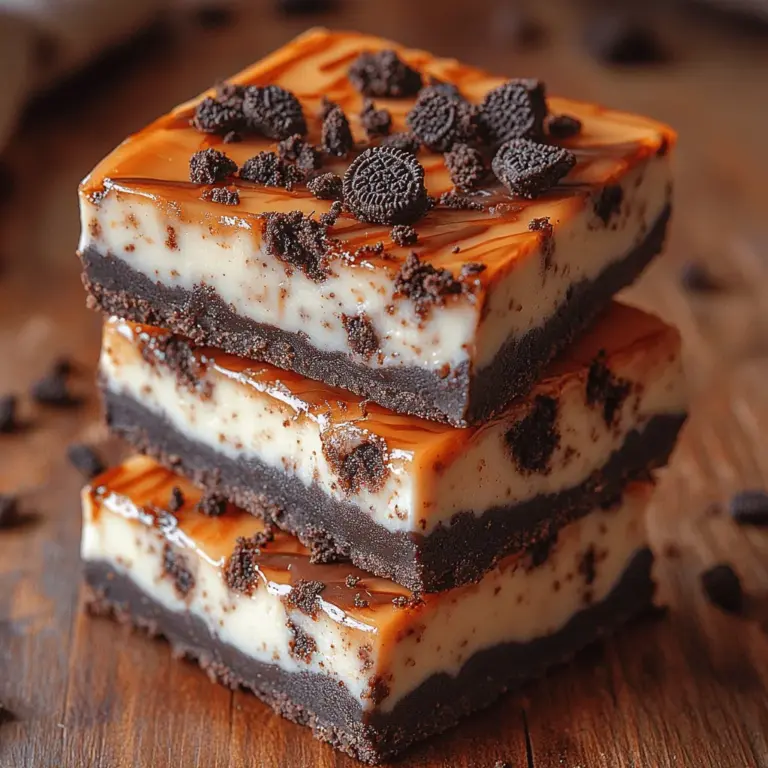
– Chopped Oreos: Sprinkling chopped Oreos on top of the cheesecake filling enhances the chocolate flavor and adds a delightful crunch. It also gives a visually appealing finish to the bars.
– Optional Chocolate Sauce: For those who want to take their dessert to the next level, a drizzle of chocolate sauce can add an extra layer of indulgence. This optional addition not only enhances the visual appeal but also complements the flavors beautifully.
Step-by-Step Instructions for No-Bake Oreo Cheesecake Bars
Now that we’ve covered the ingredients and their importance, let’s dive into the step-by-step instructions for making these irresistible No-Bake Oreo Cheesecake Bars.
Preparing the Crust
1. Crush the Oreos: Start by placing the Oreo cookies in a food processor. Pulse the cookies until they become fine crumbs, resembling sand. If you don’t have a food processor, you can place the cookies in a zip-top bag and crush them with a rolling pin.
2. Mix with Butter: Once you have your fine Oreo crumbs, transfer them to a mixing bowl. Melt the butter in the microwave and pour it over the crushed Oreos. Stir the mixture until all the crumbs are thoroughly coated with butter.
3. Press into Baking Dish: Line an 8×8-inch baking dish with parchment paper for easy removal later. Pour the Oreo crust mixture into the prepared baking dish, using your hands or a flat-bottomed measuring cup to press the crumbs evenly into the bottom. Ensure that it is packed tightly to create a firm base that won’t crumble when cut into bars.
Crafting the Cheesecake Filling
1. Soften the Cream Cheese: Make sure your cream cheese is at room temperature before beginning this step. This will ensure a smooth and lump-free filling. If you forgot to take it out in advance, you can microwave the cream cheese for about 10-15 seconds, but be careful not to melt it.
2. Mix the Ingredients: In a large mixing bowl, combine the softened cream cheese and powdered sugar. Using an electric mixer, beat the mixture on medium speed until it is creamy and smooth. Scrape down the sides of the bowl as needed to ensure everything is well incorporated.
3. Whip the Heavy Cream: In a separate bowl, whip the heavy cream until stiff peaks form. This is crucial for achieving the light and airy texture of the cheesecake filling. Be careful not to overwhip, as this can lead to butter formation.
4. Combine the Mixtures: Gently fold the whipped cream into the cream cheese mixture. Use a spatula to carefully incorporate the whipped cream, ensuring that you retain the airiness of the whipped cream. This step is key to achieving that dreamy cheesecake consistency.
With these steps completed, you’ll be well on your way to assembling your No-Bake Oreo Cheesecake Bars. The next part of the process will involve pouring the filling over the crust and preparing it for chilling. Stay tuned as we continue to guide you through this delicious dessert recipe!
Tips for Achieving Stiff Peaks and the Role of Whipped Cream in Lightening the Filling
When it comes to crafting the perfect No-Bake Oreo Cheesecake Bars, achieving stiff peaks in your whipped cream is crucial. Stiff peaks mean that when you lift the whisk out of the cream, the peaks hold their shape without collapsing. This is essential for providing structure to your cheesecake filling, ensuring that it sets well and maintains a light, airy texture.
To achieve stiff peaks, start with cold heavy whipping cream; colder cream whips faster and achieves volume more effectively. Use a clean, dry mixing bowl and beaters to avoid any grease that can prevent the cream from whipping properly. Begin by whipping on medium speed until soft peaks form, then gradually increase to high speed. Watch closely as you whip; once the cream starts to hold its shape firmly, stop mixing. Overwhipping can lead to a grainy texture or even butter, which is not what you want in your cheesecake.
The role of whipped cream in this recipe cannot be understated. It lightens the filling, making it creamy and fluffy, contrasting beautifully with the dense chocolatey flavor of the Oreo crust. The whipped cream adds volume and a delightful mouthfeel, ensuring that each bite of your cheesecake bars is as enjoyable as it is satisfying.
Combining and Filling the Bars
Now that you have your whipped cream perfectly prepared, it’s time to combine it with the cream cheese mixture. Start by adding the whipped cream to the cream cheese mixture in three parts. This technique helps to maintain the fluffiness of the whipped cream while incorporating it evenly into the filling.
Folding Techniques to Maintain Fluffiness: To fold, gently scoop the whipped cream from the bottom of the bowl and lift it over the cream cheese mixture, rotating the bowl as you go. This method incorporates air and keeps the mixture light. Avoid vigorous stirring, which can deflate your whipped cream and result in a denser filling. Repeat this process until no streaks of whipped cream are visible, ensuring a uniform mixture without losing the airy texture.
Once fully combined, it’s time to pour this luscious filling over your prepared Oreo crust. Using a spatula, gently spread the filling evenly across the crust, making sure to cover all corners and edges for a smooth finish. This step is important not only for aesthetics but also for ensuring that each bar has a consistent ratio of crust to filling.
Chilling the Bars
After pouring and spreading the filling, the cheesecake bars need to chill. This chilling time is crucial for setting the cheesecake properly. It allows the filling to firm up, making it easier to cut into clean, neat squares once ready to serve. Ideally, you should chill your cheesecake bars in the refrigerator for at least 4 hours, but overnight is preferable if you have the time. The longer the bars chill, the better the flavors meld together, resulting in a richer and more delicious dessert.
Serving Suggestions
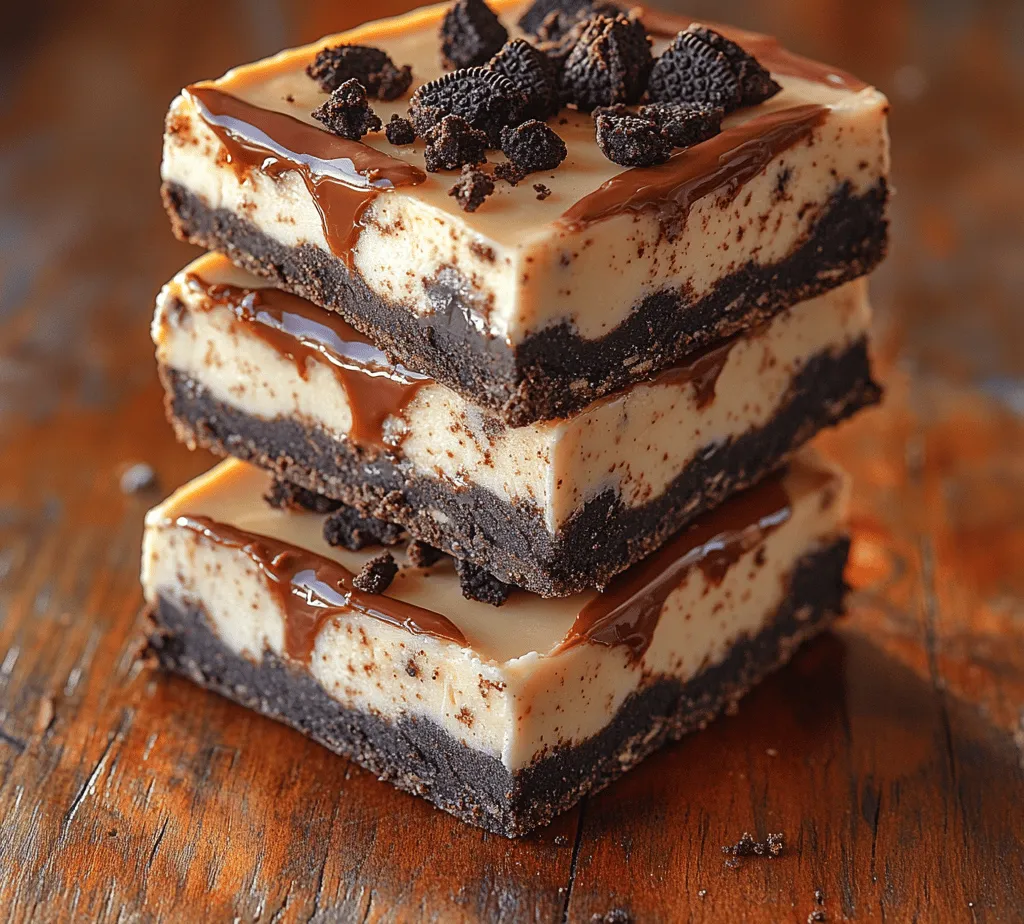
Once your No-Bake Oreo Cheesecake Bars have set, it’s time to think about presentation and serving. For a simple yet elegant look, consider cutting the bars into squares and dusting them with powdered sugar or cocoa powder. You can also garnish each bar with a dollop of whipped cream and a mini Oreo cookie on top for an extra touch of flair.
Creative Ideas for Presentation: For a more elaborate presentation, serve the cheesecake bars on a platter with a drizzle of chocolate or caramel sauce. You can also pair them with fresh berries, such as raspberries or strawberries, which add a pop of color and a refreshing tang that complements the rich flavors of the cheesecake.
Ideal Occasions for Serving These Bars: These cheesecake bars are perfect for a variety of occasions. Whether it’s a summer barbecue, a birthday party, or a holiday gathering, they are sure to impress your guests. Their no-bake nature makes them a convenient dessert option, allowing you to enjoy the festivities without being stuck in the kitchen.
Pairing Suggestions with Beverages: To enhance the experience, consider pairing your cheesecake bars with beverages that complement their rich flavors. A glass of cold milk is a classic choice, but you can also serve them alongside coffee or a dessert wine. The bitterness of the coffee or the sweetness of the wine can beautifully balance the rich, creamy cheesecake.
Storage and Shelf Life
If you find yourself with leftover No-Bake Oreo Cheesecake Bars, it’s important to know how to store them properly to maintain their deliciousness. To store, cover the bars tightly with plastic wrap or transfer them to an airtight container. This will help prevent them from absorbing any odors from the refrigerator while keeping them fresh.
Duration of Freshness in the Refrigerator: When stored correctly, these cheesecake bars can last for approximately 5-7 days in the refrigerator. Always check for any signs of spoilage before consuming.
Tips for Freezing and Thawing Cheesecake Bars: For longer storage, you can freeze your cheesecake bars. Cut them into portions and place them in a single layer on a baking sheet lined with parchment paper. Freeze until firm, then transfer them to a freezer-safe container or bag, separating layers with parchment paper. They can be frozen for up to 3 months. When ready to enjoy, simply transfer them to the refrigerator to thaw overnight for the best texture.
Nutritional Information
Understanding the nutritional content of your No-Bake Oreo Cheesecake Bars can be beneficial, especially for those tracking dietary intake. Each bar is rich in flavor and includes ingredients like cream cheese, heavy whipping cream, and Oreos, leading to a dessert that is decadent yet satisfying.
Overview of the Nutritional Aspects: On average, one bar may contain around 250-300 calories, with a balance of fats, carbohydrates, and protein. While they are indulgent, they can certainly fit into a balanced diet when enjoyed in moderation.
Considerations for Dietary Restrictions or Modifications: If you or your guests have dietary restrictions, there are ways to modify this recipe. For a gluten-free version, consider using gluten-free Oreo cookies. You can also substitute the cream cheese with a dairy-free alternative if you need a lactose-free option. Adjusting the sugar content can also help accommodate those looking to reduce sugar intake.
Conclusion
Making No-Bake Oreo Cheesecake Bars is not only a fun culinary adventure but also a delightful experience that brings joy to any gathering. The creamy filling, combined with a crunchy Oreo crust, creates a perfect balance of textures and flavors that is hard to resist. Whether you stick to the classic recipe or explore variations by incorporating different flavors or toppings, these bars offer endless possibilities for creativity in the kitchen.
As you enjoy the fruits of your labor, remember that no-bake desserts hold a special place in home cooking. They provide a quick and easy way to satisfy your sweet tooth without the need for long baking times or complicated techniques. So gather your ingredients, whip up a batch, and share the joy of these delicious cheesecake bars with friends and family. Happy baking!