Introduction
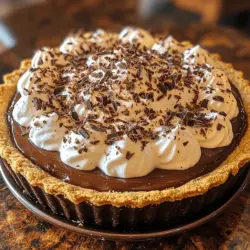
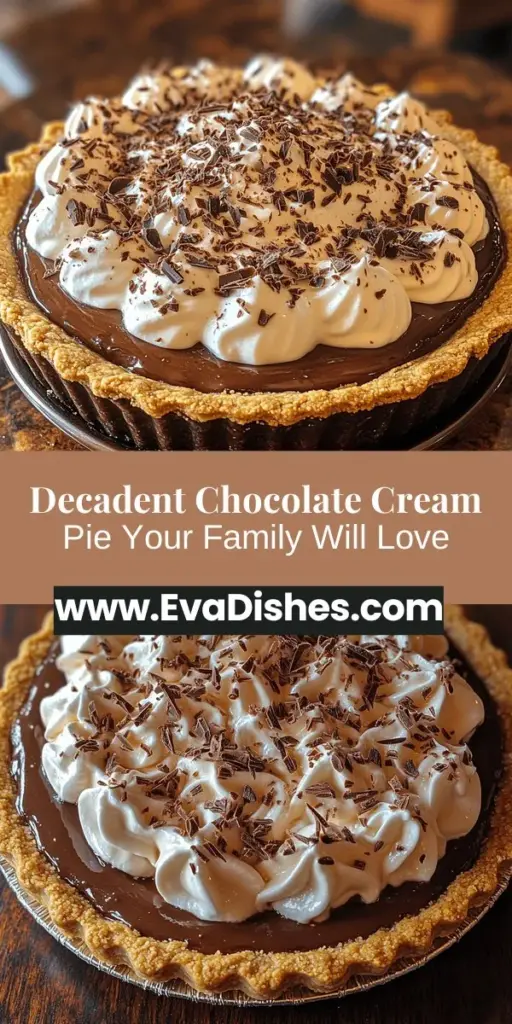
Step into the warm, inviting world of home baking with Mom’s Decadent Chocolate Cream Pie. This classic dessert is not just a treat; it’s a slice of nostalgia that evokes memories of family gatherings, celebrations, and the sweet comfort of home. With its rich, velvety chocolate filling nestled in a buttery graham cracker crust, this pie is a favorite for both casual dinners and festive occasions alike.
The beauty of this recipe lies not only in its sumptuous flavors but also in its simplicity. It requires a handful of essential ingredients, each playing a crucial role in crafting a dessert that is both indulgent and satisfying. Whether you are a seasoned baker or a novice in the kitchen, this chocolate cream pie promises to impress, making it a perfect addition to your dessert repertoire.
In this article, we will guide you through the ingredients and preparation steps involved in creating this decadent pie. We’ll also explore the significance of each component, ensuring you understand how they contribute to the ultimate chocolate experience. So, roll up your sleeves and get ready to dive into a delightful journey of flavors and textures as we unveil the secrets behind Mom’s Decadent Chocolate Cream Pie.
Understanding the Ingredients
To create a pie that is both delicious and memorable, it’s crucial to understand the ingredients that come together to form this delightful dessert. Each element plays a significant role, and knowing their functions will enhance your baking skills and the final outcome of your pie.
The Importance of Graham Cracker Crumbs in the Crust
The foundation of any great pie is its crust, and in this recipe, the graham cracker crust is essential. Graham cracker crumbs provide a sweet, slightly nutty flavor that pairs beautifully with the rich chocolate filling. Unlike traditional pie crusts made from flour, the graham cracker crust is quick and easy to prepare, requiring no rolling or intricate techniques. The unique texture of the crumbs creates a satisfying crunch that contrasts wonderfully with the creaminess of the filling.
Role of Sugar in Both the Crust and Filling
Sugar serves multiple purposes in this pie. In the crust, it not only sweetens but also aids in browning, creating that golden, crisp texture we all love. In the chocolate filling, sugar balances the bitterness of the cocoa powder and semi-sweet chocolate, ensuring a harmonious flavor profile. The right amount of sugar is crucial; too much can overwhelm the chocolate flavor, while too little may leave the dessert tasting flat.
The Significance of Unsalted Butter for Flavor Balance
Unsalted butter is a key player in both the crust and the filling. It adds richness and depth of flavor, while allowing you to control the salt content of your dessert. The creamy texture of the butter melds beautifully with the graham cracker crumbs, helping to bind the crust together while also enhancing the filling’s smoothness. Always opt for high-quality unsalted butter to achieve the best results.
Overview of Dairy Components: Whole Milk vs. Heavy Cream
Dairy is the heart of the chocolate filling, and choosing the right type is essential. Whole milk provides a creamy base, while heavy cream adds a luxurious richness that elevates the pie to decadent heights. For an even more indulgent filling, you can use a combination of both. The cream helps to create a silky texture that melts in your mouth, making each bite a delightful experience.
Understanding Cocoa Powder and Its Influence on Flavor
Cocoa powder is the star of the filling, delivering that rich chocolate flavor we crave. Choosing high-quality unsweetened cocoa powder is vital, as it directly impacts the pie’s taste. Dutch-processed cocoa powder can give a smoother, milder flavor, while natural cocoa powder tends to be more intense and slightly acidic. Experimenting with different types of cocoa can lead to discovering your preferred flavor profile.
The Necessity of Cornstarch as a Thickening Agent
Cornstarch is essential in achieving the perfect consistency for your chocolate filling. It acts as a thickening agent, giving the filling its luxurious, pudding-like texture. This ingredient helps stabilize the filling, ensuring it holds its shape when sliced. When using cornstarch, it’s important to mix it with cold milk before adding it to the heated mixture, as this prevents clumping and ensures a smooth filling.
The Role of Egg Yolks in Creating a Creamy Texture
Egg yolks are another critical component in the filling, contributing to its richness and creaminess. They act as an emulsifier, helping to blend the fats and liquids together for a smooth texture. The addition of egg yolks also imparts a subtle flavor that enhances the overall chocolate experience. Be sure to temper the yolks by adding a small amount of the hot chocolate mixture to them before incorporating them back into the pot; this prevents them from scrambling.
How Semi-Sweet Chocolate Enhances the Dessert
Semi-sweet chocolate is a key ingredient that adds depth to the chocolate flavor. Its balanced sweetness complements the cocoa powder and sugar in the filling, creating a rich, well-rounded flavor. When melting the chocolate, opt for high-quality bars for the best results. The melting process should be done gently, either in a double boiler or in short bursts in the microwave, to ensure a smooth, glossy finish.
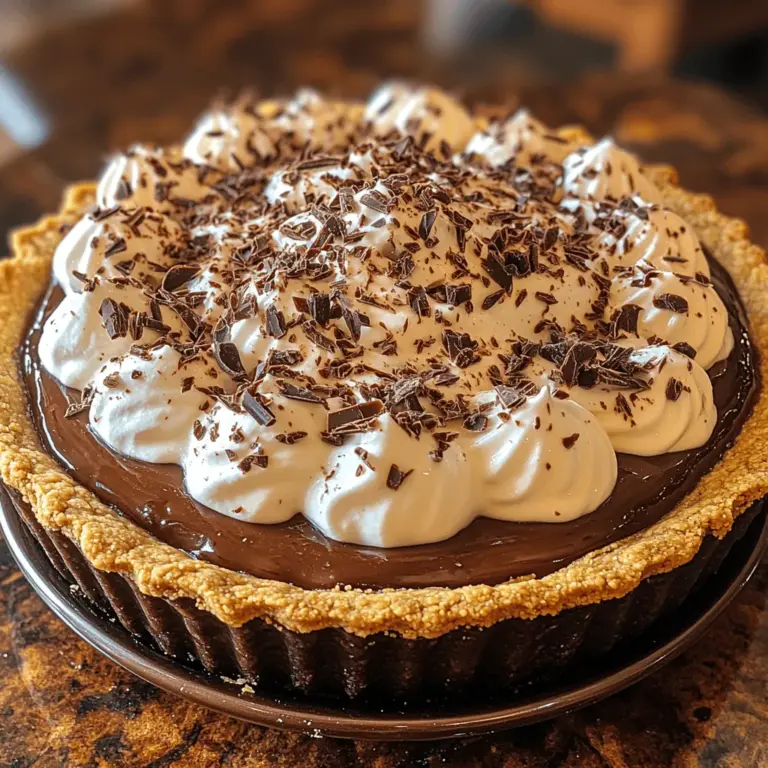
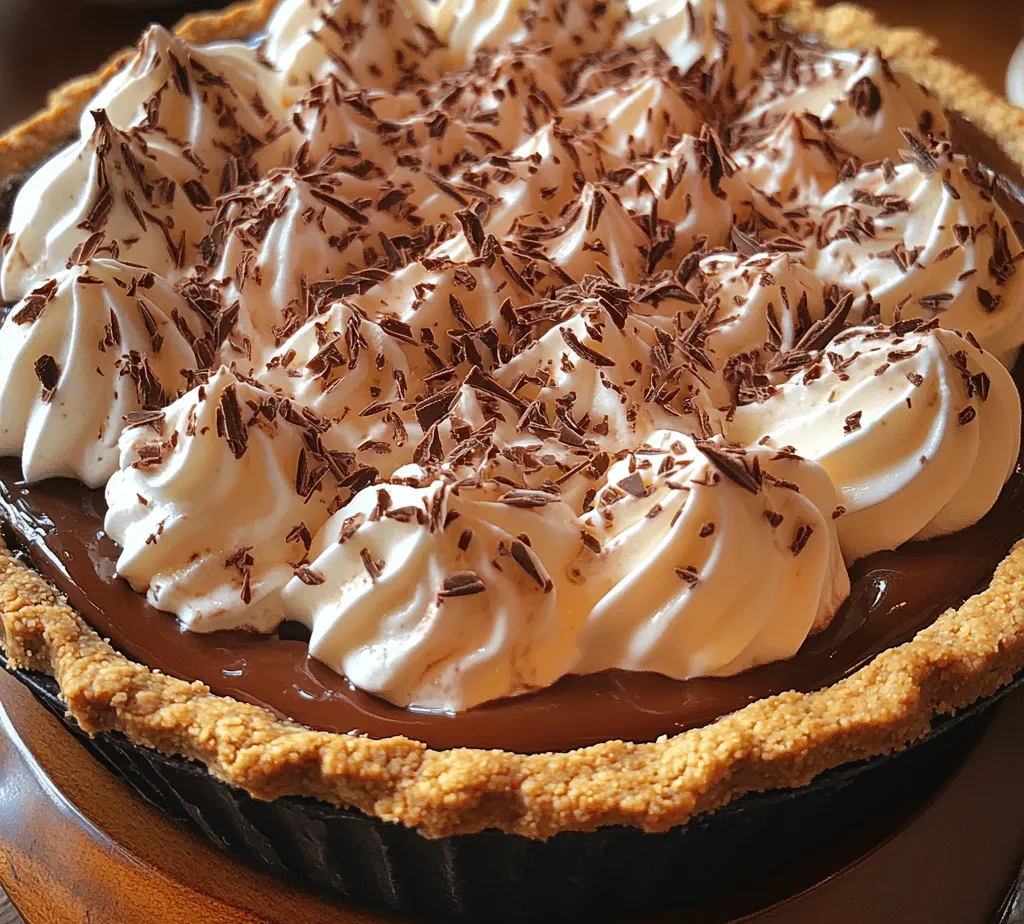
The Finishing Touch: Whipped Cream and Garnishes
No chocolate cream pie is complete without a generous dollop of whipped cream on top. This light, airy topping contrasts beautifully with the rich filling and adds an extra layer of indulgence. You can either whip your own cream or use store-bought varieties, but for the best flavor and texture, homemade is always recommended. Consider garnishing with chocolate shavings, fresh berries, or a sprinkle of cocoa powder for an elegant touch that elevates the presentation of your pie.
Crafting the Perfect Crust
Now that we have explored the vital ingredients for Mom’s Decadent Chocolate Cream Pie, it’s time to focus on crafting the perfect graham cracker crust. This step is essential, as the crust serves as the foundation for your pie and influences both flavor and texture.
Step-by-Step Guide to Preparing the Graham Cracker Crust
1. Gather Your Ingredients: You will need graham cracker crumbs, sugar, unsalted butter, and a pinch of salt.
2. Preheat the Oven: Start by preheating your oven to 350°F (175°C). This ensures that your crust will bake evenly.
3. Mix the Dry Ingredients: In a medium mixing bowl, combine the graham cracker crumbs, sugar, and salt. Mix well to ensure the sugar is evenly distributed throughout the crumbs.
4. Add Melted Butter: Melt your unsalted butter and pour it into the crumb mixture. Use a fork to combine until the crumbs are evenly coated and the mixture resembles wet sand.
5. Press into the Pie Dish: Transfer the crust mixture into a 9-inch pie dish. Use your fingers or the bottom of a measuring cup to firmly press the crumbs into the bottom and up the sides of the dish. Make sure to create an even layer for optimal baking.
6. Bake the Crust: Place the pie dish in the preheated oven and bake for about 8-10 minutes, or until the edges are lightly golden. This step helps to set the crust and enhance its flavor.
7. Cool the Crust: Once baked, remove the crust from the oven and allow it to cool completely before adding the chocolate filling. This prevents the filling from melting the crust and ensures a clean slice when serving.
Best Practices for Mixing and Pressing the Crust
– Use Fresh Graham Crackers: For the best flavor, consider using fresh graham crackers instead of pre-packaged crumbs. Simply crush them using a food processor or by placing them in a zip-top bag and rolling them with a rolling pin.
– Don’t Skip the Salt: A pinch of salt in the crust enhances the sweetness of the graham crackers and balances the overall flavor.
– Press Firmly: To ensure your crust holds together, press the mixture firmly into the pie dish. A well-packed crust will maintain its shape better when sliced.
Tips for Achieving the Ideal Texture and Flavor
– Experiment with Add-Ins: Feel free to get creative with your crust! Consider adding a tablespoon of cocoa powder for a chocolatey twist, or mix in crushed nuts for added texture.
– Check for Even Baking: Keep an eye on the crust while it bakes. If some areas are browning faster than others, rotate the pie dish halfway through baking for even cooking.
How to Tell When the Crust is Perfectly Baked
The crust should be lightly golden and fragrant when it’s done baking. A well-baked crust will feel dry to the touch and should not have any wet or mushy spots. If there are any areas that appear undercooked, return the crust to the oven for an additional minute or two.
Importance of Cooling the Crust Before Adding Filling
Letting the crust cool completely is essential for achieving the perfect pie. If the crust is still warm when you add the filling, it can cause the filling to become runny, leading to a soggy dessert. Allow it to rest at room temperature for at least 20-30 minutes before proceeding.
Creating the Luxurious Chocolate Filling
With the perfect graham cracker crust ready, we now turn our attention to the star of the show: the chocolate filling. This step is where the magic happens, transforming simple ingredients into a rich, decadent experience.
Detailed Breakdown of the Filling-Making Process
1. Combine Dairy Ingredients: In a medium saucepan, combine the whole milk and heavy cream. Heat over medium heat until it starts to simmer, but do not let it boil. Stir occasionally to prevent the milk from scorching.
2. Mix Dry Ingredients: In a separate bowl, whisk together the sugar, cocoa powder, cornstarch, and a pinch of salt. This dry mixture will help prevent clumping when added to the wet ingredients.
3. Temper the Egg Yolks: In another bowl, whisk the egg yolks until they are smooth. Slowly add a small amount of the hot milk mixture to the yolks, whisking constantly to temper them. This step is crucial to prevent the eggs from scrambling.
4. Combine Mixtures: Once tempered, pour the yolk mixture back into the saucepan with the remaining milk mixture. Whisk continuously while cooking over medium heat until the mixture thickens and starts to bubble. This should take about 5-7 minutes.
5. Add Chocolate: Remove the saucepan from the heat and stir in the chopped semi-sweet chocolate. Continue stirring until the chocolate is completely melted and the filling is smooth and glossy.
6. Cool the Filling: Allow the filling to cool for a few minutes before pouring it into the prepared graham cracker crust. This prevents the crust from becoming soggy.
By understanding each ingredient’s role and following these detailed steps, you are well on your way to creating a pie that is not only delicious but also a testament to the love and care put into home baking. Keep an eye out for the next part, where we will explore the finishing touches that will elevate your chocolate cream pie to perfection.
The Science Behind Tempering Eggs for a Smooth Consistency
Tempering eggs is a crucial technique in creating a silky smooth chocolate cream filling. The process involves gradually raising the temperature of the eggs without cooking them, which can result in scrambled eggs if done too quickly. Start by whisking together your egg yolks in a bowl. In a separate saucepan, heat your milk mixture until it’s steaming but not boiling. The key here is to slowly add a small amount of the hot milk to the eggs while whisking vigorously. This method allows the eggs to gradually warm up, preventing them from curdling. Once you’ve tempered the eggs, you can safely return the mixture to the saucepan, ensuring a creamy consistency in your pie filling.
Importance of Cooking the Filling to the Right Temperature
Cooking the filling to the right temperature is pivotal for achieving that luxurious texture. The goal is to heat the mixture to about 170°F (77°C). At this temperature, the starches in the flour and cornstarch will swell and thicken the filling, while the eggs will set perfectly, creating a rich and velvety texture. A food thermometer can be your best friend here; it ensures you don’t overshoot the temperature, which can lead to a grainy texture. Stir constantly while cooking to prevent the mixture from sticking to the bottom of the pan and burning.
How to Know When the Filling Has Thickened Adequately
You’ll know your filling is ready when it coats the back of a spoon and leaves a clear trail when you run your finger through it. This is often referred to as the “nappe” stage, which indicates that the mixture has thickened properly. Additionally, you may notice that the bubbles in the mixture become larger and start to pop, signaling that it’s time to take it off the heat. This step is essential, as an undercooked filling will not set correctly, while an overcooked one can lead to a lumpy texture.
Incorporating Chocolate and Vanilla for Maximum Flavor
Once your filling has thickened, it’s time to enhance it with chocolate and vanilla. Using high-quality chocolate, preferably bittersweet or semi-sweet, will elevate the flavor profile of your pie significantly. Chop the chocolate into small pieces for easy melting, and stir it into the hot filling until smooth. Then, add a splash of pure vanilla extract to round out the flavors. This combination not only adds depth to the chocolate but also balances the sweetness, making every bite a delightful experience.
Assembling the Pie
Bringing it All Together
Once your filling is ready, it’s time to assemble your chocolate cream pie. Begin by pouring the thickened chocolate filling into the pre-baked pie crust. To ensure an even layer, use a spatula to gently spread the filling, smoothing it out towards the edges. Take your time with this step; a well-smoothed filling not only looks appealing but also ensures an even distribution of flavors throughout the pie.
Importance of Chilling the Pie Before Serving
Chilling the pie is crucial for achieving the perfect set. Once you’ve poured the filling into the crust, cover the pie with plastic wrap to prevent a skin from forming on the surface. Refrigerate the pie for at least 4 hours, although overnight is ideal. This extended chilling time allows the filling to firm up completely, making each slice clean and easy to serve.
How Long to Refrigerate to Achieve the Best Set
For the best results, aim to chill your chocolate cream pie for at least 4 hours. However, for optimal texture and flavor development, refrigerating it overnight is recommended. This allows the filling to set fully and the flavors to meld beautifully. If you’re in a rush, a minimum of 2 hours can suffice, but be prepared for a slightly softer filling.
Tips for Covering the Pie to Maintain Freshness
To maintain the freshness of your chocolate cream pie, it’s essential to cover it properly during refrigeration. Use a piece of plastic wrap, ensuring it does not touch the surface of the filling, to avoid any condensation. Alternatively, you can use a pie dome or an airtight container to keep your pie fresh. This also helps prevent any unwanted odors from the fridge from being absorbed into the pie.
Whipping Up the Topping
Adding the Final Touch
The final touch to your decadent chocolate cream pie is a luscious whipped cream topping. Start by chilling your mixing bowl and beaters in the freezer for about 10-15 minutes before you begin. This will help the cream whip up faster and achieve better volume.
Step-by-Step Instructions for Making Whipped Cream
1. Chill the Equipment: As mentioned, chilling your mixing bowl and beaters is key.
2. Add Ingredients: Pour 1 cup of heavy whipping cream into the bowl and add 2 tablespoons of powdered sugar, along with 1 teaspoon of pure vanilla extract for flavor.
3. Begin Mixing: Use an electric mixer on medium speed, then gradually increase to high.
4. Watch for Peaks: Whip the cream until soft peaks form, which should take about 2-3 minutes. This means when you lift the beaters, the cream should hold its shape but still be slightly soft.
5. Avoid Overwhipping: Stop mixing as soon as you reach soft peaks; overwhipping can turn your cream into butter.
The Significance of Using Heavy Whipping Cream for Texture
Using heavy whipping cream is essential for achieving the desired texture in your topping. With a higher fat content (around 36%), heavy cream whips beautifully, creating a rich and stable topping that complements the chocolate filling. Light or regular cream may not whip as well and can result in a less satisfying texture.
How to Achieve Soft Peaks for Optimal Topping
Soft peaks are ideal for a light and airy whipped cream topping. To achieve this, watch closely while mixing; stop as soon as the cream begins to hold a shape but still appears smooth and glossy. This texture ensures that the whipped cream will hold its form while being dolloped on top of the pie, providing a delightful contrast to the creamy filling.
Creative Ways to Garnish with Chocolate Shavings or Cocoa Powder
For an elegant finish, consider garnishing your whipped cream topping with chocolate shavings or a dusting of cocoa powder. To create chocolate shavings, use a vegetable peeler to shave a bar of chocolate. Sprinkle these shavings over the whipped cream just before serving for a beautiful presentation. Alternatively, a light dusting of cocoa powder adds a sophisticated touch and enhances the chocolate flavor.
Serving Suggestions and Pairings
Enhancing Your Dessert Experience
Ideal Occasions for Serving Chocolate Cream Pie
Mom’s Decadent Chocolate Cream Pie is perfect for a variety of occasions. Whether it’s a family gathering, holiday celebration, or a simple weeknight treat, this pie brings joy and satisfaction to any dessert table. It’s also an excellent choice for birthdays or anniversaries, making it a crowd-pleaser that everyone will love.
Beverage Pairings That Complement the Rich Flavors
Pairing your chocolate cream pie with the right beverage can elevate the experience significantly. A rich cup of coffee or espresso complements the chocolate beautifully, enhancing the pie’s flavors. For a non-caffeinated option, consider serving it with a glass of cold milk or a creamy vanilla latte. If you’re feeling adventurous, a dessert wine like a sweet port or a fruit-forward red can also enhance the chocolate notes.
Suggestions for Serving Size and Presentation
When it comes to serving, a simple slice of chocolate cream pie is often enough to satisfy, given its richness. Aim for slices that are about 1/8 of the pie for a balanced portion. Present the pie on a decorative cake stand for an inviting look, and consider adding fresh berries or mint leaves for garnish to create a beautiful contrast against the dark chocolate.
How to Store Leftovers Properly
If you have any leftovers, storing them correctly is essential to maintain freshness. Keep the pie covered in the refrigerator, where it will last for up to 3 days. If you anticipate not finishing it within that time, consider slicing it and placing individual pieces in an airtight container. This way, you can enjoy a slice whenever the craving strikes!
Conclusion
Mom’s Decadent Chocolate Cream Pie is more than just a dessert; it’s a heartfelt creation that brings joy and warmth to any gathering. With its velvety filling, buttery crust, and light whipped topping, it embodies the essence of comfort food. This pie is not only a treat for the taste buds but also a wonderful way to create lasting memories with family and friends. Try this recipe and experience the delightful blend of flavors and textures that make chocolate cream pie a timeless favorite. Whether you’re celebrating a special occasion or simply indulging in a sweet craving, this pie is sure to impress and satisfy, leaving everyone asking for seconds.