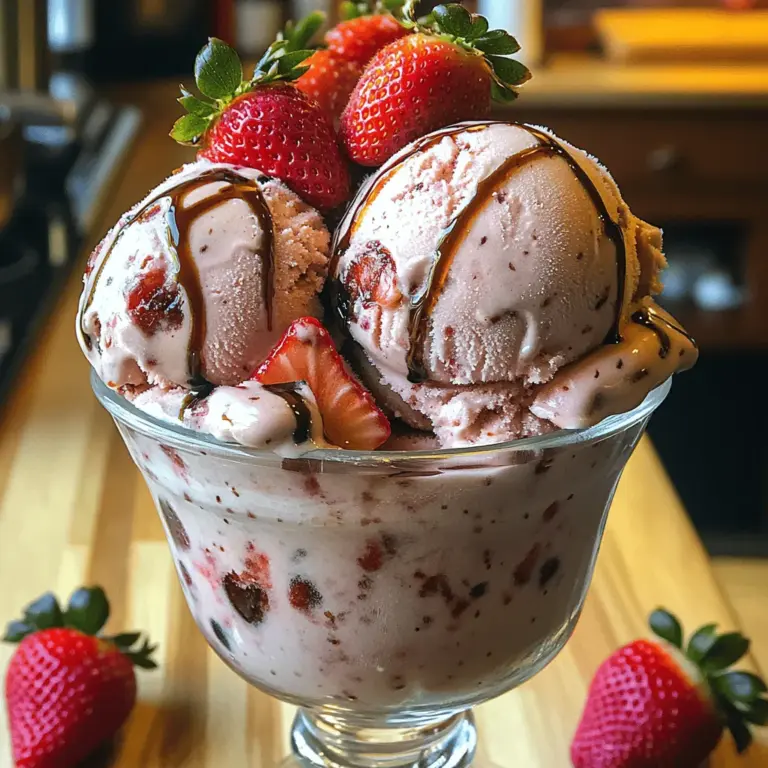

Delight your taste buds with the unique and indulgent flavors of Roasted Strawberry Balsamic Ice Cream. This homemade ice cream recipe combines the sweetness of fresh strawberries with the tangy depth of balsamic vinegar, creating a truly memorable dessert. Perfect for warm summer days or as an elegant treat for special occasions, this ice cream is not only delicious but also surprisingly easy to make.
The concept of blending sweet and savory flavors has taken the culinary world by storm, and this Roasted Strawberry Balsamic Ice Cream is a perfect example of this trend. The combination of strawberries and balsamic vinegar may seem unconventional at first, but the roasting process intensifies the natural sweetness of the strawberries while adding a complex flavor dimension from the vinegar. This ice cream offers a refreshing, gourmet twist on traditional strawberry desserts, making it an exquisite addition to your summer dessert repertoire.
Understanding the Ingredients
To create this delectable Roasted Strawberry Balsamic Ice Cream, it’s essential to understand the core components of the recipe. Each ingredient plays a vital role in achieving the perfect balance of flavors and textures.
Fresh Strawberries: The Star Ingredient
The star of this recipe is undoubtedly the fresh strawberries. When selecting strawberries for your ice cream, opt for ripe, juicy berries. The natural sweetness and vibrant flavor of fresh strawberries are essential to the success of this dish. Look for strawberries that are bright red with a natural sheen and a strong aroma, as these qualities indicate peak ripeness. Using local, in-season strawberries can elevate the flavor even further, making your ice cream taste more vibrant and fresh.
Granulated Sugar: Balancing Sweetness
Granulated sugar is another critical ingredient in this recipe. While strawberries are naturally sweet, the addition of sugar helps to balance the flavors and enhance the overall sweetness of the ice cream. The sugar not only sweetens the mixture but also aids in the freezing process, resulting in a smoother texture. You can adjust the amount of sugar based on your taste preference, but keep in mind that the sweetness should complement the strawberries and balsamic vinegar rather than overpower them.
Balsamic Vinegar: An Unexpected Twist
Balsamic vinegar may not be the first ingredient that comes to mind when you think of ice cream, but it plays a crucial role in this recipe. The tangy acidity of balsamic vinegar is the perfect counterpoint to the sweetness of the strawberries, creating a well-rounded flavor profile. The roasting process enhances the complexities of the balsamic, bringing out its rich, caramel notes that mingle beautifully with the strawberries. When selecting balsamic vinegar for this recipe, use a high-quality variety for the best flavor.
Sea Salt: Enhancing Flavor Depth
A pinch of sea salt is a small but mighty addition to this recipe. Salt is known for its ability to enhance flavors, and in this case, it helps to elevate both the sweetness of the strawberries and the tanginess of the balsamic vinegar. A little salt can also round out the flavors, making the ice cream taste more sophisticated. Use fine sea salt for even distribution throughout the mixture.
The Ice Cream Base Ingredients: Cream, Milk, and Vanilla
The base of your ice cream is just as important as the flavor additions. For this Roasted Strawberry Balsamic Ice Cream, you will need heavy cream and whole milk. The combination of these two ingredients creates a rich, creamy texture that is essential for a high-quality ice cream. Heavy cream contributes to the ice cream’s smoothness and creaminess, while whole milk adds a lighter texture.
Additionally, vanilla extract enhances the overall flavor profile of the ice cream base, providing a warm, aromatic note that complements the strawberries and balsamic vinegar beautifully. For an extra touch, consider using pure vanilla extract rather than imitation vanilla for a more authentic flavor.
The Roasting Process: Transforming Strawberries
One of the key steps in this recipe is the roasting process, which transforms the strawberries and intensifies their flavor. Roasting brings out the natural sugars in the strawberries, resulting in a caramelized, concentrated flavor that will elevate your ice cream to new heights.
The Caramelization Process: Natural Sugars at Work
When strawberries are roasted, their natural sugars undergo a caramelization process. This not only enhances their sweetness but also adds depth and complexity to their flavor. The heat from the oven breaks down the cell walls of the strawberries, allowing their juices to concentrate and intensify. The caramelization process results in a syrupy texture that will contribute to the creamy consistency of your ice cream.
The Role of Balsamic Vinegar in Roasting
In this recipe, balsamic vinegar plays a pivotal role in the roasting process. When mixed with the strawberries, the vinegar not only adds its unique flavor but also helps to create a glaze that coats the strawberries as they roast. This glaze caramelizes in the oven, further enhancing the strawberries’ sweetness and adding a delightful tang that balances the dish. The interaction between the strawberries and balsamic vinegar during roasting is what sets this ice cream apart from traditional strawberry varieties.
Step-by-Step Roasting Instructions
To achieve perfectly roasted strawberries for your ice cream, follow these step-by-step instructions:
1. Preheating the Oven: Importance of Temperature
Begin by preheating your oven to 400°F (200°C). A hot oven is crucial for achieving the caramelization effect, so ensure that it is fully preheated before placing the strawberries inside.
2. Mixing Ingredients for Optimal Flavor
In a mixing bowl, combine the fresh strawberries, granulated sugar, and balsamic vinegar. Gently toss the strawberries to ensure that they are evenly coated with the sugar and vinegar mixture. This step is key, as it allows the flavors to meld together before roasting.
3. Baking Time and Techniques for Perfectly Roasted Strawberries
Spread the coated strawberries in a single layer on a baking sheet lined with parchment paper. Make sure there is enough space between the strawberries to allow for even roasting. Place the baking sheet in the preheated oven and roast the strawberries for about 20-25 minutes, or until they are soft, juicy, and caramelized. Stir the strawberries halfway through the roasting time to ensure even cooking. Once roasted, remove them from the oven and allow them to cool slightly before incorporating them into the ice cream base.
Creating the Ice Cream Base
Now that you have your beautifully roasted strawberries, it’s time to craft the perfect ice cream base that will bring this dessert together.
Importance of Heavy Cream and Whole Milk
Start by combining heavy cream and whole milk in a large mixing bowl. The ratio of cream to milk will determine the creaminess of your ice cream. For a richer, denser ice cream, use more heavy cream. However, the balance of both is crucial for a smooth texture.
Dissolving Sugar: The Key to a Smooth Texture
Next, add granulated sugar to the cream and milk mixture. Use a whisk or an electric mixer to combine the ingredients, ensuring that the sugar dissolves completely. This step is essential for achieving a smooth ice cream texture, as undissolved sugar can lead to a gritty consistency.
Adding Flavor: Vanilla Extract and Lemon Juice
Once the sugar has dissolved, stir in the vanilla extract. This addition enhances the flavor of the ice cream base, creating a harmonious blend with the roasted strawberries. For a touch of brightness, consider adding a small amount of fresh lemon juice. The acidity from the lemon juice balances the sweetness and adds depth to the overall flavor profile.
With all these steps, you are well on your way to creating a delicious Roasted Strawberry Balsamic Ice Cream that will impress your family and friends. In the next section, we will walk through the final steps of combining the roasted strawberries with the ice cream base and the process of churning and freezing to create a delightful frozen treat. Stay tuned to discover how to bring this unique dessert to life!
Incorporating Roasted Strawberries: Puree vs. Chunks
When it comes to adding roasted strawberries to your ice cream, you have two primary options: pureeing the strawberries or incorporating them in chunks. Each approach offers a unique texture and flavor experience, allowing you to customize your Roasted Strawberry Balsamic Ice Cream to your liking.
Puree for Smoothness
If you prefer a silky-smooth ice cream, pureeing the roasted strawberries is the way to go. This method creates a cohesive blend where the sweet, caramelized flavors of the strawberries meld beautifully with the creamy base. To achieve this, simply place the roasted strawberries in a blender or food processor and pulse until smooth. You can adjust the consistency to your preference, adding a bit of the ice cream mixture to help blend if needed.
Chunks for Texture
On the other hand, if you enjoy bites of fruit in your ice cream, opt for leaving some of the strawberries in chunks. This method provides bursts of flavor and a delightful textural contrast against the creamy ice cream base. After roasting, set aside a few strawberries before pureeing the rest. Chop these reserved strawberries into bite-sized pieces and fold them into the ice cream mixture just before churning.
The choice between puree and chunks ultimately depends on your personal preference—whether you desire a smooth, creamy treat or a textured experience with fruity surprises.
Chilling the Mixture: The Science Behind It
Chilling your ice cream mixture is a crucial step that significantly impacts both texture and flavor. Understanding why this process is essential can help you achieve the perfect ice cream.
Understanding Why Chilling is Essential
Chilling the mixture helps to stabilize the fats in the cream and the sugars in the strawberries, ensuring a smoother texture when churning. When the mixture is cold, it freezes more evenly, preventing the formation of large ice crystals that can lead to a grainy texture.
The Cooling Process: Room Temperature to Refrigeration
Start by allowing your ice cream mixture to cool to room temperature after combining all the ingredients. This process helps prevent thermal shock in your ice cream maker, which can negatively affect the churning process. Once the mixture has cooled, transfer it to the refrigerator for further chilling.
The Impact of Chilling on Flavor Development
Chilling not only improves texture but also enhances the overall flavor. The longer the mixture sits, the more the flavors meld together. This resting period allows the sweet notes of the strawberries and the tanginess of the balsamic vinegar to integrate fully, resulting in a more robust and complex flavor profile.
Recommended Chilling Times for Best Results
For optimal results, it is recommended to chill your mixture for at least 4 to 6 hours, or overnight if possible. This extended chilling time allows the flavors to deepen and the mixture to cool thoroughly, making it ready for the churning process.
Churning the Ice Cream: Techniques for Success
Once your mixture is perfectly chilled, it’s time to churn the ice cream. This step transforms your creamy mixture into a luscious dessert.
Using an Ice Cream Maker to Achieve Creaminess
An ice cream maker is an essential tool for achieving that smooth, creamy consistency that homemade ice cream is known for. There are several types of ice cream makers available, including:
– Traditional Ice Cream Makers: These require ice and salt to freeze the mixture, which can be a bit messy but yields excellent results.
– Electric Ice Cream Makers: These are user-friendly and often have built-in freezers, making the process quicker and easier.
– Gelato Makers: Designed specifically for making gelato, these machines churn at a slower speed, incorporating less air for a denser texture.
Choose the type that suits your needs and preferences.
Churning Instructions: Timing and Techniques
When you’re ready to churn, pour the chilled mixture into the ice cream maker and follow the manufacturer’s instructions. Generally, churning takes about 20 to 30 minutes. Keep an eye on the mixture as it churns; it should start to thicken and double in volume.
Adding Texture: Incorporating Reserved Strawberry Pieces
If you opted for the chunk method, now is the time to add your reserved pieces of roasted strawberries. Gently fold them into the mixture once it has reached a soft-serve consistency, ensuring that they are evenly distributed throughout the ice cream.
Freezing the Ice Cream: Achieving the Perfect Scoop
After churning, your ice cream will likely have a soft, creamy texture that’s perfect for enjoying right away. However, for the best scooping experience, you’ll want to freeze it further.
The Final Step for Ideal Consistency
Transfer the churned ice cream to an airtight container, pressing it down to eliminate any air pockets. This step helps prevent freezer burn and ensures that your ice cream stays fresh. Smooth the top with a spatula, and cover the container with a lid or plastic wrap.
Best Practices for Freezing Homemade Ice Cream
To achieve the ideal consistency, freeze your ice cream for at least 4 hours, or until it reaches a firm texture. If you’re in a hurry, placing it in the back of the freezer (where it’s coldest) can help it freeze faster.
Understanding Ice Cream Texture: Firm vs. Soft Serve
Once frozen, your Roasted Strawberry Balsamic Ice Cream should be firm but still scoopable. If it’s too hard, let it sit at room temperature for a few minutes before scooping. For a softer texture reminiscent of soft serve, you can reduce the freezing time slightly or adjust the sugar content in the base.
Storing Your Ice Cream: Airtight Containers and Duration
For optimal freshness, store your ice cream in an airtight container and consume it within 1 to 2 weeks. While it may last longer, the flavor and texture are best when enjoyed fresh.
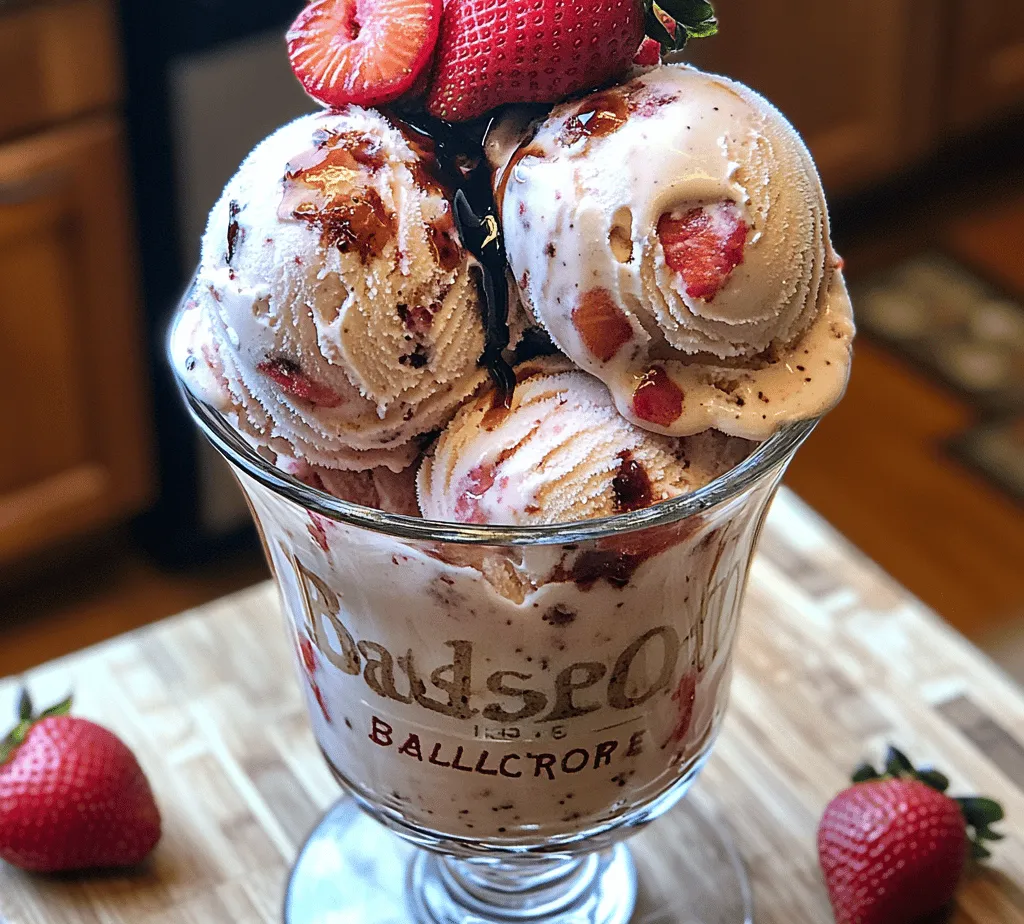
Serving Suggestions for Roasted Strawberry Balsamic Ice Cream
Now that your ice cream is ready, it’s time to think about presentation and serving. Here are some creative ways to elevate your dessert experience.
Elevating Your Dessert Presentation
The way you serve your ice cream can significantly enhance its appeal. Consider these options:
– Serving in Bowls vs. Cones: While classic ice cream cones add a nostalgic touch, serving in elegant bowls allows for more creative garnishing. Choose based on the occasion and your personal preference.
– Garnishing Options: Elevate your dish with a drizzle of balsamic reduction over the top, which not only looks stunning but also adds an extra layer of flavor. Fresh strawberries, crushed nuts, or even a sprig of mint can make for beautiful garnishes that enhance both taste and presentation.
Pairing Ideas: Complementary Flavors and Textures
To further enhance your ice cream experience, consider pairing it with complementary flavors and textures. Here are a few suggestions:
– Chocolate: The richness of dark chocolate or chocolate sauce creates a beautiful contrast with the fruity, tangy ice cream.
– Cookies: Crushed cookies or crumbled cake can add a delightful crunch, creating a satisfying textural contrast.
– Savory Elements: A sprinkle of sea salt or a hint of pepper can elevate the flavor profile, making it a more sophisticated dessert option.
Conclusion: The Joy of Homemade Ice Cream
Roasted Strawberry Balsamic Ice Cream is not just a dessert; it’s an experience that brings together the charm of homemade goodness with innovative flavor combinations. As you savor each scoop, appreciate the blend of sweet, tangy, and creamy elements that make this ice cream truly special. This recipe not only showcases the beauty of fresh ingredients but also invites you to indulge in the joys of creating something delicious from scratch.
Whether it’s a treat for yourself or a delightful dessert to share with loved ones, this ice cream is sure to impress and satisfy. With its unique flavor profile and inviting texture, Roasted Strawberry Balsamic Ice Cream is bound to become a favorite in your household. So gather your ingredients, embrace the process, and get ready to enjoy a scoop of pure joy!
