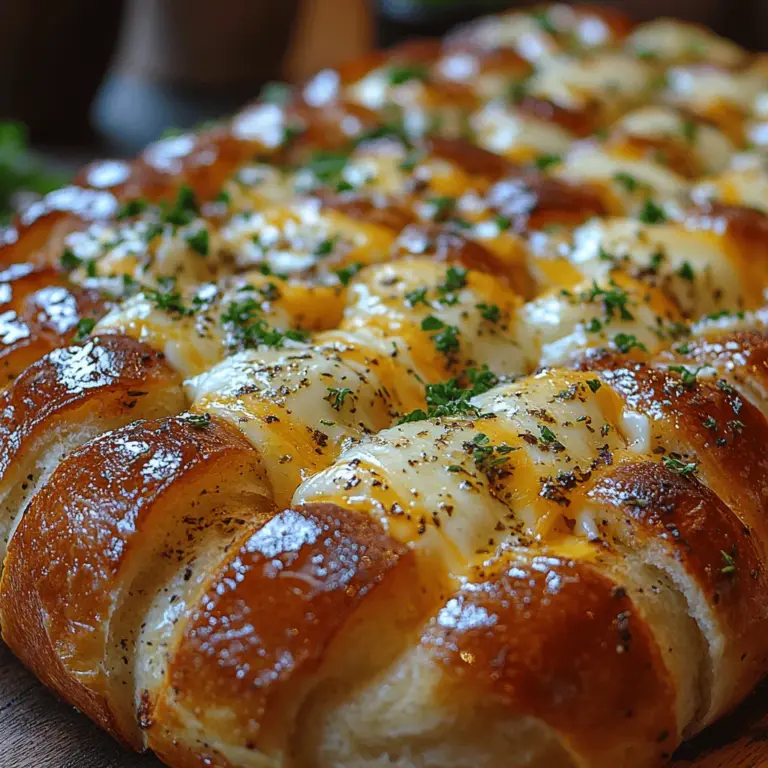
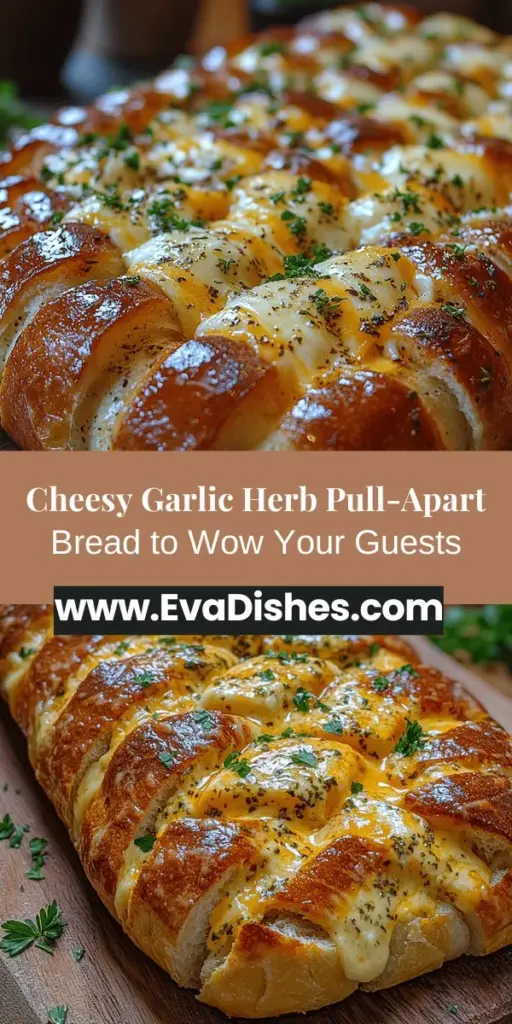
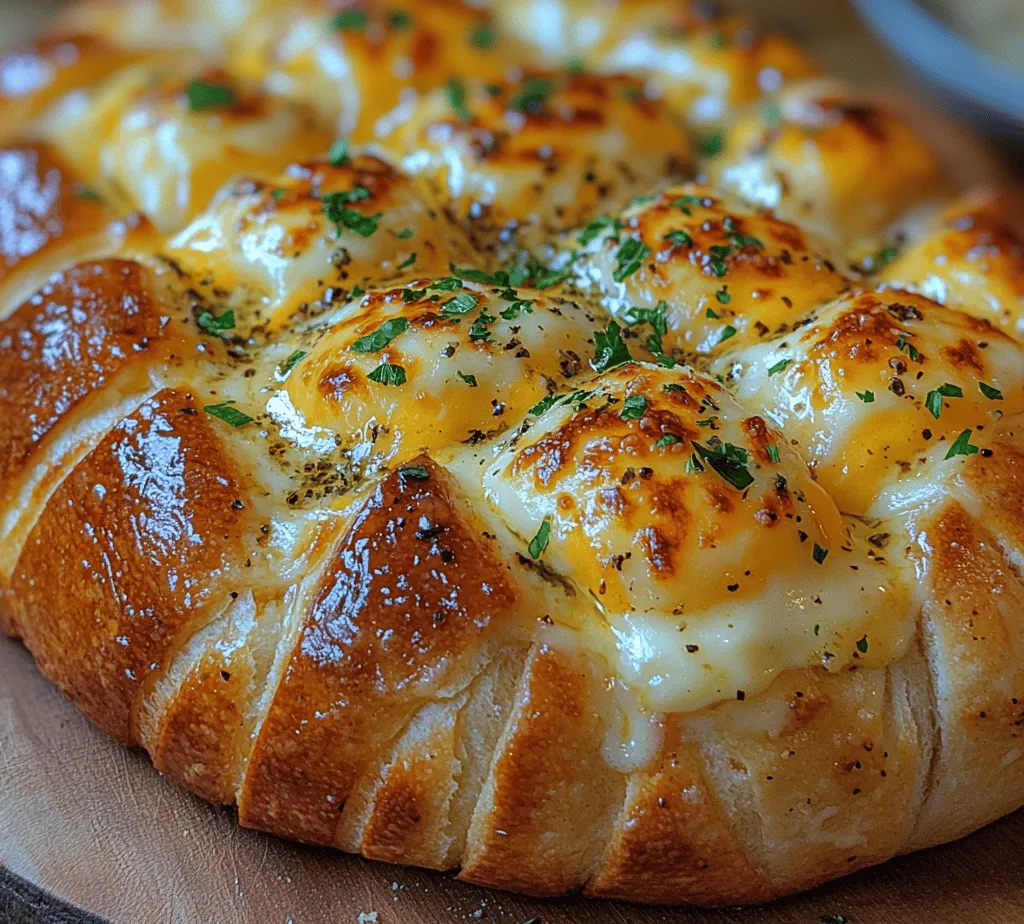
Delightful and comforting, Cheesy Garlic Herb Pull-Apart Bread is a perfect addition to any meal or gathering. Its enticing aroma and gooey, cheesy center make it a crowd-pleaser that combines simplicity with deliciousness. This beloved recipe has become a staple in many households, cherished for both its flavor and its ability to bring people together. The experience of tearing off a warm piece of bread, oozing with melted cheese and infused with aromatic garlic and herbs, is nothing short of heavenly.
This pull-apart bread is not just a side dish; it can stand on its own as an appetizer or snack. Whether you’re hosting a dinner party, enjoying a cozy family meal, or just craving a savory treat, this bread is sure to impress. In this article, we will explore the intricacies of this beloved recipe, providing step-by-step instructions, ingredient insights, and serving suggestions to ensure your bread turns out perfectly every time. With a few simple ingredients and some easy-to-follow techniques, you can create a masterpiece that will leave your guests begging for more.
Understanding the Ingredients: The Heart of the Recipe
Every great dish begins with quality ingredients, and Cheesy Garlic Herb Pull-Apart Bread is no exception. Let’s break down the essential components that contribute to this delightful recipe.
The Role of Bread: Choosing the Right Loaf
The foundation of any pull-apart bread is the loaf itself. For optimal texture and flavor, it’s crucial to select the right type of bread. Crusty breads, such as Italian or French loaves, are ideal for this recipe. These varieties have a sturdy crust that holds the fillings in place while still allowing for that delightful pull-apart experience.
When shopping for bread, look for a loaf that’s fresh and has a thick crust. A good-quality sourdough can also add a unique flavor profile while providing the necessary structure. Avoid soft sandwich breads, as they may not hold up under the weight of all the delicious fillings and could lead to a mushy outcome.
The Magic of Garlic: Enhancing Flavor
Garlic is arguably the star of this recipe. Not only does it add a robust flavor, but it also brings numerous health benefits to the table. Garlic is known for its anti-inflammatory and antioxidant properties, making it a powerful ingredient in many dishes.
For this pull-apart bread, the garlic is transformed into a rich garlic butter mixture that infuses the bread with its savory goodness. Fresh garlic cloves are ideal for this recipe, but you can also use pre-minced garlic for convenience. Whichever you choose, ensure that the garlic is finely minced to maximize its flavor release when combined with the butter.
Herbs and Spices: Elevating the Taste
Herbs are essential in elevating the taste of the Cheesy Garlic Herb Pull-Apart Bread. Dried oregano, thyme, and parsley are classic choices that complement the garlic and cheese perfectly. These herbs add depth and complexity to the flavor profile, making each bite a delight.
While dried herbs work well, using fresh herbs can take your bread to the next level. Fresh herbs tend to have a more vibrant flavor and aroma. If you decide to use fresh herbs, remember that they are typically more potent than dried, so adjust the quantities accordingly.
Cheese Selection: The Best Melting Varieties
Cheese is the crowning glory of this recipe. The choice of cheese is crucial to achieving that gooey, melty center that everyone loves. Mozzarella is a popular choice due to its excellent melting properties and mild flavor. It creates that satisfying stretch when you pull apart a piece of bread.
Cheddar cheese is another fantastic option, providing a sharper flavor that contrasts beautifully with the buttery garlic mixture. For a more gourmet touch, consider blending mozzarella with other cheeses like Gruyère or fontina, which also melt beautifully and add depth to the flavor.
Step-by-Step Instructions: Creating Cheesy Garlic Herb Pull-Apart Bread
Now that we’ve covered the necessary ingredients, let’s dive into the preparation process. Follow these detailed steps to create your own Cheesy Garlic Herb Pull-Apart Bread.
Preheating the Oven: Setting the Stage for Baking
Before you start assembling your bread, it’s essential to preheat your oven. Proper preheating ensures that your bread bakes evenly and achieves the perfect texture. Set your oven to 375°F (190°C) and allow it to reach the desired temperature before placing your bread inside. This step is crucial; skipping it can result in uneven baking and a less-than-perfect crust.
Preparing the Bread: Techniques for Cutting
To create the iconic pull-apart effect, the bread must be cut correctly. Begin by placing the loaf on a cutting board. Using a sharp bread knife, make diagonal cuts in the loaf, spacing them about 1 inch apart. Be careful not to cut all the way through the bottom of the loaf; you want to leave the base intact to hold the bread together.
Next, make similar cuts in the opposite direction to create a diamond pattern. This technique allows the garlic butter and cheese to seep into the crevices, ensuring that every bite is packed with flavor. Once you’ve made your cuts, gently pull apart the sections slightly to create openings for the filling.
Making the Garlic Butter Mixture: Infusing Flavor
Now it’s time to prepare the garlic butter mixture that will elevate your bread to new heights. In a mixing bowl, combine softened unsalted butter, minced garlic, and your chosen herbs. If you’re using dried herbs, about a teaspoon each of oregano, thyme, and parsley should suffice. For fresh herbs, you can use a tablespoon of each, finely chopped.
Mix the ingredients thoroughly until well combined. The butter should be soft enough to spread easily, but not overly melted. If the mixture is too runny, it won’t adhere to the bread properly, and you may lose some of that delicious flavor infusion.
Once your garlic butter mixture is ready, it’s time to fill the cuts in the bread. Using a spoon or a small spatula, carefully spread the mixture into each crevice of the bread, making sure to get it into all the cuts. Don’t be shy—generously distribute the mixture to ensure every bite is packed with flavor.
Next, add the cheese. Sprinkle the shredded mozzarella and cheddar into the cuts, allowing it to nestle into the garlic butter. Be sure to fill the bread generously, as the cheese will melt and create that gooey, irresistible center that makes this recipe a favorite.
With the bread prepared, you’re now ready to move on to baking, but we’ll save that for the next section. Stay tuned as we guide you through the final steps to create the perfect Cheesy Garlic Herb Pull-Apart Bread that will have everyone reaching for seconds.
Stuffing the Bread: Maximize the Cheese Delight
To create an unforgettable Cheesy Garlic Herb Pull-Apart Bread, the stuffing process is crucial. This step ensures that every bite bursts with flavor and gooey cheese. Start by taking your prepared dough and gently flatten it out on a clean, floured surface. Use a rolling pin to roll the dough into a rectangle about 1/2-inch thick. This will provide ample surface area for the delicious stuffing.
Next, melt 1/2 cup of unsalted butter in a small saucepan over low heat. Once melted, stir in four cloves of minced garlic, a teaspoon of dried oregano, a teaspoon of dried basil, and a pinch of salt. Allow this mixture to simmer for about two minutes until fragrant. This garlic butter will be the base of your stuffing and will infuse the bread with incredible flavor.
Using a pastry brush, evenly coat the surface of the dough with the garlic butter mixture. Be generous, as this will help the flavors penetrate thoroughly. After buttering, sprinkle a cup of shredded mozzarella cheese and a half-cup of grated Parmesan cheese over the dough. For an extra kick, feel free to add a teaspoon of red pepper flakes.
To stuff the bread, cut the dough into 1-inch squares using a sharp knife or pizza cutter. Take each square and stack them, layering with more cheese if desired, before placing them into a greased bundt pan. This layering not only maximizes the cheesy goodness but also creates that iconic pull-apart effect once baked. Make sure to press down gently as you stack the pieces to ensure they fit snugly together.
Baking the Bread: Achieving Golden Perfection
Once your bundt pan is filled with the dough, it’s time to prepare for baking. Preheat your oven to 375°F (190°C). Cover the bundt pan with aluminum foil to retain moisture while baking, which is vital for achieving that fluffy interior. The foil will help steam the bread, allowing it to rise properly and maintain a soft texture.
Place the bundt pan in the oven and bake for 20 minutes covered. After this time, carefully remove the foil, allowing the top of the bread to brown. Bake for an additional 10-15 minutes until the top is golden and the cheese is bubbling. The internal temperature should reach around 190°F (88°C) to ensure the dough is fully cooked.
Once baked, remove the bread from the oven and let it cool for about 5 minutes in the pan. This resting period allows the cheese to set slightly, making it easier to remove the bread without falling apart.
Finishing Touches: Unwrapping and Garnishing
After the cooling period, carefully invert the bundt pan onto a serving platter. Give it a gentle shake to help release the bread. If it doesn’t come out easily, gently tap the sides of the pan or use a rubber spatula to loosen the edges.
While the bread is still warm, brush the reserved garlic butter mixture over the top of the bread. This final touch not only enhances the flavor but also adds a beautiful sheen that makes the bread irresistible. For an added visual appeal, sprinkle some freshly chopped parsley or chives over the top. This garnish will contrast beautifully against the golden brown of the bread and add a fresh flavor.
Serving Suggestions: Pairing and Presentation Ideas
Perfect Pairings: What to Serve with Pull-Apart Bread
Cheesy Garlic Herb Pull-Apart Bread is versatile and can be served in various ways. It makes an excellent appetizer or side dish. Pair it with a light salad, such as a mixed greens salad with a vinaigrette dressing, to balance the richness of the cheese. Alternatively, serve it alongside a hearty soup like tomato basil or minestrone for a comforting meal.
For a more substantial dining experience, consider offering it as a side with roasted meats or grilled vegetables. This bread complements flavors well, making it a delightful addition to any meal.
Creative Serving Options: Beyond Traditional Sharing
To elevate your serving presentation, consider offering a selection of dipping sauces. Marinara sauce pairs wonderfully with the cheesy bread, creating a classic Italian experience. Alternatively, a garlic aioli or a creamy ranch dressing can add a different flavor profile. Set out small bowls of these dips alongside the bread for guests to enjoy.
For gatherings, arrange the bread on a wooden board and serve it with a variety of cheeses and cured meats. This creates a rustic charcuterie-style display that is sure to impress your guests.
Nutritional Value: Understanding the Ingredients
Breakdown of Nutritional Information
While Cheesy Garlic Herb Pull-Apart Bread is undeniably delicious, it’s important to be mindful of its nutritional content. A serving size (approximately 1/8 of the loaf) contains roughly 250-300 calories, depending on the specific ingredients used. This includes about 15-20 grams of fat, primarily from the butter and cheese, and approximately 25-30 grams of carbohydrates.
The recipe is rich in flavor but also in calories, so it’s best enjoyed in moderation, especially if you’re watching your calorie intake.
Healthier Alternatives: Modifications for Dietary Needs
If you’re looking to adapt this recipe for a healthier lifestyle, consider using whole wheat flour instead of all-purpose flour for added fiber. You can also reduce the butter by using a combination of Greek yogurt and olive oil, which provides moisture and richness without as many calories.
For a gluten-free option, substitute all-purpose flour with a gluten-free flour blend. Ensure the baking powder is also gluten-free. You can maintain the cheesy goodness by using gluten-free bread mixes available in stores or online.
Conclusion: Enjoying the Cheesy Garlic Herb Pull-Apart Bread Experience
Cheesy Garlic Herb Pull-Apart Bread is not just a recipe; it’s a flavorful experience that brings people together. By following the detailed instructions and embracing the rich flavors of garlic, herbs, and cheese, you can create an unforgettable dish that will be the highlight of any meal. Whether enjoyed with family or shared at gatherings, this bread is sure to please every palate, making it a staple in your cooking repertoire.
With its gooey, cheesy interior and golden-brown crust, this pull-apart bread is perfect for any occasion. From cozy family dinners to festive holiday gatherings, the comforting flavors of garlic and cheese will leave everyone coming back for more. So gather your ingredients, invite some friends or family over, and enjoy the delightful process of making and sharing this delicious Cheesy Garlic Herb Pull-Apart Bread.
