
Introduction
Cinnamon rolls have a timeless appeal that transcends generations, making them a beloved treat in households around the world. There’s something undeniably comforting about the soft, pillowy dough, the warm aroma of cinnamon and sugar filling the air, and the final touch of creamy frosting that brings it all together. Whether enjoyed as a decadent breakfast, an indulgent dessert, or a cherished snack with afternoon tea, cinnamon rolls have a special place in our hearts and stomachs.
The irresistible combination of warm dough, spiced filling, and luscious cream cheese frosting creates a sensory experience that’s hard to resist. The moment you take a bite, the buttery richness and sweet, spiced flavor envelop your taste buds, making it an unforgettable treat. But what truly sets homemade cinnamon rolls apart is the ability to control ingredients, texture, and flavor, elevating them from ordinary to extraordinary.
Homemade cinnamon rolls can transform any occasion into something special. Be it a festive holiday gathering, a cozy family brunch, or a simple Sunday morning, the act of baking these delightful rolls can create an atmosphere of warmth and joy. As you prepare the dough and roll in the filling, the anticipation builds, and the sweet smell wafting from the oven has a magical way of bringing people together.
The Science Behind Perfect Cinnamon Rolls
Creating the ultimate cinnamon roll goes beyond just following a recipe; it involves understanding the science of baking. Each ingredient plays a crucial role in achieving the perfect texture and flavor that defines a great cinnamon roll.
Key Ingredients and Their Roles
– Flour: The foundation of your cinnamon roll, flour provides structure and stability to the dough. All-purpose flour is commonly used, but bread flour can be used for a chewier texture due to its higher protein content.
– Yeast: This magical ingredient is responsible for the dough’s rise and airy texture. It ferments and produces carbon dioxide, which causes the dough to expand. Active dry or instant yeast can be used in this recipe, but it’s essential to ensure it’s fresh for optimal rise.
– Sugar: Not only does sugar sweeten the dough, but it also feeds the yeast, helping it to rise. It adds flavor and contributes to the browning of the rolls during baking.
– Salt: While it may seem counterintuitive, salt enhances flavor and strengthens the dough structure. It controls yeast activity, ensuring a balanced rise and preventing over-fermentation.
– Milk: Warm milk is key to activating the yeast and creating a tender crumb. It adds moisture to the dough and enriches the flavor profile.
– Butter: This ingredient adds richness and flavor to the rolls. It also contributes to a soft texture, making every bite melt in your mouth.
– Eggs: Eggs enrich the dough, providing moisture and fat that contribute to the rolls’ tenderness. They also act as a binding agent, helping to hold everything together.
The Importance of Yeast
Yeast is often regarded as the heart of any yeast-leavened dough. For cinnamon rolls, active yeast is crucial because it not only helps the dough rise but also affects the final texture. When yeast is mixed with warm milk, it activates and begins to ferment, producing carbon dioxide gas. This gas gets trapped in the dough, causing it to rise and develop a light, airy quality that is characteristic of perfect cinnamon rolls.
When using milk to warm up your yeast, make sure it’s not too hot, as high temperatures can kill the yeast, leading to dense and disappointing rolls. Aim for a temperature of about 110°F (43°C) — warm to the touch, but not scalding.
The Role of Butter and Eggs
Butter and eggs are essential for creating a rich flavor and tender crumb in your cinnamon rolls. Butter contributes to both moisture and richness, while eggs add structure and stability. The combination of these ingredients results in a soft dough that pulls apart easily, revealing the swirls of cinnamon and sugar within.
When preparing your dough, make sure to use room temperature butter, as this will allow for better incorporation into the dough. If you forget to set your butter out in advance, you can soften it in the microwave for a few seconds, but be careful not to melt it completely.
Gathering Your Ingredients
Before you dive into the baking process, it’s important to gather all your ingredients. Having everything on hand will make the entire process smoother and ensure you don’t forget any critical components. Here’s a detailed list of ingredients for the Ultimate Cinnamon Roll Recipe with Cream Cheese Frosting, along with some potential substitutions:
Ingredients List
– For the Dough:
– 4 cups all-purpose flour (can substitute with bread flour for a chewier texture)
– 1 packet (2 ¼ teaspoons) active dry yeast
– ½ cup granulated sugar
– 1 teaspoon salt
– 1 cup whole milk, warmed to 110°F
– ⅓ cup unsalted butter, melted (plus more for greasing)
– 2 large eggs, at room temperature
– For the Filling:
– ½ cup unsalted butter, softened to room temperature
– 1 cup brown sugar, packed (light or dark brown sugar works well)
– 2 tablespoons ground cinnamon
– ½ teaspoon ground nutmeg (optional, but adds a lovely depth of flavor)
– For the Cream Cheese Frosting:
– 8 oz cream cheese, softened
– ½ cup unsalted butter, softened
– 2 cups powdered sugar
– 1 teaspoon vanilla extract
– 1-2 tablespoons milk or cream (to achieve desired consistency)
Importance of Quality Ingredients
Quality ingredients can make a significant difference in the final taste and texture of your cinnamon rolls. For instance, using fresh, high-quality vanilla extract can elevate the flavor of your cream cheese frosting. Furthermore, high-quality butter contributes to a rich and delicious roll, while fresh eggs improve the dough’s structure.
When it comes to spices, consider using freshly ground cinnamon for the filling. The flavor will be more potent and aromatic compared to pre-ground options. If you choose to include nutmeg, ensure it’s fresh as well, as pre-ground spices can lose their flavor over time.
Optional Ingredients
While the essential ingredients will yield delicious cinnamon rolls, consider adding some optional ingredients for enhanced taste:
– Nutmeg: Adding nutmeg to your filling can bring warmth and complexity to the flavor profile.
– Chopped nuts: Walnuts or pecans can be sprinkled in the filling for an added crunch.
– Raisins or dried fruit: For a touch of sweetness, consider adding raisins or dried cranberries.
– Zest of an orange or lemon: A hint of citrus zest can brighten the flavors of the rolls.
Step-by-Step Guide to Making Ultimate Cinnamon Rolls
Preparing the Dough
The first step in creating the ultimate cinnamon rolls is preparing the dough. This process involves mixing the dry ingredients and creating a wet mixture that will come together to form a soft, pliable dough.
Mixing Dry Ingredients
1. In a large mixing bowl, combine the flour, sugar, yeast, and salt.
2. Whisk the dry ingredients together until evenly combined. This ensures that the yeast and salt are distributed throughout the flour, allowing for an even rise.
Creating the Wet Mixture
1. In a separate bowl, mix the warm milk, melted butter, and eggs.
2. Gently whisk until the mixture is well combined. The warmth of the milk should help the melted butter to blend smoothly.
Combining Wet and Dry Ingredients
1. Pour the wet mixture into the bowl with the dry ingredients.
2. Using a spatula or wooden spoon, stir until the dough begins to come together. It may look shaggy at first, but that’s perfectly okay.
Kneading the Dough
1. Turn the dough out onto a floured surface.
2. Knead the dough for about 8-10 minutes, until it becomes smooth and elastic. Proper kneading is essential for gluten development, which helps the dough rise and gives the rolls their structure.
Tips for Knowing When the Dough is Ready:
– The dough should spring back when gently pressed.
– A smooth surface and slight tackiness indicate it’s ready.
Creating the Ideal Environment for Rising
1. Place the kneaded dough in a lightly greased bowl, cover it with plastic wrap or a clean kitchen towel, and let it rise in a warm, draft-free area until it has doubled in size (about 1-2 hours).
2. If your kitchen is cool, you can create a warm environment by preheating your oven to the lowest setting, turning it off, and placing the dough inside to rise.
Crafting the Filling
While the dough is rising, you can prepare the filling for your cinnamon rolls.
1. In a medium bowl, combine the softened butter, brown sugar, cinnamon, and optional nutmeg. Mix until well combined, creating a spreadable paste.
2. Ensure the butter is at room temperature, as this will make it much easier to spread over the rolled-out dough.
Rolling Out the Dough
1. Once the dough has risen, punch it down to release any air bubbles.
2. Turn it out onto a floured surface and roll it out into a rectangle about ¼ inch thick. Aim for a size of approximately 16×24 inches.
With the dough rolled out and the filling prepared, you’re ready to assemble your ultimate cinnamon rolls. The next steps will involve spreading the filling onto the dough, rolling it up, and cutting it into perfect individual rolls. This process will lead you closer to the warm, gooey, and delicious cinnamon rolls that everyone loves. Stay tuned for the continuation, where we’ll dive into the assembly, baking, and frosting of these delightful treats.

Techniques for Achieving the Right Thickness and Size
When making cinnamon rolls, achieving the correct thickness and size is essential for both texture and baking. Aim for a dough thickness of about 1/4 inch to 1/2 inch. This thickness allows the rolls to rise properly while still maintaining a soft and fluffy interior. To achieve this, use a rolling pin and apply even pressure while rolling out the dough. If you find the dough sticking, lightly dust your work surface with flour but avoid using too much, as excess flour can dry out the dough.
Tips for Maintaining a Uniform Rectangle Shape
To ensure your dough forms a uniform rectangle, start by patting it into a rough rectangular shape with your hands before using the rolling pin. This initial shaping helps control the direction you roll. As you roll the dough, frequently check that it maintains a rectangular shape, adjusting the edges as needed. Use a ruler to measure the dimensions, aiming for approximately 12 inches by 18 inches. This size will yield rolls that are thick and satisfying while allowing for the perfect amount of filling.
Adding the Filling
Now that your dough is rolled out to the desired thickness and shape, it’s time to add the filling. Make sure your butter is softened to room temperature; this will allow for easy spreading. Use a spatula or a butter knife to evenly spread the softened butter over the entire surface of the dough, leaving a small border around the edges. This ensures that the filling adheres well to the dough and prevents it from oozing out during baking.
Once the butter is applied, sprinkle the cinnamon-sugar mixture generously over the buttered surface. The key here is even distribution; use a light hand to ensure every part of the dough is covered, as this will enhance the flavor and sweetness of each roll.
Evenly Spreading the Filling and Ensuring a Tight Roll
After applying the filling, it’s crucial to roll the dough tightly to create those delightful spirals. Starting from the long edge, carefully lift the dough and begin to roll it away from you, keeping it as tight as possible without tearing the dough. A tight roll ensures that the filling stays inside while baking. As you roll, gently tug on the dough to maintain tension; this will help create a beautifully swirled cinnamon roll.
Techniques for Sealing the Roll to Prevent Filling Leakage
To seal the roll, pinch the edge of the dough after rolling it up. This method ensures that the filling doesn’t escape during baking. For added security, you can brush a little water or melted butter along the edge before sealing; this acts as glue and helps the seam stick together. If you notice any excess filling oozing out, simply wipe it away before placing the rolls in the baking dish.
Slicing the Rolls
Once you have your roll, it’s time to slice it into individual cinnamon rolls. Use a serrated knife or unflavored dental floss for the cleanest cuts. If using a knife, make sure it’s sharp to prevent squishing the rolls. For the dental floss method, slide a piece of floss under the roll, cross the ends over the top, and pull to slice through. This technique creates clean edges and maintains the integrity of each roll.
Best Practices for Cutting Uniform Pieces
Aim for slices about 1 to 1.5 inches thick. This size allows the rolls to bake evenly while remaining soft in the center. Keeping the pieces uniform ensures that all rolls rise and bake at the same rate, creating a consistent texture. After slicing, place the rolls in a greased baking dish, leaving some space between them to allow for rising.
Importance of Spacing in the Baking Dish for Optimal Rise
Spacing is key in allowing the rolls to expand as they rise. If the rolls are too close together, they will not develop that desirable fluffy texture. Leave about 1 inch of space between each roll in the baking dish. Once assembled, cover the dish with a clean kitchen towel and let the rolls rise in a warm place until they’ve doubled in size—this typically takes about 30-45 minutes.
The Baking Process
Preheating the Oven: Setting the Right Temperature
Preheat your oven to 375°F (190°C) while the rolls are rising. It’s crucial to ensure the oven is fully preheated before placing the rolls inside, as this will help them rise evenly and create a beautiful golden crust.
Baking Time and Signs of Doneness
Bake the cinnamon rolls for about 25-30 minutes or until they are golden brown on top. The exact time may vary depending on your oven, so keep an eye on them. A toothpick inserted into the center should come out clean, and the rolls should have a soft, puffy appearance. If you notice the tops browning too quickly, loosely cover them with aluminum foil to prevent burning.
Tips for Preventing Over-baking and Achieving Golden Tops
To prevent over-baking, check the rolls a few minutes before the timer goes off. Every oven is different, and the heat can vary, so it’s better to err on the side of caution. To achieve that perfect golden top, you might consider brushing melted butter over the rolls during the last few minutes of baking. This adds flavor and enhances the color for an appetizing finish.
Creating the Cream Cheese Frosting
Ingredients and Tools Needed for the Frosting
To make the perfect cream cheese frosting, you will need:
– 8 ounces of cream cheese, softened
– 1/2 cup of unsalted butter, softened
– 2-4 cups of powdered sugar (adjust based on desired sweetness)
– 1 teaspoon of vanilla extract
– A mixing bowl
– An electric mixer or whisk
Step-by-Step Instructions for Achieving the Perfect Consistency
1. Combine Ingredients: In a mixing bowl, combine the softened cream cheese and butter. Beat them together until smooth and creamy.
2. Add Sugar and Vanilla: Gradually add the powdered sugar, one cup at a time, mixing well after each addition. Once all the sugar is incorporated, add the vanilla extract.
3. Adjust Consistency: If the frosting is too thick, add a teaspoon of milk or cream at a time until you reach your desired consistency. If it’s too thin, gradually add more powdered sugar.
Tips for Adjusting Consistency Based on Preference
For a thicker frosting, use less milk or cream; for a thinner, more spreadable frosting, add more. Taste as you go to ensure it meets your preferences, as some might enjoy a sweeter, more decadent frosting while others prefer it more subtle.
Frosting and Serving Your Cinnamon Rolls
Importance of Frosting While the Rolls Are Warm
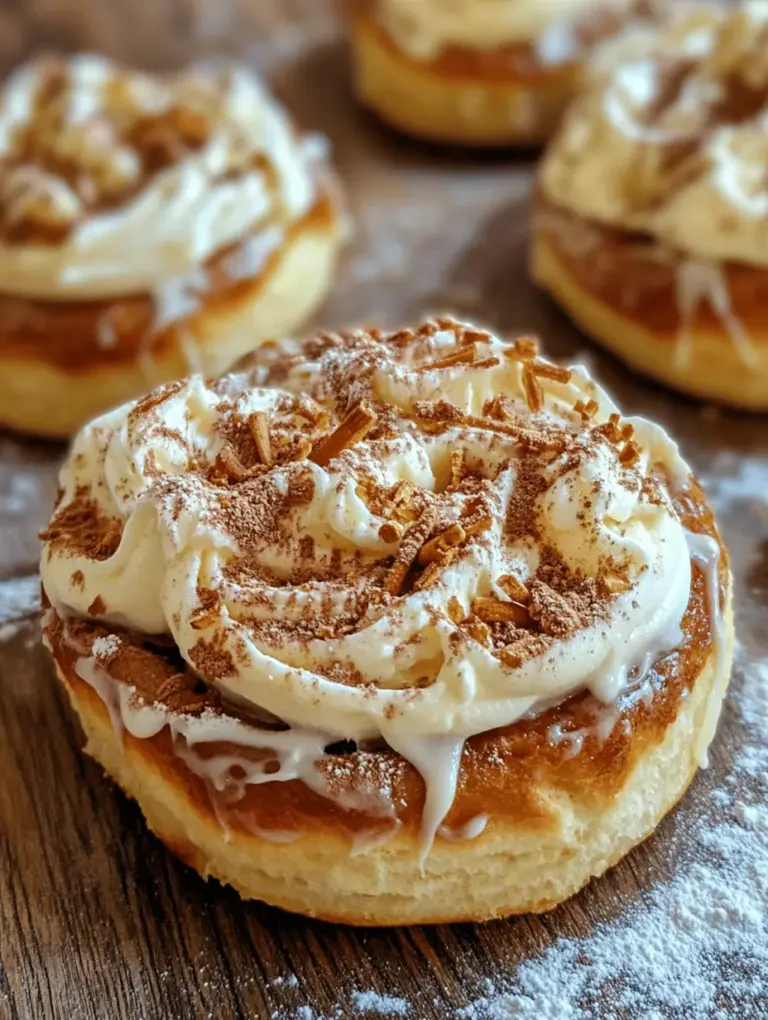
It’s best to frost your cinnamon rolls while they are still warm from the oven. This allows the frosting to melt slightly into the rolls, enhancing the flavor and creating a delicious, gooey topping that seeps into the crevices of each roll. Use a spatula to spread the frosting generously over the top of each roll, ensuring every bite is deliciously sweet.
Suggestions for Garnishing or Enhancing Presentation
For an extra touch, consider sprinkling crushed walnuts or pecans over the frosted rolls for added texture and flavor. A light dusting of cinnamon or a drizzle of caramel sauce can also elevate the presentation and taste, making your cinnamon rolls not just a treat for the palate but for the eyes as well.
Serving Ideas for Various Occasions (Breakfast, Brunch, Dessert)
These ultimate cinnamon rolls are perfect for any occasion—whether it’s a cozy breakfast with family, a festive brunch with friends, or a delightful dessert after dinner. Serve them warm with a side of fresh fruit or a cup of coffee for a comforting morning treat. They can also be the star of a holiday brunch spread, impressing guests with their homemade charm.
Storing and Reheating Leftover Cinnamon Rolls
Tips for Proper Storage to Maintain Freshness
If you have any leftover cinnamon rolls (which is rare), store them in an airtight container at room temperature for up to 3 days. For longer storage, place them in the refrigerator, where they can last up to a week. To keep them fresh, consider wrapping each roll individually in plastic wrap before placing them in the container.
Methods for Reheating to Enjoy Them Warm Again
To reheat cinnamon rolls, preheat your oven to 350°F (175°C). Place the rolls on a baking sheet and cover them with aluminum foil to prevent drying out. Heat for about 10-15 minutes or until warmed through. Alternatively, you can pop them in the microwave for 15-20 seconds if you prefer a quicker method.
Conclusion
Making homemade cinnamon rolls is a delightful experience that brings joy not only to the baker but also to those who indulge in the sweet, warm goodness. The process allows for creativity, whether through the addition of unique fillings or experimenting with different frostings. Sharing these homemade treats with loved ones creates lasting memories and strengthens bonds over delicious food.
As you become more comfortable with this ultimate cinnamon roll recipe, don’t hesitate to explore new flavors and fillings—think chocolate chips, fruit preserves, or even a savory twist. The possibilities are endless. So roll up your sleeves, embrace the art of baking, and enjoy the delicious rewards of your labor!